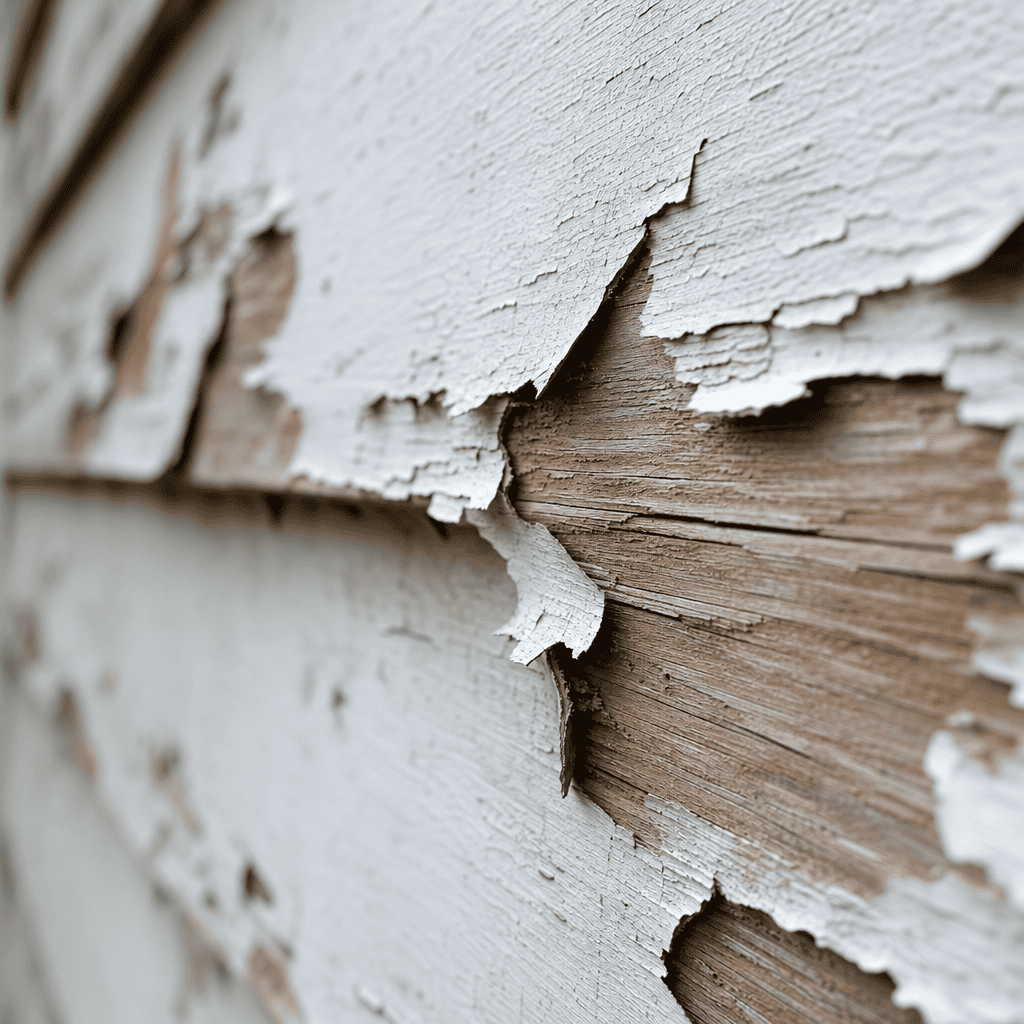
Most homeowners wait too long. By the time exterior paint peeling is obvious from the street, the damage underneath has usually been building for a year or more. The truth is that failing exterior paint does not announce itself all at once. It signals trouble gradually, through cracks, color shifts, and surfaces that no longer repel water the way they should. If you own a home in Surrey, Langley, Abbotsford, or anywhere across the Lower Mainland, the wet climate here accelerates every one of these warning signs faster than homeowners in drier regions expect. This article lays out the five clearest signs that your home’s exterior needs professional attention before the problems compound.
Table of Contents
- Quick Takeaways
- Sign 1: Exterior Paint Peeling in Sheets or Flakes
- Sign 2: Cracking and Checking Across the Surface
- Sign 3: Severe Fading and Chalking
- Sign 4: Moisture Stains and Mildew Growth
- Sign 5: Visible Wood Damage and Early Rot
- When to Repaint House Exterior: Timing That Actually Matters
- DIY vs. Local Painter vs. National Franchise: An Honest Comparison
- Frequently Asked Questions
- References
Quick Takeaways
| Key Insight | Explanation |
|---|---|
| Peeling paint is a moisture alarm, not just a cosmetic issue | Once paint separates from the substrate, water enters the wood directly and accelerates rot and structural damage. |
| Fraser Valley humidity shortens paint cycles | Homes in Surrey, Langley, and Abbotsford typically need repainting every 5 to 7 years, compared to 7 to 10 years in drier climates. |
| Chalking is a late-stage warning sign | When you rub your hand on siding and it comes away chalky, the binders in the paint have broken down and the surface is no longer protecting the substrate. |
| Mildew under paint is more dangerous than mildew on paint | Surface mildew can be cleaned. Mildew that has grown under the film means the seal is broken and repainting alone may not be sufficient without prep work. |
| Hairline cracks become water channels | Small cracks in paint film are not cosmetic. Rain drives moisture directly into cracks and behind siding, especially on west and north-facing walls. |
| Early repainting costs far less than wood replacement | A full exterior repaint on a typical Lower Mainland home costs a fraction of replacing rotted fascia boards, trim, and siding sections caused by delayed maintenance. |
| Color fading signals UV degradation of the paint film | Significant fading means the topcoat has been consumed by UV exposure. The remaining film offers diminished protection and adhesion for any future coats. |
Sign 1: Exterior Paint Peeling in Sheets or Flakes
Exterior paint peeling is the most visible and most urgent warning sign a home can show. When paint lifts away from the surface in sheets or curling flakes, it means the bond between the paint film and the substrate has failed completely. That bond does not fail randomly. It fails because moisture has worked its way in, because the original surface was not properly prepared before painting, or because the paint applied was not suited to the climate.
In practice, peeling on the Lower Mainland almost always traces back to moisture. British Columbia’s wet winters and humid summers create constant pressure on exterior paint systems. North-facing walls and shaded areas under eaves are the first places peeling appears on most homes in Surrey and Langley, simply because those areas stay damp longer after rain.
What peeling actually tells you about the substrate underneath
When you see paint peeling back to bare wood, the wood beneath has already been cycling through wet and dry conditions without protection. That cycling causes wood fibers to expand and contract, which opens the grain further and allows deeper moisture penetration. Left unaddressed, this process leads directly to rot.
A common mistake is painting over peeling areas without removing all loose material and addressing the moisture source. Homeowners who do this find themselves repainting the same sections within one or two seasons. Professional preparation, which means scraping, sanding, priming bare wood, and caulking any gaps, is not optional. It is what determines whether a repaint lasts five years or ten.
Pro tip: If you see peeling on the underside of eaves or on window trim while the main field of siding looks intact, start there. Trim and eaves are the first areas to fail because they catch dripping water and do not dry as quickly as flat wall surfaces.
Sign 2: Cracking and Checking Across the Surface
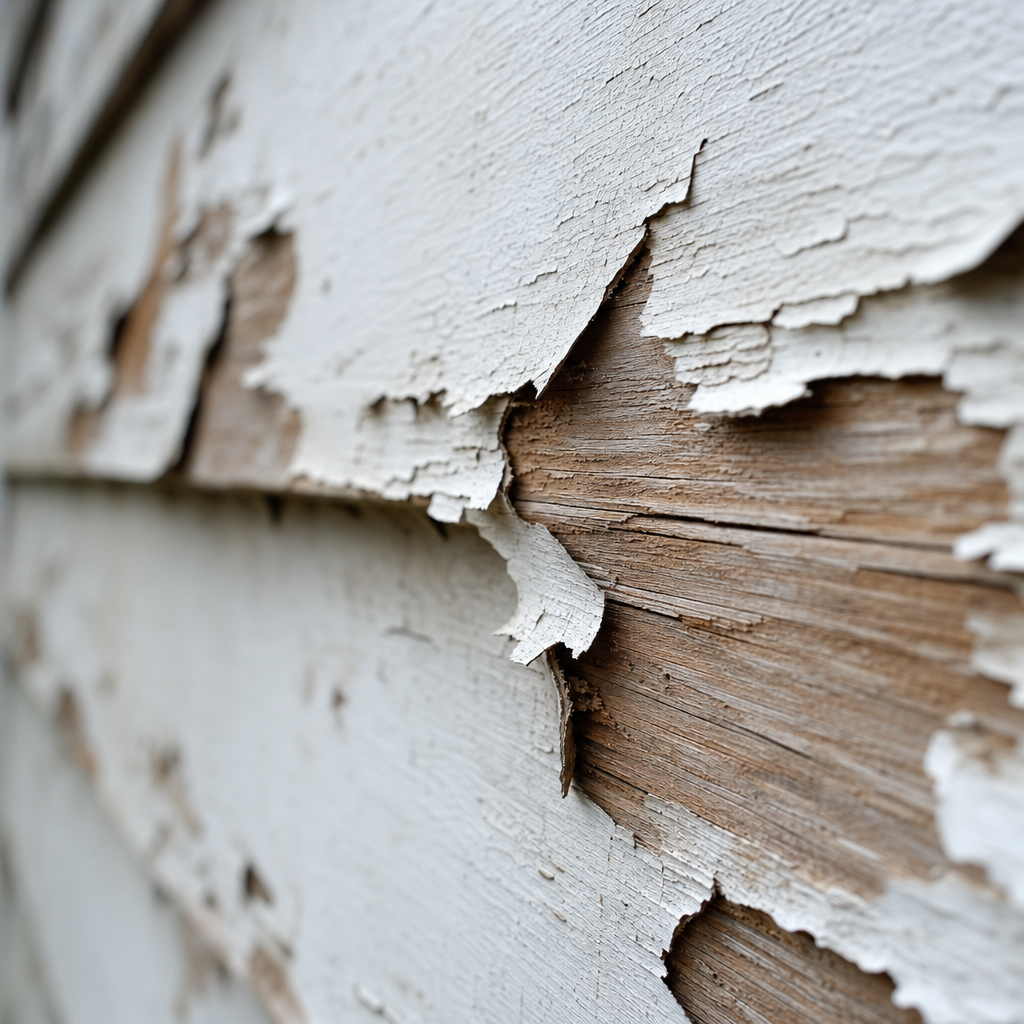
Cracking and checking are the earlier stages of the same failure process that eventually produces peeling. Checking refers to fine, parallel cracks that run along the grain of the wood. Cracking refers to broader fractures in the paint film itself. Both are signs that the paint has lost its flexibility.
Quality exterior paints are formulated to flex slightly as the substrate expands and contracts with temperature and humidity changes. When a paint film ages past its useful life, it becomes rigid. The substrate keeps moving. The paint does not. Cracks form. Once those cracks form, every rainstorm drives water directly into the substrate. The paint no longer acts as a barrier. It becomes a trap, holding moisture against the wood while appearing, from a distance, to still be intact.
Distinguishing surface cracks from structural cracks
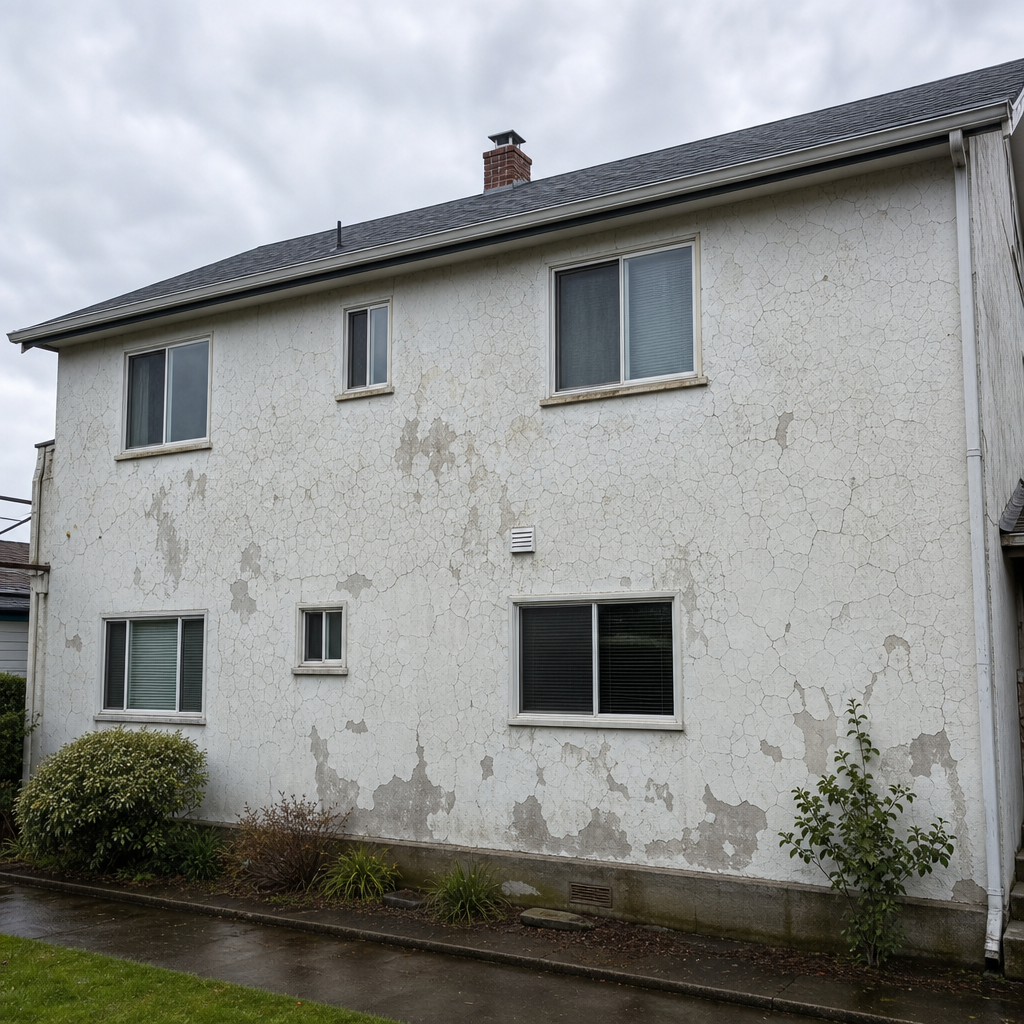
Not every crack in exterior paint signals the same level of urgency. Hairline surface cracks that do not penetrate to the substrate are a warning sign that repainting is coming due within the next season or two. Deep cracks that expose bare wood or that run continuously along boards require immediate attention, especially heading into a wet Lower Mainland winter.
On stucco surfaces, which are common in parts of Surrey and Abbotsford, cracking carries additional risk. Stucco cracks allow water to reach the lath and sheathing underneath, and water damage to stucco systems is significantly more expensive to repair than equivalent damage to wood siding. If your stucco shows any cracking beyond hairline spider cracks, get it assessed before the next rainy season.
Pro tip: Run your hand firmly across cracked painted surfaces after they have dried in the sun. If the paint powder comes off on your hand or the crack edges crumble, the paint film has failed throughout, not just at the surface. That home needs a repaint, not a touch-up.
Sign 3: Severe Fading and Chalking
Some degree of color fading over time is expected. Severe, uneven fading is not. When your home’s exterior color has shifted significantly from its original shade, or when south-facing and west-facing walls look noticeably lighter than shaded walls, the topcoat has been degraded by UV exposure to the point where it is no longer performing its protective function.
Chalking is the physical evidence of that UV degradation. The pigment and binder in the paint film break down and rise to the surface as a fine powder. Rub your hand across faded siding. If your palm comes away with a chalky residue, the paint’s binders have failed. That chalky layer also prevents new paint from bonding correctly if you paint over it without proper preparation.
“Paint failure is almost never about the paint itself. It’s about what happened to the surface before the paint went on, and what the surface has been exposed to since.” – Bob Cusumano, coatings consultant and author of field guides on residential paint systems.
The Lower Mainland’s combination of significant rainfall and intense summer UV creates a dual assault on paint films that homeowners from other regions often underestimate. The rain seasons accelerate moisture-related failures. The summer sun accelerates UV degradation. Both processes are happening simultaneously across the life of the paint, which is why exterior paint cycles here are shorter than national averages suggest.
Sign 4: Moisture Stains and Mildew Growth
Dark streaking or staining on exterior walls, particularly on north-facing walls or below gutters and eaves, is a reliable sign that water is sitting against the surface longer than it should. In many cases, those stains are accompanied by mildew growth, which appears as gray, green, or black patches that do not wash away with a simple rinse.
Mildew on an intact paint surface is a maintenance problem. Mildew growing under a paint film is a structural problem. The difference matters enormously when deciding whether pressure washing and spot treatment will resolve the issue or whether a full repaint with proper preparation is required.
How to tell whether mildew is under or on top of the paint film
Apply a small amount of household bleach to the affected area and let it sit for one to two minutes. If the discoloration lightens or disappears, the mildew is growing on the surface of the paint and can be treated before repainting. If the discoloration remains or if the surrounding paint lifts or bubbles, mildew has penetrated the film and the paint needs to be removed in that area before any new coating is applied.
Homes in the Fraser Valley with overhanging trees are particularly vulnerable. Organic debris from trees keeps siding damp and creates ideal conditions for mildew. A paint job on a home with this kind of exposure should include mildewcide-fortified primer as a baseline, not an upgrade.
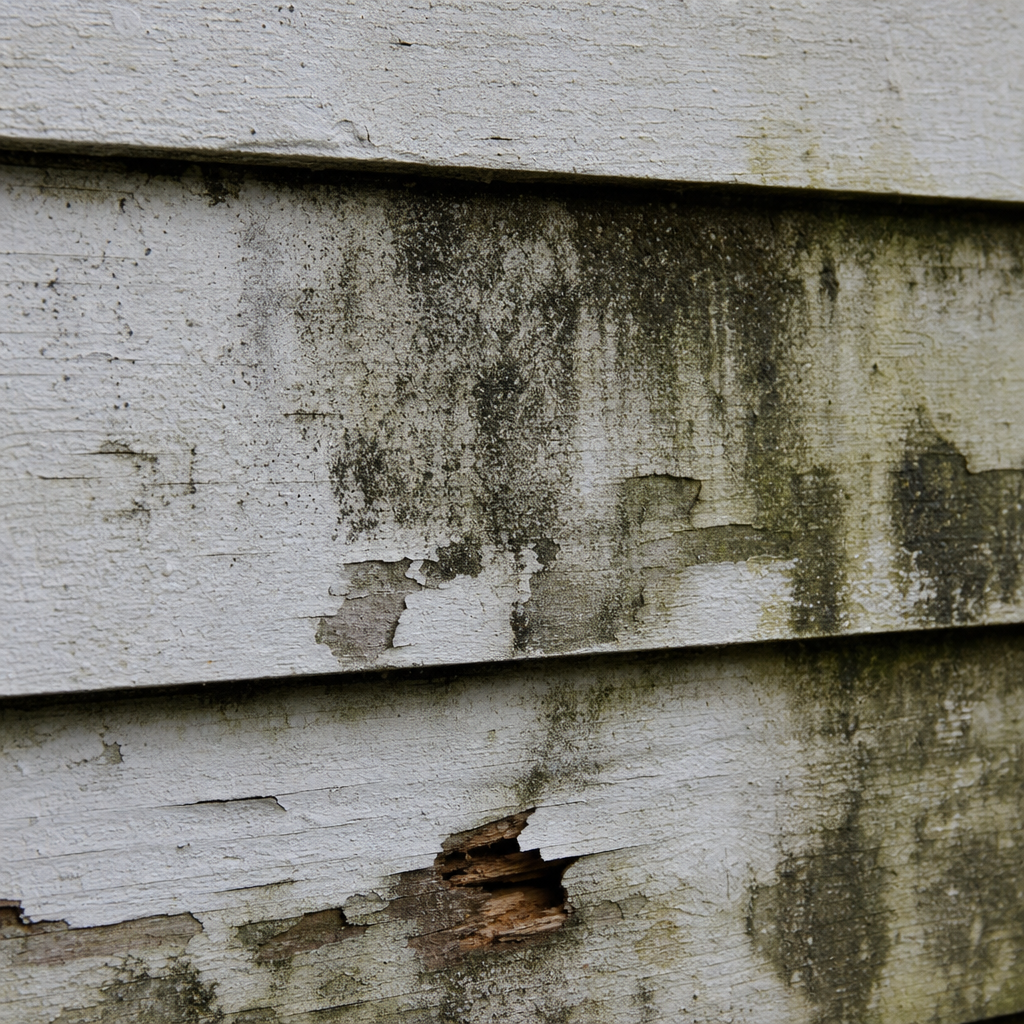
Sign 5: Visible Wood Damage and Early Rot
By the time soft spots, spongy areas, or visibly darkened wood appear on exterior siding, trim, or fascia boards, the paint has been failing for long enough that wood fiber damage has occurred. This is the most expensive sign on this list because it means the repair scope has expanded beyond a paint job to include wood replacement.
The practical test is simple. Take a screwdriver and press the tip firmly into any area that looks darker than surrounding wood or that shows surface irregularity. Healthy wood resists the pressure cleanly. Wood in early rot stages gives way with minimal force, and the penetration depth indicates how far the damage has progressed.
What repainting can and cannot fix
A repaint cannot reverse wood rot. Any section of wood that has lost structural integrity needs to be replaced before painting begins. Painting over soft wood seals moisture into the damaged fibers and accelerates the decay beneath the new paint film. The new paint will look fine for a season and then fail in the same location, because the substrate underneath was never sound.
Experienced painting crews, like those at Dreamscape Painting, identify wood damage during the estimation process and flag it before a single drop of paint is opened. This is one of the clearest differences between a professional exterior repaint and a budget crew that covers problems rather than solving them.
If rot damage is limited to trim boards and minor fascia sections, a skilled painting company can often coordinate the carpentry repairs as part of the overall project scope, so homeowners are not managing two separate contractors and two separate schedules.
When to Repaint House Exterior: Timing That Actually Matters
The standard advice to repaint every five to ten years is a useful starting point but not a reliable schedule for homes in the Lower Mainland. The real answer depends on what the home is clad in, which direction its walls face, what trees or structures shade it, and what quality of paint and preparation was used in the last paint job.
Wood siding in the Fraser Valley, especially on homes that see significant rain exposure on west and north walls, realistically needs repainting every five to seven years to maintain protection. Fiber cement siding holds paint longer and can stretch to eight or ten years with a quality paint system. Stucco falls in between, typically at six to eight years, and requires close monitoring for cracking regardless of paint condition.
The best season for exterior painting in Surrey and the Lower Mainland
In practice, late spring through early fall is the optimal window for exterior painting on the Lower Mainland. Paint requires dry surfaces and temperatures above 10 degrees Celsius to cure properly. Attempting to paint in November or February in this region almost always results in poor adhesion and premature failure, regardless of the paint quality used.
The sweet spot is May through September. Booking early in this window is advisable because professional painters in Surrey, Langley, and Abbotsford fill their schedules quickly once dry weather settles in. Homeowners who wait until July often find they are scheduling into August or September, which shortens the drying season before the fall rains arrive.
The data consistently shows that homes repainted proactively, before failure signs reach the cracking and peeling stage, require less surface preparation and therefore cost less overall than homes repainted reactively after visible damage has accumulated.
DIY vs. Local Painter vs. National Franchise: An Honest Comparison
Homeowners deciding how to address exterior paint failure have three realistic options. Here is an honest comparison of what each delivers for Lower Mainland homes.
| Factor | DIY Repaint | Established Local Painter (e.g., Dreamscape Painting) | National Franchise (e.g., WOW 1 DAY Painting) |
|---|---|---|---|
| Surface preparation quality | Highly variable. Most DIYers underestimate time required for scraping, sanding, and priming. | Thorough prep is standard. Experienced crews identify substrate issues before painting begins. | Speed-focused model limits prep depth. One-day timelines compress surface preparation. |
| Paint system selection | Consumer-grade products from hardware stores. Limited access to professional-grade coatings. | Access to professional product lines suited to BC climate and specific substrates. | Standardized product selections across franchises regardless of local climate conditions. |
| Accountability and follow-up | No warranty. Any failure is the homeowner’s problem. | Local reputation is on the line. Family-owned companies like Dreamscape Painting have 35 years of community accountability. | Franchise warranty exists but local operator turnover can complicate warranty claims. |
| Suitability for complex failure signs | Not suitable for peeling, rot, or mildew requiring professional prep and primer selection. | Well suited. Experienced estimators assess damage scope accurately before work begins. | Limited. Speed-based model is better suited to cosmetically sound surfaces needing a fresh color. |
| Cost | Lowest upfront. Highest potential long-term cost if prep is inadequate and early failure occurs. | Mid to higher range. Reflects thorough prep, professional-grade materials, and experienced labor. | Mid range. Savings come from standardized processes, not reduced material costs. |
Frequently Asked Questions
How quickly does exterior paint peeling spread if left untreated?
Peeling spreads faster than most homeowners expect. Once the paint film separates from the substrate in one area, water infiltrates the gap and migrates laterally along the wood grain. A peeling section the size of a dinner plate in spring can triple or quadruple in size by fall if the home goes through a wet summer season. Treating it early is always less expensive than treating it after it has spread.
Can I paint over exterior paint that is peeling without scraping it all off first?
No. Painting over peeling paint without removing all loose material is the single most common cause of premature paint failure in residential repaints. New paint applies over the unstable layer and inherits its adhesion problems. Within one season, the new paint peels in the same locations. Every loose or lifting section must be removed down to a stable surface, the bare wood primed, and edges feathered before any topcoat is applied.
What is the typical cost of an exterior repaint in Surrey or Langley?
Exterior repaint costs on the Lower Mainland vary significantly based on home size, siding type, number of stories, and the extent of surface preparation required. A single-story home in good condition with minimal prep needs runs differently than a two-story home with significant peeling and trim replacement. The most reliable way to get an accurate number for your specific property is to have an experienced estimator walk the home in person, which Dreamscape Painting provides as a standard part of their process.
Does exterior paint failing on one side of the house mean the entire exterior needs repainting?
Not necessarily, but it is worth assessing all walls before deciding to spot-repaint. South and west-facing walls typically degrade faster due to UV exposure and prevailing weather. North-facing walls tend to suffer more from mildew and moisture retention. In many cases, walls fail at different rates. A professional estimator can assess which sections need immediate work and which can reasonably wait, so homeowners are not spending more than necessary or less than required.
Is pressure washing before repainting something homeowners can do themselves?
Homeowners can pressure wash as a preliminary step, but professional painters generally re-clean surfaces as part of their prep process regardless. The risk with DIY pressure washing is using too much pressure on wood siding, which raises the grain, damages existing paint in areas that were still adhering, and can drive water into gaps that then need time to dry before painting. If you pressure wash yourself, allow a minimum of 48 to 72 hours of dry weather before any painter assesses the surface for readiness.
How do I know if my home’s stucco needs repainting or recoating versus a full repair?
The distinction comes down to crack severity and moisture intrusion. Fine spider cracks in stucco paint are a normal aging pattern and typically require only a quality elastomeric repaint to bridge and seal them. Cracks wider than a credit card or cracks that have allowed water infiltration behind the stucco surface require repair before repainting. Bubbling or delaminating stucco sections indicate water is already trapped behind the surface. Painting over active stucco delamination will not hold. Those sections need to be repaired by someone experienced with stucco systems before any paint is applied.
If you have noticed any of these signs on your own home, we would like to hear what tipped you off first and what the repair process looked like for you. Share your experience in the comments below.
We would love your feedback and any insights you would share with others. What perspective would you add?
References
- United States Environmental Protection Agency: guidance on moisture, mold, and exterior building materials in residential properties
- U.S. Department of Energy: resources on building envelope performance, moisture management, and exterior cladding systems
- Forbes: home improvement cost data and analysis for residential exterior painting and maintenance spending
- Statista: market data on residential painting services, home improvement industry size, and homeowner spending patterns
- Oregon State University Extension Service: research on wood decay, moisture damage, and exterior wood coating performance in Pacific Northwest climates