Most homeowners who have hired painters before have at least one story about surprises they wished someone had warned them about. Furniture left in the wrong place, primer skipped to save time, or a “quick job” that stretched into a second week. Understanding the professional interior painting process from start to finish eliminates those surprises and helps you hold any contractor accountable to a real standard. This guide walks through every stage, from the initial estimate to final walkthrough, based on over 35 years of interior painting experience serving homeowners across the Lower Mainland and Fraser Valley.
Table of Contents
- Quick Takeaways
- The Estimate and Consultation Stage
- Preparation: The Most Important Phase
- Primer Application and Why It Matters
- The Painting Phase: Coats, Techniques, and Timelines
- Comparison: DIY vs. Budget Contractor vs. Professional Painter
- Cleanup and Final Walkthrough
- What Homeowners in the Lower Mainland Should Specifically Ask
- Frequently Asked Questions
- References
Quick Takeaways
| Key Insight | Explanation |
|---|---|
| Preparation takes more time than painting | Proper surface prep, including filling holes, sanding, and masking, typically accounts for 40 to 60 percent of the total job time on a professional interior project. |
| Primer is not optional on most interior surfaces | Skipping primer on bare drywall, new patches, or dark-to-light color changes will result in uneven sheen and color inconsistency, no matter how good the topcoat is. |
| Two coats is the professional standard | One coat of even premium paint rarely achieves full hide or consistent color depth. Two coats with proper dry time between them is the industry baseline for a lasting finish. |
| A written scope of work protects both parties | Before any work starts, a professional painter should provide a detailed quote listing surfaces to be painted, number of coats, paint products, and prep inclusions. |
| Drying time and cure time are not the same | Latex paint feels dry to the touch in one to two hours but does not fully cure for 30 days. Avoid washing or scrubbing freshly painted walls for at least two to four weeks. |
| Professional painters move and protect your furniture | A reputable company will move standard furniture to the center of the room and cover it with drop cloths. Fragile or oversized items should be relocated by the homeowner before the crew arrives. |
| Final walkthrough is your quality checkpoint | Do not skip the end-of-project walkthrough. This is your opportunity to flag touch-ups, confirm cleanup is complete, and sign off before the crew leaves the site. |
The Estimate and Consultation Stage
A professional interior painting project does not start when the first brush hits the wall. It starts with the estimate. At Dreamscape Painting, experienced estimators visit the home in person, measure surfaces, assess existing conditions, and discuss the homeowner’s goals before any number is put on paper. This on-site step is not a formality. It is how professionals identify hidden prep requirements like water-stained ceilings, peeling paint on window trim, or previous DIY patch jobs that will affect the final result.
A common mistake homeowners make is accepting a phone estimate or a price per square foot without any site visit. Those quotes almost always miss scope items that show up as surprise charges later. Insist on an in-person estimate with a written breakdown.
What a professional estimate should include
A credible written quote for interior painting Vancouver homeowners should specify the rooms and surfaces included, the number of coats per surface, the paint brand and product line, what prep work is included, the project timeline, and payment terms. If any of those items are missing, ask for them in writing before signing anything.
The consultation is also where you should discuss sheen levels. Flat paint hides surface imperfections well but is harder to clean. Eggshell and satin are the most popular choices for living areas and bedrooms because they balance washability with a soft appearance. Semi-gloss is the standard for trim, doors, and kitchens. A professional painter will guide this conversation based on the specific conditions of your home, not just personal preference.
Pro tip: Ask your estimator to note any existing surface defects in the written quote and specify how each one will be addressed during prep. This prevents disagreements about what was included once the job is underway.
Preparation: The Most Important Phase
In practice, the difference between a paint job that lasts three years and one that lasts fifteen comes down almost entirely to preparation. Paint adheres to clean, sound, properly primed surfaces. It does not stick well to dust, grease, peeling old paint, or glossy surfaces that have not been lightly abraded. Professional interior painters in the Lower Mainland understand that the climate here, with its moisture and temperature swings, puts additional stress on interior finishes, making prep even more important than in drier climates.
Surface cleaning and repairs
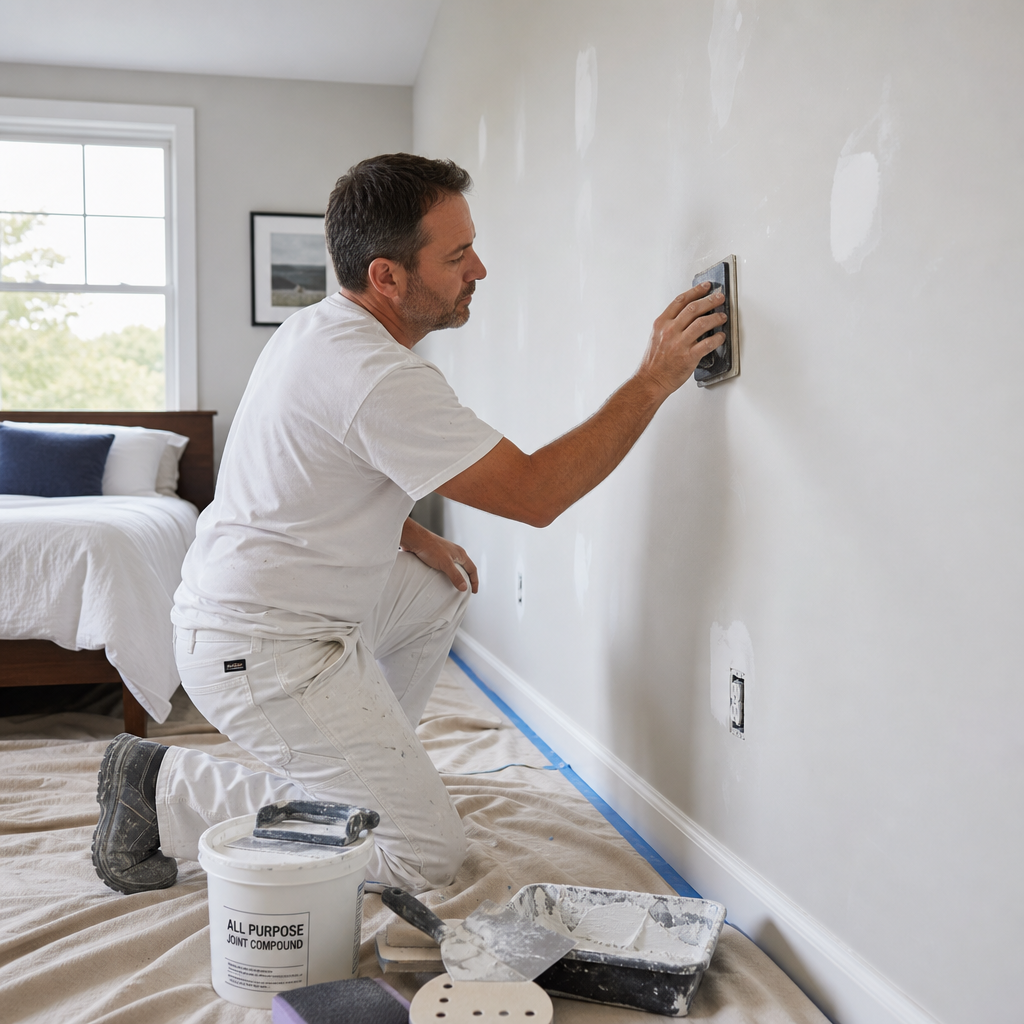
Before any tape goes up, the crew should wash walls with a mild cleaning solution to remove grease, dust, and residue. In kitchens and areas near fireplaces, this step is especially important because airborne grease and smoke residue will prevent paint adhesion even under multiple coats. Any nail holes, cracks, or dents are filled with the appropriate filler, sanded smooth, and feathered into the surrounding surface so the repair is invisible once painted.
Masking, taping, and protecting your home
Professional masking is not just about painter’s tape along baseboards. It includes covering floors with drop cloths, removing or covering outlet covers and switch plates, and masking hardware that cannot be removed. A crew that skips this step is telling you something about how they approach the rest of the job as well.
At Dreamscape Painting, cleanliness is a core commitment, not an afterthought. Furniture is moved to the center of the room and protected. Floors are covered from doorway to doorway. This protects your home and it also signals professionalism to the homeowner from day one.
Pro tip: Before the crew arrives, remove small decorative items, wall art, and fragile objects yourself. Professional painters will move furniture and protect floors, but small valuables are best handled by you to avoid any risk of accidental damage.
Primer Application and Why It Matters
Primer is the most skipped and most consequential step in interior painting. A budget contractor who needs to finish a job in one day will often skip it and count on the topcoat to compensate. In practice, it never does. The result is patchy coverage, inconsistent sheen, and a finish that shows every repaired spot like a map of the wall’s history.
When primer is required is actually a straightforward question with a clear answer. You need primer any time you are painting over bare or newly patched drywall, going from a dark color to a significantly lighter one, dealing with a surface that has stains from water, smoke, or tannins bleeding through from wood, or painting over a previously glossy surface. In those cases, primer is not optional. It is what makes the topcoat perform the way the manufacturer intended.
Choosing the right primer for Lower Mainland interiors
High-humidity environments like basements and bathrooms in Fraser Valley homes benefit from mold-resistant primers. For most living spaces, a quality PVA primer seals porous surfaces and creates a uniform base that reduces the number of topcoats needed. Shellac-based primers are the right call for severe stain blocking, like smoke damage or persistent water stains that have already been sealed once. A professional painter should specify the primer product being used, not just say “we’ll prime it.”
“Surface preparation and priming account for the majority of a paint job’s longevity. The finish coat is what people see, but the prep is what makes it last.” – Paint Quality Institute, industry guidance on residential coating applications
The Painting Phase: Coats, Techniques, and Timelines
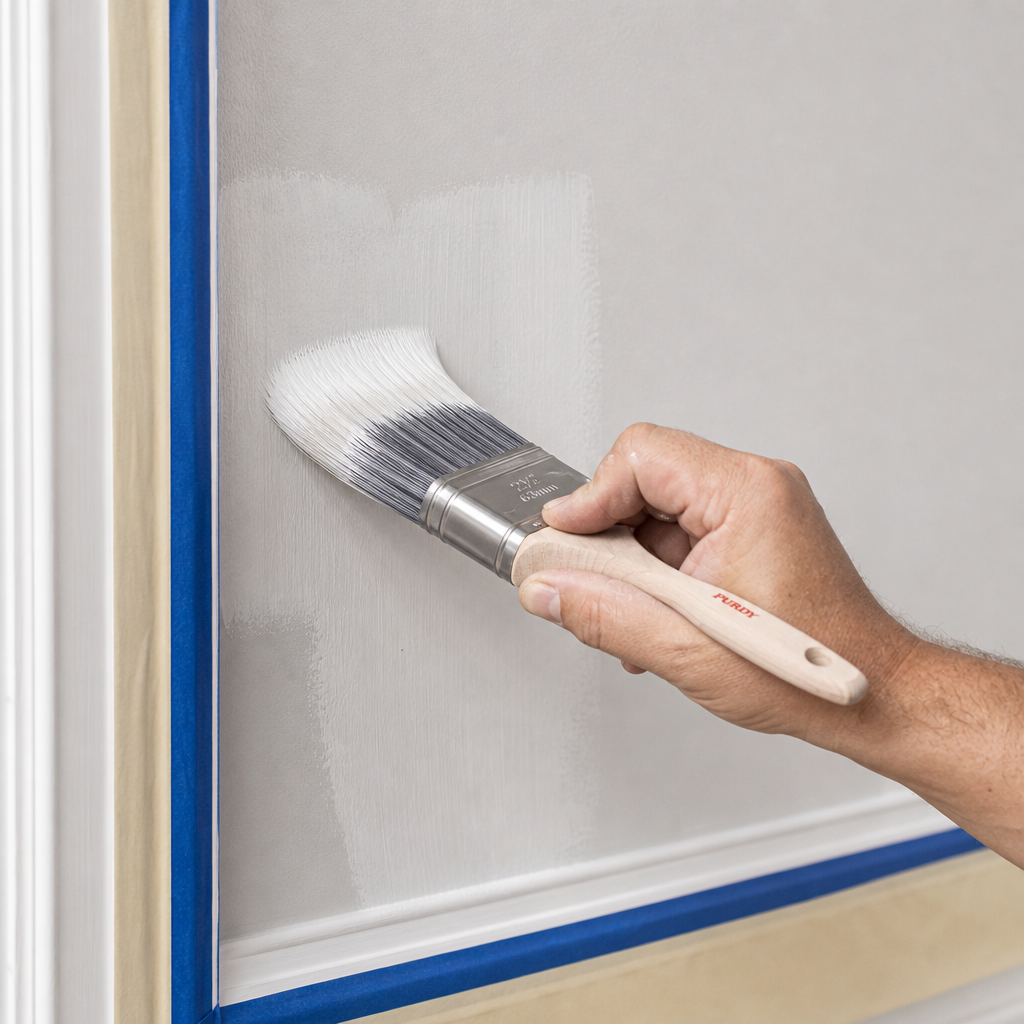
Once primer has dried fully, typically overnight for water-based primers, the topcoat application begins. A professional crew working on a standard room will cut in along edges, corners, trim, and ceiling lines before rolling the field of the wall. This sequence matters. Cutting in first, then rolling into the wet edge of the cut-in, produces a seamless blend that brush marks alone cannot achieve.
First coat and dry time
The first coat of paint establishes the base color and reveals any areas where additional surface prep may be needed. It is normal to see some unevenness or patchiness after the first coat. This is not a defect. It is why two coats are the standard. Allow the first coat to dry completely, a minimum of two to four hours for quality latex paints, before applying the second coat. Rushing this step is one of the most common causes of peeling and poor adhesion.
Second coat and sheen consistency
The second coat is where the finish comes together. A professional painter applies it with consistent pressure and overlapping strokes to ensure even coverage and uniform sheen. On larger walls, a professional roller with the correct nap for the paint product avoids stipple texture inconsistencies that show up under raking light from windows. The sheen should look identical across the entire surface when viewed from any angle. Visible roller lap marks or heavy texture after the second coat are signs that the applicator rushed or used improper technique.
For a typical bedroom or living room in a Lower Mainland home, a two-person professional crew will usually complete two coats of walls plus one coat of trim in a single day, depending on the size of the space and the complexity of the trim work. Kitchens and rooms with significant built-in features or many windows take longer.
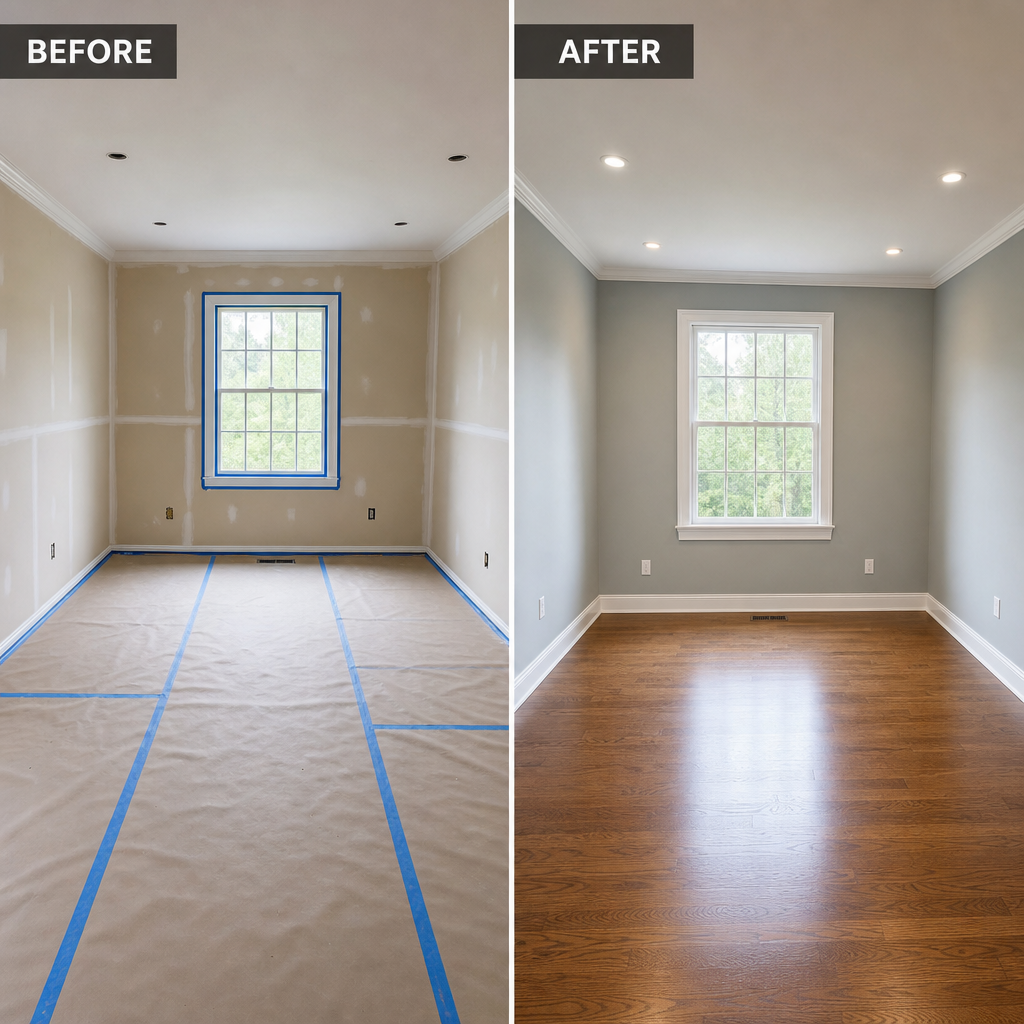
Comparison: DIY vs. Budget Contractor vs. Professional Painter
Homeowners searching for interior painters Lower Mainland will encounter a wide range of options at very different price points. Understanding what those differences actually mean for your project outcome is more useful than comparing quotes alone.
| Factor | DIY Approach | Budget Contractor | Professional Painter (e.g., Dreamscape Painting) |
|---|---|---|---|
| Prep Quality | Variable, often minimal. Most DIY painters underestimate prep time. | Basic. Holes filled but walls rarely washed or properly primed. | Comprehensive. Washing, sanding, filling, priming as needed per surface condition. |
| Primer Use | Often skipped to save money or time. | Frequently skipped or applied only on obvious bare spots. | Applied where surface conditions require it, with correct product selected for the situation. |
| Coats Applied | Often one coat with touch-ups. | Sometimes one coat sold as two coats. | Two full coats as standard. Three coats if color change requires it. |
| Cleanup and Protection | Inconsistent. Paint on floors and hardware is common. | Minimal. Drop cloths may not cover all floor areas. | Full floor and furniture protection. Hardware masked or removed. Site left clean. |
| Finish Longevity | 2 to 5 years before touch-ups needed. | 3 to 6 years with visible wear at edges and corners sooner. | 8 to 15 years with normal maintenance, depending on traffic and surface type. |
| Warranty or Guarantee | None. | Rarely provided in writing. | Written workmanship guarantee standard at Dreamscape Painting. |
Cleanup and Final Walkthrough
A professional interior painting project is not complete when the last brush stroke is applied. Cleanup is part of the service, and it should leave your home in better condition than when the crew arrived, not just the same. At Dreamscape Painting, this means removing all tape and masking, replacing outlet covers and switch plates, moving furniture back into position, removing all drop cloths, and taking away any paint cans, empty or otherwise, that are not designated for touch-ups you want to keep.
Any residual paint drips on hardware or glass should be removed carefully with a razor blade by the crew before they leave. Finding paint spots on your door handles or window glass the next morning is a sign that cleanup was rushed.
The final walkthrough process
Before signing off on the job, walk through every painted surface with the project lead in good lighting. Use a flashlight or a work light held at a raking angle to check for thin spots, missed areas, or texture inconsistencies that are not visible under overhead lighting. Check corners, where a brush typically leaves a slightly different texture than the roller-applied field. Check the cut-in lines along the ceiling and trim for jagged or wavy edges. A professional crew will address any touch-ups identified during the walkthrough before considering the job complete.
What to expect from painters at the close of a project is a clear conversation about care instructions. You should be told how long to wait before washing walls, whether any touch-up paint is being left for you, and what the warranty or guarantee covers.
What Homeowners in the Lower Mainland Should Specifically Ask
The Lower Mainland and Fraser Valley present specific conditions that affect interior painting decisions. Homes near Surrey, Langley, Abbotsford, and the surrounding areas deal with high ambient humidity for much of the year, which affects dry times, moisture-related prep requirements in basements and bathrooms, and the performance of certain paint formulations. These are not abstract concerns. They affect what products should be used and what prep steps are required.
Ask any painter you are considering these specific questions before hiring. First, what primer product will you use in my bathroom and basement, and why? Second, how do you handle painting in cold or humid conditions if the project runs into late fall or winter? Third, what is your process if a surface defect is discovered after the job starts that was not visible during the estimate? Fourth, are your painters employees of your company or subcontractors, and does that affect your warranty?
At Dreamscape Painting, painters are experienced professionals who have worked in Lower Mainland homes for decades. The answers to those questions are specific and grounded in real project experience, not sales language. That difference matters when you are trusting someone in your home for several days with your walls, furniture, and family.
Pro tip: Request that leftover paint from your project be labeled with the room name, color name, and product code before the crew leaves. Stored properly, it can be used for touch-ups two to three years later and will save you from guessing the formula when a scuff or chip appears.
Frequently Asked Questions
How long does a professional interior painting project typically take?
A single room of average size, roughly 12 by 14 feet, typically takes one full day for a two-person professional crew including prep, two coats of walls, and one coat of trim. A full interior repaint of a 2,000 square foot home with multiple rooms, trim, and ceilings generally takes three to five days depending on the complexity of the prep work and the number of coats required.
Do I need to leave my home while painters are working?
You do not need to vacate your home, but low-VOC or zero-VOC paint products will make the experience more comfortable if you stay. Rooms being actively painted should be vacated during application and while the paint dries, primarily for air quality reasons and to avoid accidental contact with wet surfaces. Many homeowners remain in the home and simply use other areas while the crew works room by room.
What is the difference between paint drying and paint curing?
Latex paint is dry to the touch within one to two hours, which means it will not transfer to your hand if you gently press it. However, it does not fully cure and harden for 30 days. During that 30-day cure period, avoid scrubbing or using cleaning products on the painted surface. Light dust cleaning with a dry cloth is fine, but anything more aggressive can scuff or remove paint that has not fully hardened yet.
How do I prepare my home before the painters arrive?
Remove small decorative items, wall art, picture frames, and any fragile objects from the rooms being painted. Move any items that are not furniture, including plants, electronics, and clothing, out of the room or into closets. Professional painters will move standard furniture to the center of the room and cover it, but the more accessible the walls are when they arrive, the faster they can start productive prep work.
What should I do if I am not happy with the finished result?
Raise any concerns during the final walkthrough before the crew leaves. A reputable company like Dreamscape Painting will address touch-ups and quality issues on the spot or schedule a return visit within a day or two. If concerns arise after the crew has left, contact the company directly with photos and a specific description of the issue. Any professional painter with a workmanship guarantee will return to correct legitimate defects in application or coverage without additional charge.
Is it worth painting before listing a home for sale in the Lower Mainland market?
Yes, consistently. Fresh interior paint is one of the highest-return pre-sale investments a homeowner can make. According to Zonda Media’s Cost vs. Value data, interior repainting ranks among the top cosmetic improvements for return on investment at resale. In a competitive market like Vancouver and the Fraser Valley, freshly painted interiors reduce buyer objections and support higher asking prices by presenting a well-maintained, move-in-ready home.
Can professional painters match an existing paint color without a formula?
Yes. Professional paint suppliers have spectrophotometer tools that can scan an existing painted surface and generate a color match formula. The match quality depends on how clean and representative the sample area is. For best results, provide the painter with a chip of original paint on a removable surface, like a small piece of drywall or a trim offcut, rather than trying to scan a wall that has years of light exposure and cleaning affecting the color.
If you have worked with a professional painting company on an interior project recently, share what surprised you most about the process in the comments below, your experience could help another homeowner make a more informed decision.
References
- U.S. Environmental Protection Agency, guidance on indoor air quality and low-VOC paint products for residential interiors
- Forbes Home, editorial coverage of home improvement costs, contractor hiring advice, and interior painting project planning
- Statista, market data and statistics on the residential painting and home improvement industry in North America
- National Research Council Canada, building science research on moisture management and interior finish performance in Canadian climate zones
- HomeStars, Canadian homeowner reviews and verified contractor ratings for painting services across British Columbia and the Lower Mainland