

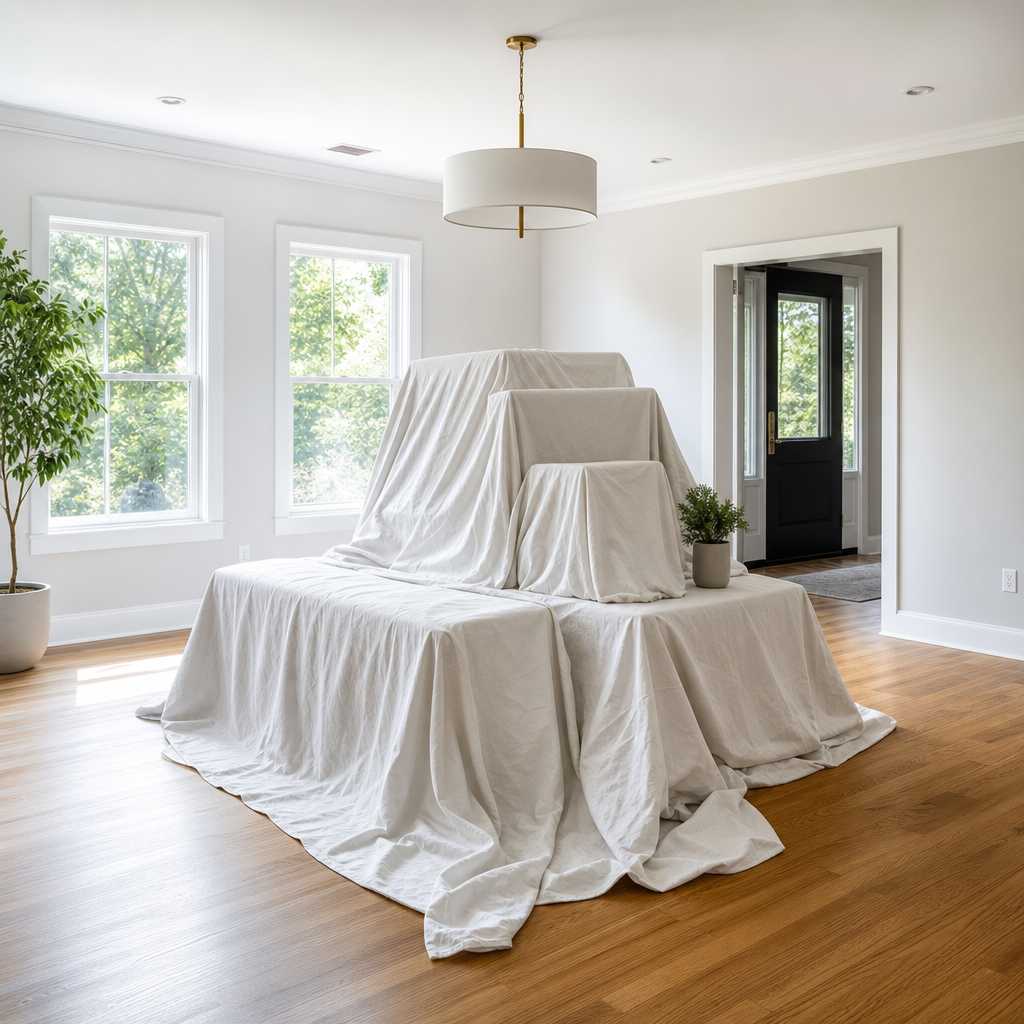
Most interior painting jobs go sideways before a single drop of paint is opened. Homeowners assume professional painters handle all the prep, show up the morning of the job with nothing moved, and wonder why the estimate comes in higher than expected or the project takes longer than planned. The reality is that how well you prepare your home for painters directly affects the quality of the finish, the speed of the job, and the final cost. This checklist walks you through exactly what to do, room by room, in the days before your crew from Dreamscape Painting Ltd. arrives.
Table of Contents
- Quick Takeaways
- Why Preparation Matters More Than Most Homeowners Think
- The Complete Interior Painting Checklist by Timeline
- Room-by-Room Preparation Guide
- What Professional Painters Expect You to Handle vs. What They Handle
- Comparison of Preparation Approaches
- Common Mistakes That Delay Your Project
- Frequently Asked Questions
- References
Quick Takeaways
| Key Insight | Explanation |
|---|---|
| Clear rooms at least 48 hours before painters arrive | Rushing furniture removal on the morning of the job delays the start time and may cost you hourly overage charges. |
| Patch small holes yourself or flag them clearly | Painters can fill nail holes, but large drywall damage needs to be repaired before painting begins. Know the difference and communicate it to your estimator. |
| Remove all wall decor and hardware in advance | Leaving picture frames, hooks, and switch plates in place forces painters to work around them, which produces uneven edges and slows the job. |
| Secure pets and establish a clear access plan | Pets in the work area cause safety hazards and can track paint through the home. Arrange alternate accommodation for animals the night before. |
| Confirm your paint colour selections at least one week early | Last-minute colour changes force crews to re-prime surfaces and increase material waste. Commit to colours before your start date. |
| Clean walls with a damp cloth in high-traffic areas | Grease, fingerprints, and grime near kitchen and hallway walls prevent paint adhesion. A quick wipe-down costs nothing and saves a re-coat. |
| Label or store items that cannot be moved | For heavy furniture that stays in the room, push it to the centre and cover it with drop cloths. Flag anything fragile with a sticky note so painters know to take extra care. |
Why Preparation Matters More Than Most Homeowners Think
In practice, the difference between a five-day interior project and a seven-day one is almost always preparation, not the painters. When a professional crew from a company like Dreamscape Painting Ltd. arrives at a home in Langley or Surrey and finds furniture still in place, art still on walls, and no clear path to the work area, the first two hours of a billable day disappear before a brush is picked up.
According to data from the Painting and Decorating Contractors of America, surface preparation accounts for roughly 80 percent of the total quality of a paint job. The paint itself is only 20 percent of the equation. That ratio holds whether you are painting a 900-square-foot condo in Vancouver or a 3,500-square-foot family home in Abbotsford.
“The single biggest factor that determines how a finished paint job looks is what happened to the surface before the first coat went on. Preparation is not optional. It is the job.” – Master Painters Institute, Professional Painter Training Standards
A common mistake is treating preparation as a courtesy rather than a contractual expectation. When you book with a professional painting company serving the Fraser Valley and Lower Mainland, your estimate is built around a certain state of readiness. Showing up unprepared shifts work onto the crew’s schedule and can void warranty coverage on some projects.


The Complete Interior Painting Checklist by Timeline
Breaking your preparation into a timeline prevents the last-minute scramble that almost every first-time painting client experiences. The following schedule works for a standard residential interior painting project of three to five rooms in the Lower Mainland.
One Week Before Painters Arrive
Confirm your paint colours with your Dreamscape Painting estimator and get written sign-off on the colour selections. If you are pulling colours from a Benjamin Moore or Sherwin-Williams fan deck, have the exact code, not just a colour name. “Soft grey” means nothing to a painter ordering product. The specific formula code means everything.
Walk through each room and identify any wall damage larger than a nail hole. Hairline cracks, water-stained patches, and screw anchor holes larger than half an inch need drywall repair before painting. If you are unsure, photograph the damage and send it to your estimator. Dreamscape Painting’s team can often include minor repairs in the scope, but only if they know about them in advance.
Make a list of every piece of furniture that needs to move and every item mounted to a wall. This list becomes your pre-paint day task list.
Three Days Before Painters Arrive
Begin removing wall art, mirrors, clocks, and decorative shelving. Take down all curtain rods and blinds if the painters are working up to the ceiling line. Remove outlet covers and light switch plates yourself and store them in a labeled bag by room. This step alone saves a surprising amount of time during masking.
Clean walls in high-use areas. In kitchens, wipe down the area above countertops and near the stove with a degreasing cleaner. In hallways and near light switches, a damp cloth removes the skin-oil buildup that prevents paint from bonding properly. Do not use oil-based cleaners. They leave a residue that causes exactly the adhesion problem you are trying to solve.
Pro tip: Fill nail holes yourself using lightweight spackle from any hardware store. Apply it with a putty knife, let it dry fully, and sand it flush. This is a five-minute task per room that removes it from the crew’s setup list entirely.
The Day Before Painters Arrive
Move all furniture to the centre of each room or, better, out of the room entirely. Rooms that are fully cleared allow painters to roll without interruption and produce a more even finish because they can maintain a wet edge across the full wall length.
Remove rugs and roll them up in a hallway or garage. Hardwood and tile floors in the Fraser Valley home are almost always protected by drop cloths, but rugs create uneven surfaces under those cloths and become trip hazards for painters carrying ladders.
Arrange a secure space for pets. Dogs and cats do not stay still in a room full of unfamiliar people and equipment. A single paw print through a freshly rolled wall requires a re-coat. Board your pets or confine them to a room that is completely outside the work area.
Morning of the Job
Ensure there is clear parking near the home’s entrance for the painting crew’s vehicle. In townhouse complexes or strata properties in Surrey or Langley, notify your strata office in advance so the crew is not ticketed or blocked. Unlock the spaces the crew needs to access and show them where they can store equipment safely.
Identify a room that is off-limits for the entire project day so your household has a private space. Crews from Dreamscape Painting are professional and respectful, but having a designated retreat for your family keeps everyone comfortable throughout a full-day job.
Room-by-Room Preparation Guide
Different rooms present different preparation challenges. A living room with a mounted 75-inch television is a different problem than a kitchen with open shelving. The following covers the rooms that require the most specific attention.
Kitchen Preparation
Kitchens have more fixed objects than any other room in the house. Clear the countertops completely and move any small appliances to another room. If your project includes cabinet refinishing as part of the interior painting scope, empty every cabinet and drawer completely before the crew arrives. Painters cannot work around cabinet contents, and removing them mid-job costs time.
Turn off the kitchen ventilation fan and cover the vent opening with painter’s tape and plastic sheeting. Paint particles drawn into the ductwork create a fine residue that is difficult to clean and can create air quality issues if it reaches your HVAC system.
Living and Dining Room Preparation
These rooms typically hold the most furniture. Bookcases must be emptied before moving because their weight and fragile contents make them impossible to reposition safely when full. Move large upholstered pieces out if at all possible. A sectional sofa pushed to the centre of a 16-by-20-foot room reduces the paintable wall area significantly and forces the crew to use smaller rollers and more time near the floor and ceiling edges.
Take down all window treatments, including the hardware brackets if they are close to the trim line. If the window trim is being painted, brackets left in place will be masked around and produce a visible unpainted outline when you rehang the curtains.
Bedroom Preparation
Beds can often stay in the room if they are pushed to the centre and covered. However, if the room has a walk-in closet or an accent wall behind the headboard that is being painted, the bed must move. Coordinate this with your painter during the estimate walk-through so they know what the room configuration will look like on start day.
Pro tip: Label everything you remove from walls with a piece of tape on the back indicating which room and approximate wall position it came from. Re-hanging everything after a multi-room project takes far less time when you have a clear record of where each item originated.

Bathroom Preparation
Bathrooms require extra attention to moisture and ventilation. Remove all items from the vanity top and clear any shelving units that are mounted near walls being painted. Ensure the bathroom fan works properly before the job starts. Paint fumes and moisture need active ventilation to dry correctly in a small, enclosed space like a bathroom.
If your bathroom has wallpaper, do not assume painters will remove it on the scheduled start day without prior arrangement. Wallpaper removal is a separate scope of work. Confirm with your estimator whether it is included in your quote or needs to be scheduled as a prior task.
What Professional Painters Expect You to Handle vs. What They Handle
This is where miscommunication most often creates friction between homeowners and painting crews in the Lower Mainland. There is a clear and reasonable division of responsibilities on any professional interior painting project. Understanding it prevents surprises and builds a better working relationship with your crew.
Homeowners are generally responsible for furniture removal, clearing personal belongings from shelves and walls, securing pets, and confirming colour selections before the start date. These tasks are not included in a standard painting estimate unless they are explicitly quoted as add-on services.
Experienced painters, including Dreamscape Painting’s crews with over 35 years of service in the Fraser Valley, are responsible for surface preparation including light sanding and priming, all masking and taping, applying the agreed number of coats to specification, protecting floors and fixed surfaces with drop cloths, and cleaning up paint debris and materials at the end of each day.
The grey zone is wall repair. Minor nail holes and hairline cracks are typically handled by painters as part of surface preparation. Water-damaged drywall, large holes from anchors or electrical work, and mould-stained surfaces are separate repair scopes that need to be identified during the estimate. If you find new damage after booking, call your estimator before the start date rather than pointing it out to the crew on arrival day.
Comparison of Preparation Approaches
Homeowners approach interior painting preparation in one of three ways. Each has measurable consequences for the project outcome, cost, and the relationship with the painting crew.
| Preparation Approach | What It Looks Like in Practice | Likely Impact on Your Project |
|---|---|---|
| Fully Prepared (48 hours before) | Rooms cleared, walls cleaned, art and hardware removed, colours confirmed, pets secured, estimator briefed on any wall damage | Project starts on time, crew works at maximum efficiency, finish quality is highest, final invoice matches estimate |
| Partially Prepared (morning of) | Some furniture moved, personal items still on shelves, a few wall pieces still hanging, colour not fully confirmed | First 1-2 hours of billable time spent on setup tasks that were the homeowner’s responsibility, possible minor cost additions, crew rushes later stages to stay on schedule |
| Unprepared (painter handles everything) | Homeowner expects crew to move furniture, remove hardware, and identify wall repairs on arrival day | Project delayed by half a day or more, additional charges for labour outside scope, increased risk of items being damaged during rushed moves, potential scheduling conflicts with other booked jobs |
Common Mistakes That Delay Your Project
After decades of interior painting work across Abbotsford, Surrey, Langley, and the broader Lower Mainland, the same preparation errors come up repeatedly. These are not minor inconveniences. Each one has a measurable cost in time or money.
Leaving Electrical Items Mounted and Live
Ceiling fans and light fixtures that are being painted around need to be either removed or fully covered before painters work near them. Painters cannot mask around a spinning fan blade. If the fixture is staying in place, ask your estimator in advance whether the crew will bag and tape it or whether you need to arrange an electrician to disconnect it temporarily.
Not Communicating About Pets or Residents with Sensitivities
Modern interior paints have significantly lower VOC levels than products used twenty years ago, but ventilation is still required. If anyone in your household has asthma, chemical sensitivities, or respiratory conditions, communicate this to your painting company before the start date. Professional painters can work with low-VOC or zero-VOC formulations if they know the requirement in advance. Raising it on the morning of the job after materials are already mixed is not a workable solution.
Assuming the Estimate Includes All Surface Repairs
A common mistake among first-time clients is reading a line item that says “surface preparation” and assuming it covers everything. In standard practice, surface preparation means cleaning, light sanding, and spot-priming. It does not mean repairing large drywall sections, skim-coating textured walls for a smooth finish, or stripping multiple layers of old paint from trim. Each of those is a separate scope with a separate cost. Review your quote line by line and ask your estimator to define what each item includes.
Dreamscape Painting’s estimators walk every project in detail before quoting, which eliminates most of this ambiguity before the crew ever shows up. If you are comparing quotes from multiple professional painters in Vancouver and the Fraser Valley, ask each one to specify exactly what surface preparation is included. A quote that looks cheaper often omits this scope entirely.
Frequently Asked Questions
Do I need to move all my furniture before the painters arrive?
Not necessarily all of it, but you should move everything you reasonably can. Light and mid-weight furniture should be cleared from the room or pushed to the centre. Large, heavy pieces like entertainment units or built-in shelving can often stay if they are pushed away from the walls and covered with drop cloths. Confirm the plan with your painting crew during the estimate walkthrough so there are no surprises on start day.
Should I buy the paint myself or let the painting company supply it?
In most cases, let the painting company supply the paint. Professional painting companies in the Lower Mainland, including Dreamscape Painting, have trade accounts with Benjamin Moore and Sherwin-Williams that give them access to commercial-grade formulations not available at retail. They also order the correct quantities based on room measurements, which eliminates the very common problem of homeowners underbuying and running out mid-project. You should absolutely choose your own colours, but let the professionals handle the purchasing.
How far in advance should I confirm my paint colours?
At minimum one week before your start date, and ideally at the time of booking. Colour selection affects primer type, number of required coats, and material ordering. A saturated dark colour going over a light base, for example, may require a tinted primer to achieve proper coverage in two coats rather than three. Your estimator needs this information to quote the project accurately.
What should I do about holes and wall damage before the painters come?
Fill nail holes and small anchor holes yourself using lightweight spackle, then sand flush when dry. This is a simple DIY task that removes it from the crew’s setup time. For holes larger than about half an inch, or for any area with water staining, crumbling drywall, or mould, do not attempt to repair it yourself. Document it with a photo, send it to your estimator, and let a professional assess whether it needs drywall repair or a specialist before painting can proceed.
Do I need to be home during the entire painting project?
You do not need to be present the entire time, but you should be available by phone. It is strongly recommended that you are home at the start of the first day to do a walkthrough with the crew, confirm access to each room, and point out any specific areas of concern. For multi-day projects across multiple rooms in a home in Langley or Surrey, being reachable during the workday allows the crew to get quick decisions on things like trim colour at transitions or the handling of an unexpected wall condition.
How do I prepare my home if I have young children?
The most practical approach is to arrange for children to be out of the home during active painting hours, especially on the first and last day of the project when the most movement and noise occurs. If that is not possible, designate a single room as a family zone that is completely off-limits to the crew and clearly communicated at the morning walkthrough. Ensure children understand that the work areas are off-limits, particularly stairwells and hallways where ladders and equipment are frequently repositioned.
If you have recently worked through an interior painting project and have tips from your own experience preparing for the crew, share what worked best for your home in the comments below.
We would love your feedback and any insights you would share with others. What perspective would you add?
References
- United States Environmental Protection Agency: indoor air quality and low-VOC paint standards for residential spaces
- Forbes Home: cost factors and professional standards in residential interior painting projects
- Statista: home improvement industry spending data and residential painting market statistics
- Natural Resources Canada: indoor air quality guidelines and ventilation requirements during home renovation
- HGTV: homeowner preparation guides and best practices for working with professional painting contractors

