
Most homeowners who attempt interior painting underestimate how much prep work separates a professional result from a patchy, peeling disappointment. Studies from the Paint Quality Institute show that up to 80% of paint failures trace back to improper surface preparation, not the paint itself. After 35 years of interior and exterior painting work across the Lower Mainland, the team at Dreamscape Painting has seen every shortcut backfire. This article breaks down the most common interior painting mistakes, explains exactly why they happen, and shows you how professional painters solve each one before the first drop of paint touches the wall.
Table of Contents
- Quick Takeaways
- Skipping Surface Preparation
- Choosing the Wrong Paint or Finish
- Skipping Primer or Using the Wrong One
- Poor Cutting In and Edging Technique
- Applying Too Few Coats
- Ignoring Drying and Curing Times
- DIY vs. Professional Interior Painting: Side-by-Side Comparison
- Frequently Asked Questions
- References
Quick Takeaways
| Key Insight | Explanation |
|---|---|
| Surface prep is non-negotiable | Skipping sanding, cleaning, or patching causes paint to peel within months, not years. |
| Sheen level matters as much as colour | Using flat paint in a high-moisture bathroom or kitchen is a common DIY painting problem that leads to mold and staining. |
| Primer is not optional | On bare drywall, dark colours, or stained surfaces, skipping primer wastes paint and produces uneven colour. |
| Cutting in requires a steady hand and the right brush | A 2.5-inch angled sash brush used with slow, deliberate strokes prevents the jagged edges that define amateur work. |
| Two coats is the minimum, not a bonus | One coat never achieves full hide, especially over dark, saturated, or repaired surfaces. |
| Re-coating too soon ruins adhesion | Most latex paints need at least two to four hours between coats; oil-based paints need 24 hours minimum. |
| Professional painters in Vancouver plan the job sequence | Ceilings first, walls second, trim last. This sequence eliminates lap marks and touch-up time. |
Skipping Surface Preparation

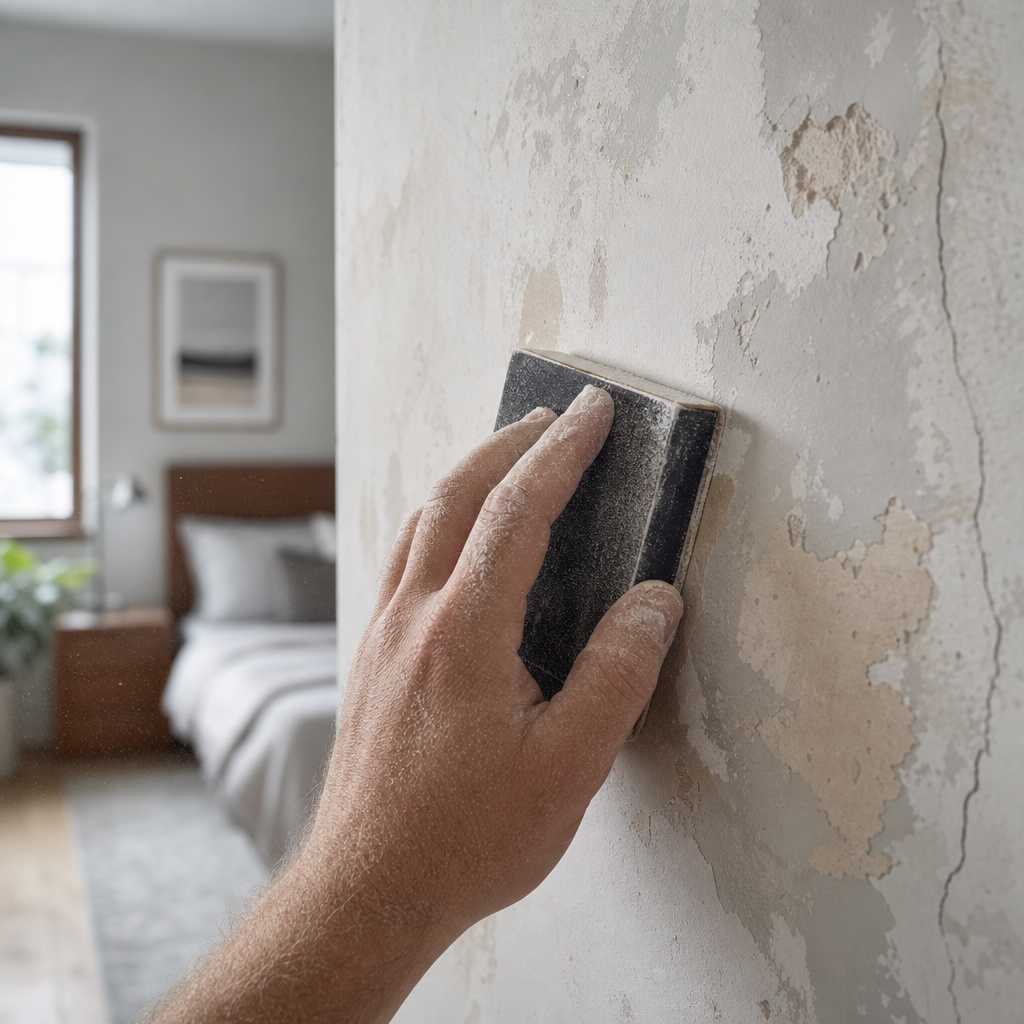
This is the single most damaging interior painting mistake a homeowner can make, and it is also the most tempting shortcut. Walls look smooth from across the room, so many DIYers roll straight onto them without washing, sanding, or patching. In practice, walls carry grease, dust, soap residue, and micro-scratches that prevent proper adhesion. Paint applied over a dirty or uneven surface will bubble, crack, and peel long before its expected lifespan.
Professional interior painters in Vancouver and across the Fraser Valley always begin with a thorough surface assessment. That means washing walls with a TSP (trisodium phosphate) solution or a quality degreaser, sanding glossy areas to create mechanical adhesion, and filling every nail hole, hairline crack, and dent with a lightweight spackle or joint compound. The repair is then sanded flush and primed before any topcoat goes on.
Why Wall Washing is Skipped and Why That is a Mistake
Homeowners often skip washing because the walls appear clean. But kitchens carry years of airborne grease, and bathrooms carry soap and mildew spores. A coat of paint over a mildew-contaminated surface will show dark spots within six months. Dreamscape Painting’s crews use a mildewcide wash on bathroom and kitchen walls before any primer touches the surface.
Pro tip: Run a flat hand across the wall surface before painting. If you feel texture, grit, or ridges, sand with 120-grit sandpaper before priming. What you feel, the paint will show.
Choosing the Wrong Paint or Finish
Walk into any hardware store and the sheer volume of paint options is overwhelming. Many homeowners default to whatever is on sale or pick a sheen level based on preference rather than the functional demands of the room. This is a predictable DIY painting problem that leads to surfaces that are hard to clean, prone to scuffing, or that highlight every wall imperfection.
Matching Sheen to the Room’s Function
Flat or matte finishes hide surface imperfections beautifully, which makes them ideal for low-traffic areas like formal dining rooms or master bedrooms. But use flat paint in a hallway or children’s room and you will have a wall that cannot be wiped clean. Eggshell or satin finishes are the practical choice for most living areas, while semi-gloss belongs on trim, doors, and cabinetry because of its washability and durability.
High-humidity areas like bathrooms require a moisture-resistant formula with mildewcide properties. Using a standard interior latex in a bathroom without ventilation is a setup for peeling and black mold growth behind the paint film. Professional interior painters in the Lower Mainland specify the correct product class for each surface before the job even begins.
Brand and Quality Grade Actually Matter
There is a measurable difference between a contractor-grade paint and a premium architectural paint. Higher-pigment, higher-resin paints cover in fewer coats, resist scuffing longer, and hold their colour more accurately over time. The savings from buying cheaper paint are almost always cancelled out by the extra labour of applying additional coats.
Pro tip: For interior walls in high-traffic areas, choose a satin or eggshell finish in a paint line with a washability guarantee. The upfront cost difference is usually $15 to $25 per gallon, and it extends the repaint cycle by two to three years.
Skipping Primer or Using the Wrong One
The myth that modern paints are self-priming has convinced many homeowners to skip a step that professional painters never skip. Paint-and-primer-in-one products perform adequately on previously painted surfaces in good condition. They do not perform adequately on bare drywall, repaired patches, wood stains, smoke damage, or colour changes from dark to light.
Bare drywall is extremely porous. Without a dedicated drywall primer, the paper face absorbs topcoat paint unevenly, creating a phenomenon called flashing where some areas look shiny and others look dull. This is nearly impossible to correct without stripping and re-priming. The Dreamscape Painting team has refinished entire rooms for clients who skipped primer and ended up with blotchy, uneven results from a DIY project.
When to Use a Stain-Blocking Primer
Water stains, nicotine, crayon, and marker bleed through standard primers and even multiple topcoats. Shellac-based primers like Zinsser BIN or oil-based stain blockers are the correct tool for these situations. Water-based stain-blocking primers have improved significantly, but for severe staining, oil or shellac is the professional standard. Applying two coats of premium paint over a water stain without a stain blocker is money wasted.
“The number one cause of paint failure is inadequate surface preparation, and that starts with the right primer for the right substrate.” – Paint Quality Institute, Surface Preparation Guidelines
Poor Cutting In and Edging Technique
Cutting in is the process of painting clean, straight lines along edges where walls meet ceilings, trim, and corners before rolling the broad wall surfaces. It requires a quality angled brush, a steady hand, and patience. Most DIYers rush this step or skip it entirely and rely on painter’s tape to do the work the brush should do. The result is wavy edges, tape bleed, or visible brush marks that stand out once the room is lit.
Professional painters cut in freehand for speed and accuracy on smooth surfaces. They load the brush correctly (about one-third of the bristle length into the paint), press the bristles to a slightly fanned position as they approach the edge, and draw a slow, consistent stroke. On textured surfaces or where a truly crisp line is non-negotiable, quality blue painter’s tape applied tightly over a sealed edge produces a clean result.
The Wet Edge Problem
A common mistake with cutting in is doing the entire room perimeter and then rolling. By the time the roller reaches the cut-in areas, the brushed paint has already started to dry. This creates a lap mark or texture difference at the junction between the brushed and rolled areas that is visible under raking light. Professional painters cut in one section at a time, then immediately roll that same section to blend the wet edges together.

Applying Too Few Coats
One coat of paint is almost never sufficient. The rare exception is a touch-up with the exact same product on a surface in perfect condition. For any real interior painting project, two coats is the baseline and three may be needed when covering dark colours, deep reds, or saturated jewel tones with a lighter colour.
The hiding power of paint is measured by its contrast ratio. Even premium paints rarely hit a contrast ratio of 1.00 in a single coat. Applying a second coat after proper drying time doubles the opacity, eliminates streaks from roller direction, and produces a finish that looks intentional rather than rushed. Dreamscape Painting always specifies a minimum of two finish coats in their written estimates so clients know exactly what they are getting.
How Roller Technique Affects Coverage
Using the wrong nap thickness for the surface also contributes to poor coverage. A 3/8-inch nap roller is the standard for smooth to slightly textured walls. A 1/2-inch or 3/4-inch nap is needed for heavily textured surfaces. Loading the roller with too much paint creates drips; too little creates dry streaks that require extra passes and disturb the paint film already applied. The correct method is to load, offload excess on the tray grid, and apply in a W or N pattern before back-rolling to even out the coat.
Ignoring Drying and Curing Times
Dry to the touch does not mean ready for a second coat. This distinction catches many DIYers off guard. Standard latex paint may feel dry in 30 to 60 minutes, but it needs at least two to four hours before a second coat can be applied without lifting the first. Oil-based paints require a full 24 hours between coats. Applying a second coat too soon traps solvent, creates a soft film that wrinkles, and in worst cases causes the entire paint layer to peel away in sheets.
Curing is a separate and longer process. Most latex paints reach full cure, meaning maximum hardness and washability, after 30 days. During that period, avoid scrubbing the surface, pressing tape against it, or placing furniture against walls. Clients who call about paint coming off when they wipe a freshly painted wall are almost always experiencing this issue. The wall looks done but the paint chemistry is still completing.
How Temperature and Humidity Affect Drying in the Fraser Valley
The Lower Mainland’s climate presents specific challenges. High humidity in autumn and winter slows drying significantly. Interior temperatures below 10 degrees Celsius can prevent latex paint from forming a proper film entirely, leading to a chalky, powdery finish. Professional painters working in the Fraser Valley monitor interior temperature and humidity before scheduling a paint day and use fans and dehumidifiers when conditions are marginal.
DIY vs. Professional Interior Painting: Side-by-Side Comparison
The decision between DIY and hiring professional interior painters comes down to time, risk tolerance, and the quality of finish you expect to live with for the next five to ten years. The table below compares the two approaches honestly across the factors that matter most to homeowners in Abbotsford, Langley, Surrey, and the broader Lower Mainland.
| Factor | DIY Interior Painting | Professional Interior Painters (e.g., Dreamscape Painting) |
|---|---|---|
| Surface Preparation | Often skipped or minimal; main source of DIY painting problems | Full wash, sand, patch, and prime before any topcoat is applied |
| Paint Selection | Chosen by colour or price; sheen and product class often wrong for the room | Specified by surface type, room function, and expected traffic level |
| Coat Count | Frequently one coat to save time and material cost | Minimum two finish coats stated in the written estimate |
| Edge and Cut-In Quality | Wavy lines, tape bleed, visible lap marks near ceilings and trim | Freehand cut-in with angled brush or taped for precision on complex details |
| Drying Time Compliance | Second coat often applied same day regardless of manufacturer guidance | Manufacturer recoat windows strictly observed; humidity and temperature checked |
| Cleanup and Protection | Floors and furniture often inadequately covered; paint on trim common | Full drop cloth coverage, furniture moved and wrapped, trim masked properly |
The comparison above does not exist to shame homeowners who want to tackle a room themselves. It exists to set realistic expectations. A bedroom refresh with a similar colour and a surface in good condition is a manageable DIY project. A full main floor repaint involving colour changes, repaired drywall, and detailed trim work is a project where the gap between DIY and professional results is large and visible every single day.
Dreamscape Painting has served the Lower Mainland for over 35 years, and the most consistent feedback from clients who tried DIY first is that they wish they had called sooner. The rework cost of fixing a failed DIY interior paint job typically exceeds what the professional job would have cost originally. For cabinet refinishing, where surface prep and fine finish technique are even more exacting, the gap is even wider. You can explore the full range of services at Dreamscape Painting’s website to understand what a professional interior painting scope looks like from estimate to cleanup.
Frequently Asked Questions
What is the most common interior painting mistake homeowners make?
Skipping or rushing surface preparation is the most damaging mistake by a wide margin. Painting over dirty, glossy, cracked, or unprimed surfaces causes adhesion failure that no amount of quality paint can fix. Clean, sand, patch, and prime before any topcoat is applied.
Do I really need primer before painting interior walls?
Yes, in most cases. On previously painted surfaces in good condition with a similar colour change, a quality paint-and-primer product may suffice. But on bare drywall, stained surfaces, smoke-damaged walls, or major colour changes from dark to light, a dedicated primer is not optional. Skipping it causes uneven coverage, flashing, and bleed-through that multiple topcoats cannot hide.
How long should I wait between coats of interior paint?
For standard latex paints, wait at least two to four hours between coats. Always check the manufacturer’s recoat window on the can. Oil-based paints require a minimum of 24 hours. Painting too soon traps solvent in the film, causes softness, and can lead to wrinkling or peeling.
Why does my paint look patchy or uneven after it dries?
Patchy or uneven results after drying are almost always caused by one of three things: insufficient surface preparation, skipping primer on a porous or stained surface, or applying only one coat. Rolling too quickly or with an overloaded roller also causes texture variation. In most cases, a second coat applied over a properly prepared and primed surface solves the problem.
Is it worth hiring professional interior painters in the Lower Mainland instead of doing it myself?
For complex projects involving colour changes, surface repairs, detailed trim work, or cabinet refinishing, hiring professional interior painters delivers a measurably better result and a longer repaint cycle. Dreamscape Painting has operated across the Fraser Valley and Lower Mainland for over 35 years, and the quality of finish their experienced painters achieve is difficult to replicate without professional tools, premium materials, and years of technique refinement.
What sheen level should I use for living room walls?
Eggshell is the most practical choice for living room walls. It is low enough in sheen to minimize wall imperfection visibility but washable enough to handle everyday scuffs and marks. Flat paint is better suited for ceilings and low-traffic formal areas. Reserve satin and semi-gloss for trim, doors, and high-moisture areas.
Why is my fresh paint peeling near the ceiling or in corners?
Peeling near ceilings and in corners usually points to one of two causes: moisture intrusion from above or from condensation, or inadequate surface adhesion from skipping primer and prep on the existing surface. If the peeling follows a pattern near windows or exterior walls, check for a moisture source before repainting. If it is widespread, the surface likely needs a full strip, prime, and repaint rather than a patch repair.
If you have tackled an interior painting project yourself and ran into any of these issues, share what happened and how you solved it. Real experiences from Fraser Valley homeowners help others make better decisions before they open the first can.
References
- U.S. Environmental Protection Agency resource on indoor air quality and paint product safety standards
- Forbes home improvement coverage on the real costs and outcomes of DIY versus professional painting projects
- Statista data and statistics on the home improvement and professional painting services industry
- National Research Council Canada research on building envelope performance and moisture effects on interior finishes
- HGTV editorial guidance on interior paint selection, sheen levels, and preparation techniques for residential spaces

