

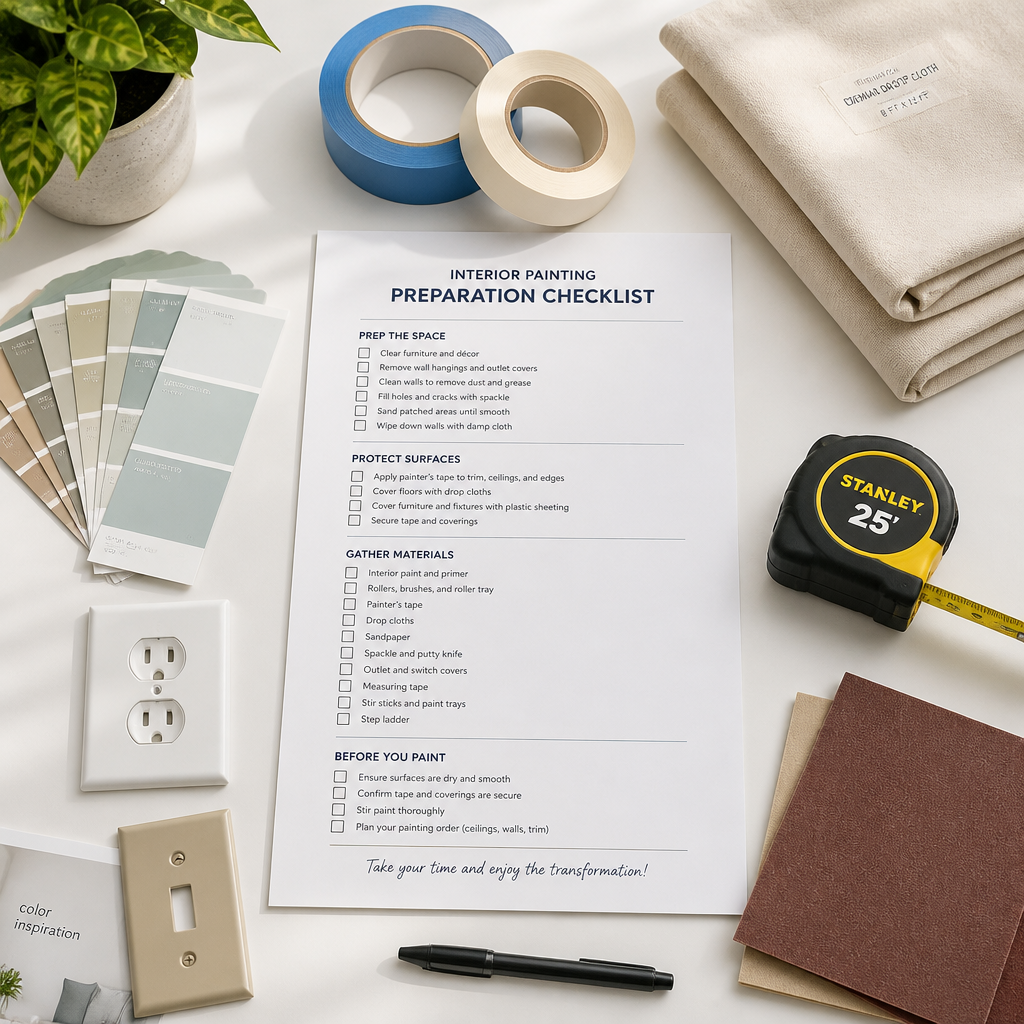
Most interior painting projects that go sideways do not fail at the painting stage. They fail at preparation. Furniture left too close to walls, greasy kitchen surfaces that repel fresh paint, outlet covers left on, walls that were never properly cleaned or patched – these are the details that separate a result you will love for ten years from one you will want to repaint by next summer. Whether you are working with a professional crew or doing some of the legwork yourself before Dreamscape Painting arrives at your Lower Mainland home, a solid interior painting preparation routine is the single most important thing you can do to protect your investment and keep the project on schedule.
Table of Contents
- Quick Takeaways
- Why Preparation Determines the Final Result
- General Whole-Home Prep Before Day One
- Living Room and Dining Room Checklist
- Kitchen Checklist
Kitchens are the most demanding room to prepare for interior painting, largely because of the grease accumulation that builds up on every surface near the cooktop. This grease is often invisible but is enough to prevent fresh paint from bonding correctly.
Surface cleaning before the crew arrives
Wipe down walls, backsplash areas, and the ceiling above the range with a proper kitchen degreaser. Mild soap and warm water handles light residue, but in a household where cooking happens daily, a dedicated degreaser applied and rinsed thoroughly is the more reliable choice. Clean walls are not optional in a kitchen – they are the foundation on which the paint job lives or dies.Clearing the kitchen space
Clear countertops of every small appliance, knife block, utensil holder, and decorative item.
Remove everything from the top of the refrigerator.
If cabinet painting is part of the project, empty every cabinet completely – every dish, glass, container, and can. A half-emptied cabinet cannot be properly refinished.
Set up a temporary coffee or kettle station in a different room so daily routines are not disrupted while the kitchen is in progress.
Place a note on any cabinet that should not be painted to prevent any confusion during the work.If your kitchen project includes cabinet refinishing, that is an entire process in itself that goes well beyond wall painting. Door removal, thorough surface degreasing, priming, fine sanding between coats, and final finish application are all part of that scope. For the Fraser Valley homeowner, Dreamscape’s cabinet refinishing work is handled with the same level of detail as any fine finish project.
Bedroom Checklist
- Bathroom Checklist
- Hallways and Stairwells Checklist
Hallways and stairwells are frequently overlooked in planning but are among the most technically demanding spaces to paint. The access challenges posed by stairwells mean the crew needs unobstructed movement at every level.
Clearing the access areas
Remove all wall-mounted items: art, mirrors, coat hooks, and any decorative shelving the entire length of the hallway and stairwell.
Move any hallway furniture, shoe storage units, and side tables into adjacent rooms.
If there is a storage closet opening onto the hallway that is being painted, clear its floor and remove any hanging items near the door frame.Why stairwells need extra planning
A stairwell with clear access allows the crew to set up proper staging without improvising. Improvised setups on stairs are both slower and less safe than a proper scaffold plank or ladder arrangement. Tell your crew in advance how many flights are involved and whether the stairwell has a landing. This single piece of information directly affects how long the access setup takes and what equipment the crew brings.Wall Surface Prep: The Step Most Homeowners Skip
Even when a homeowner does everything right with furniture and floor protection, the wall surface itself is often left unprepared. Professional crews handle most surface work, but there are things a homeowner can do in advance to speed up the process and improve the result.
Cleaning walls before painting
Walls collect dust, cobwebs, fingerprints, and grease at a rate most people do not notice until paint goes on over them and highlights every imperfection. Wipe down walls with lukewarm water and a mild cleaning solution, working in circular motions and rinsing with a lightly damp sponge. Let surfaces dry completely before the crew begins. In kitchens and areas above heat sources, use a degreaser rather than standard soap.Filling nail holes and minor cracks
You do not need to handle every repair, but filling obvious nail holes with lightweight spackle before your painters arrive is genuinely helpful. Apply it with a small putty knife, let it dry, and sand it flush. This shortens the crew’s patching phase, particularly on rooms with a lot of wall art that has been removed. Larger cracks, damaged drywall sections, or areas with peeling existing paint should be left for the professional crew to assess and repair correctly.When to caulk before painting
Gaps where trim meets the wall are a common source of a finished paint job that looks unpolished at close inspection. Fill these gaps with paintable acrylic caulk before priming. Do not use silicone caulk on interior trim – it cannot be painted over and will leave a visible gap in the finished surface. Paintable latex caulk is the correct product for interior trim-to-wall junctions.Pro tip: Water stains and marker or crayon marks on walls will bleed through standard paint even after two coats. Do not paint over them and hope for the best. These areas need a stain-blocking primer applied before the topcoat. If you notice these on any wall being prepared for painting, flag them explicitly for your crew so the right primer is brought to the job.
DIY Prep vs. Professional Prep: A Direct Comparison
- Frequently Asked Questions
- References
Quick Takeaways
| Key Insight | Explanation |
|---|---|
| Small items are your responsibility | Professional crews will move large furniture to the room’s center and cover it, but the small items along walls – baskets, lamps, pet beds, shoe racks – are faster and safer for you to relocate in advance. |
| Grease kills adhesion in kitchens | Kitchen walls carry a film of cooking grease that causes fresh paint to peel early. Wipe surfaces with a degreaser before the crew arrives – mild soap and water is not enough in high-cook households. |
| Outlet covers and switch plates must come off | Painting around them always looks amateur. Remove them, tape the screws to the back of each plate, and store in a labelled bag so reinstallation is quick. |
| Confirm your colour choices before day one | Last-minute colour changes mid-project delay scheduling, waste materials, and often cost extra. Test samples on the actual wall and confirm in writing before the crew books your start date. |
| Patch and sand before the crew arrives if possible | Small nail holes and hairline cracks in drywall are easy for a homeowner to fill with lightweight spackle. Doing this in advance shortens the prep phase and keeps the project on budget. |
| Protect floors with canvas, not old sheets | Old bed sheets and towels allow paint to seep through to hardwood or tile. Canvas drop cloths do not. If canvas is not available, use purpose-made plastic sheeting taped securely at the edges. |
| Stay reachable on painting days | Painters frequently need quick approvals on questions like colour placement at accent walls, whether a specific closet interior should be included, or what to do with wall anchors. Being available by phone prevents unnecessary delays. |
Why Preparation Determines the Final Result
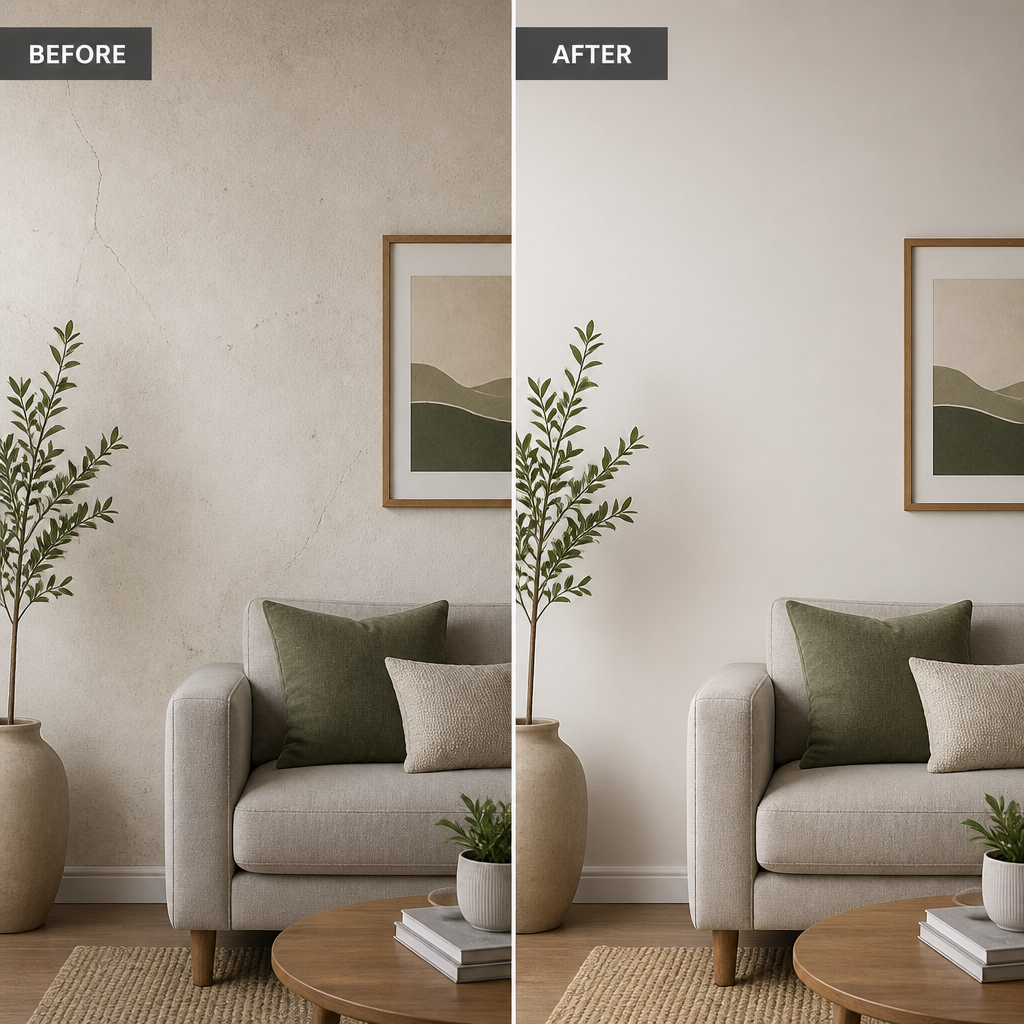
There is a direct relationship between the quality of surface preparation and how long a paint job lasts. Dust, grease, and residue on wall surfaces prevent paint from bonding properly, leading to peeling, uneven sheen, and colour inconsistency within the first few years. A paint crew that rushes directly to application on an unprepared wall is wasting both their time and your money.
At Dreamscape Painting, preparation is treated as a core part of the job, not an afterthought. After more than 35 years of interior work across Abbotsford, Langley, Surrey, and the broader Lower Mainland, the consistent finding is that the homes with the best long-term paint results are the ones where homeowners did a few simple things before the crew arrived. This checklist is built on that experience.
The condition of your walls before the first drop of paint is applied determines more about the final result than the brand of paint ever will. Preparation is not optional – it is the work.
General Whole-Home Prep Before Day One
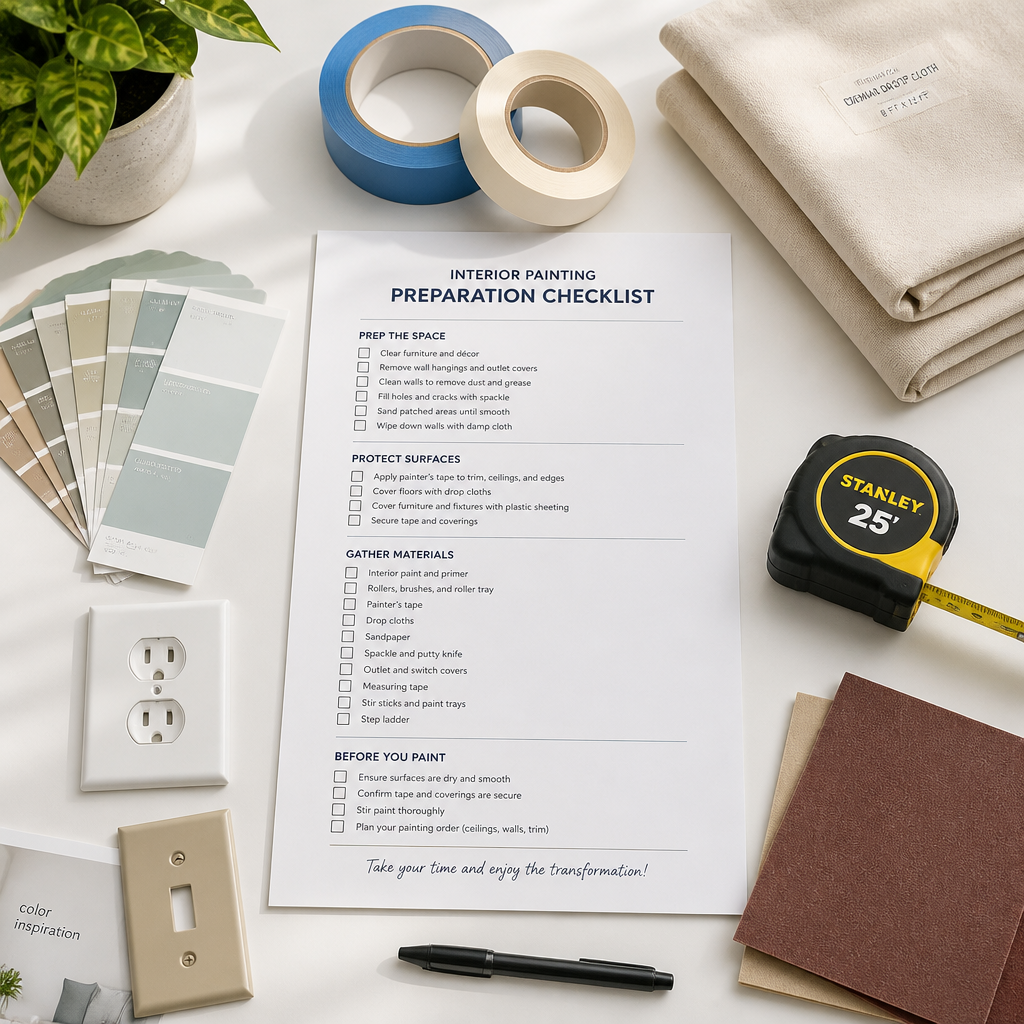
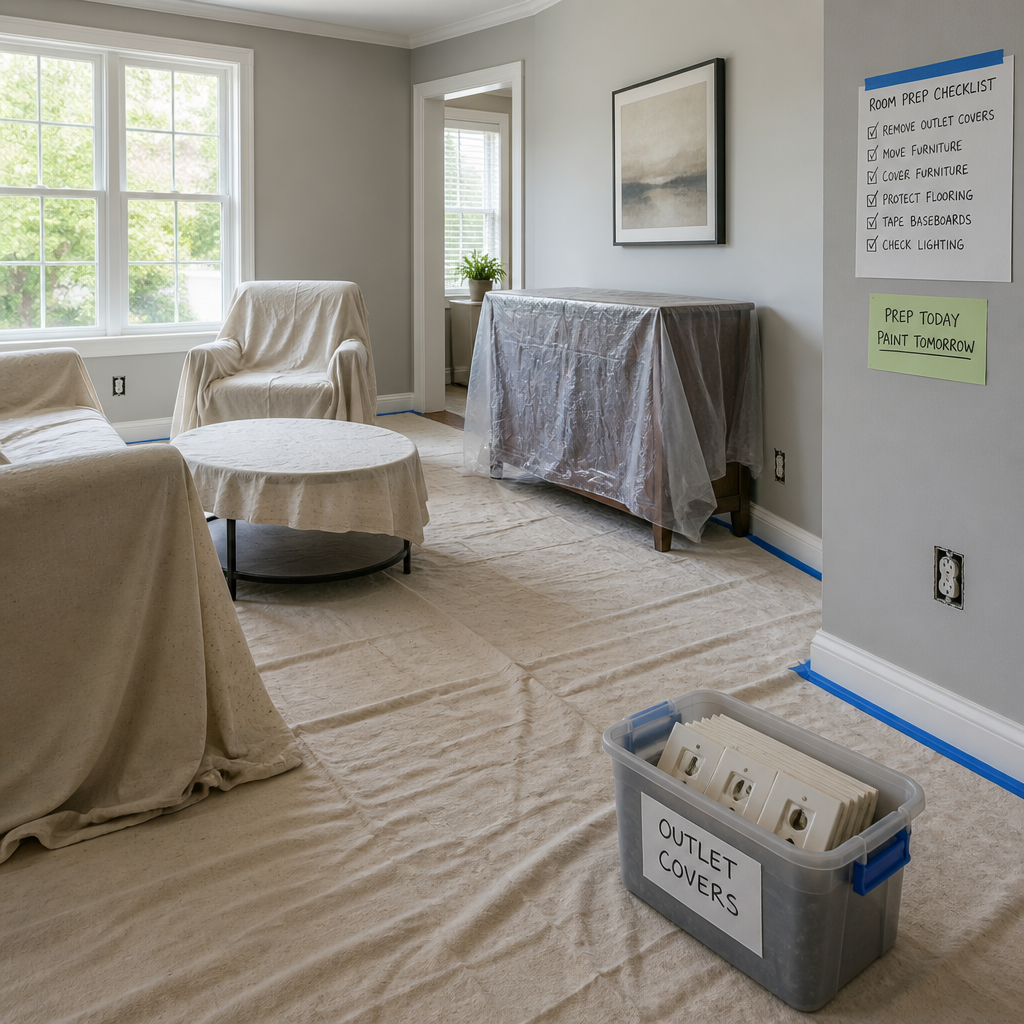
Before the room-by-room details, several tasks apply to every space in the home. Handle these in the 24 to 48 hours before your painters are scheduled to arrive.
Remove wall art, mirrors, and shelving
Take down every framed photo, mirror, clock, and wall-mounted shelf in the rooms being painted. Store them in a room that is not part of the project scope. Glass and irreplaceable items should be packed and placed away from any work areas entirely.
Pull window treatments
Remove curtains, curtain rods, and all window treatments. Rods mounted into window frames are quick to unscrew and store. Leaving them in place forces painters to work around them, which slows the job and risks splatters on fabric that may not wash out.
Remove outlet covers and switch plates
Unscrew every outlet cover and light switch plate in the rooms being painted. A common and effective trick is to tape the screws directly to the back of each plate before putting them in a labelled bag. This takes about five minutes per room and saves significant time during reinstallation.
Protect floors properly
Canvas drop cloths are the correct choice for floor protection. Unlike plastic sheeting, canvas absorbs paint drips rather than letting them spread, and it does not shift underfoot and create slip hazards. Old towels or bed sheets are not adequate – paint seeps through fabric weaves onto hardwood and tile beneath.
Pro tip: Before any prep begins, do a walkthrough of every room with your crew lead and verbally confirm the scope – which walls, which ceilings, which trim, and whether closet interiors are included. Misunderstandings about scope are the most common source of disputes on painting projects, and a five-minute walkthrough eliminates almost all of them.
Living Room and Dining Room Checklist
The living room and dining room are typically the largest spaces in the home and the ones with the most furniture to navigate. Your professional crew will move large pieces – sofas, dining tables, entertainment units, bookshelves – to the center of the room and cover them. Your job is to handle everything the crew cannot easily move or that could be damaged in transit.
What to do yourself
- Remove books from lower bookshelves sitting against walls being painted. Higher shelves the crew can work above are generally fine to leave loaded.
- Disconnect and relocate electronics: unplug and coil TV cables, gaming consoles, and speaker wire. The crew will move the TV stand, but live cables are a hazard.
- Move floor lamps, small accent tables, plant stands, and decorative baskets away from every wall.
- Roll up area rugs and store them in a hallway or spare room.
- Take down gallery walls and store frames flat to prevent glass breakage.
Surface-specific notes
Living rooms often have feature walls or accent colours. Confirm the exact colour and finish for each wall before the crew begins, not on the day itself. If you have crown moulding or detailed trim, flag whether it should be painted in a contrasting colour so the crew can schedule masking time appropriately.
Pro tip: If your living room has a fireplace surround, note whether the surround is masonry, wood, or a prefabricated unit. Each takes paint differently, and your crew needs to know this before they select primer. Masonry surfaces in particular require a bonding primer that differs from standard drywall preparation products.
Kitchen Checklist
Kitchens are the most demanding room to prepare for interior painting, largely because of the grease accumulation that builds up on every surface near the cooktop. This grease is often invisible but is enough to prevent fresh paint from bonding correctly.
Surface cleaning before the crew arrives
Wipe down walls, backsplash areas, and the ceiling above the range with a proper kitchen degreaser. Mild soap and warm water handles light residue, but in a household where cooking happens daily, a dedicated degreaser applied and rinsed thoroughly is the more reliable choice. Clean walls are not optional in a kitchen – they are the foundation on which the paint job lives or dies.
Clearing the kitchen space
- Clear countertops of every small appliance, knife block, utensil holder, and decorative item.
- Remove everything from the top of the refrigerator.
- If cabinet painting is part of the project, empty every cabinet completely – every dish, glass, container, and can. A half-emptied cabinet cannot be properly refinished.
- Set up a temporary coffee or kettle station in a different room so daily routines are not disrupted while the kitchen is in progress.
- Place a note on any cabinet that should not be painted to prevent any confusion during the work.
If your kitchen project includes cabinet refinishing, that is an entire process in itself that goes well beyond wall painting. Door removal, thorough surface degreasing, priming, fine sanding between coats, and final finish application are all part of that scope. For the Fraser Valley homeowner, Dreamscape’s cabinet refinishing work is handled with the same level of detail as any fine finish project.
Bedroom Checklist
Bedrooms are logistically straightforward but have specific details that are easy to overlook. The main challenge is that bedrooms are still in active use at night while painting happens during the day, which means the room needs to be usable by evening.
What to handle before painters arrive
- Strip all bed linens and store pillows in bags or a closet. Your crew will move the bed frame to the center and cover it, but dust and dry spray from ceiling work can land on exposed bedding.
- Clear nightstand surfaces completely.
- Remove clothing from any freestanding racks and from hooks on walls being painted.
- If the closet is being painted, clear the closet floor and remove hanging clothes from rods nearest the walls.
- Move floor lamps and personal items away from every wall.
Children’s rooms and nurseries
If a nap or sleep schedule matters, communicate this to your crew lead before the project starts. A good crew can sequence rooms so the child’s space is completed last, or can work in the space during the time window that works best for your household. Do not assume the crew already knows your schedule – say it explicitly at the walkthrough.
Bathroom Checklist
Bathrooms are small spaces but they require thoughtful sequencing, especially in homes where one bathroom will still need to be in use during the project. The first step is telling your crew lead which bathrooms are being painted and whether any of them are your only functioning bathroom.
Clearing and protecting the space
- Remove towels, bath mats, shower curtains, and curtain rods.
- Clear all countertop items: toothbrush holders, soap dispensers, cosmetics, and appliances like hair dryers and electric shavers.
- Clear the medicine cabinet if the wall surrounding or behind it is being painted.
- Remove all wall-mounted accessories that can be unscrewed, including towel bars, toilet paper holders, and robe hooks.
Finish and moisture considerations
Bathrooms require a semi-gloss or gloss finish for painted walls. These finishes resist moisture and wipe clean far more effectively than eggshell or flat sheens, which absorb steam and scrubbing. This is not a matter of preference – it is a functional requirement. Any painting company serving Fraser Valley and Lower Mainland homes should be selecting bathroom finishes with moisture resistance as the primary criterion, not just aesthetics.
Hallways and Stairwells Checklist
Hallways and stairwells are frequently overlooked in planning but are among the most technically demanding spaces to paint. The access challenges posed by stairwells mean the crew needs unobstructed movement at every level.
Clearing the access areas
- Remove all wall-mounted items: art, mirrors, coat hooks, and any decorative shelving the entire length of the hallway and stairwell.
- Move any hallway furniture, shoe storage units, and side tables into adjacent rooms.
- If there is a storage closet opening onto the hallway that is being painted, clear its floor and remove any hanging items near the door frame.
Why stairwells need extra planning
A stairwell with clear access allows the crew to set up proper staging without improvising. Improvised setups on stairs are both slower and less safe than a proper scaffold plank or ladder arrangement. Tell your crew in advance how many flights are involved and whether the stairwell has a landing. This single piece of information directly affects how long the access setup takes and what equipment the crew brings.
Wall Surface Prep: The Step Most Homeowners Skip
Even when a homeowner does everything right with furniture and floor protection, the wall surface itself is often left unprepared. Professional crews handle most surface work, but there are things a homeowner can do in advance to speed up the process and improve the result.
Cleaning walls before painting
Walls collect dust, cobwebs, fingerprints, and grease at a rate most people do not notice until paint goes on over them and highlights every imperfection. Wipe down walls with lukewarm water and a mild cleaning solution, working in circular motions and rinsing with a lightly damp sponge. Let surfaces dry completely before the crew begins. In kitchens and areas above heat sources, use a degreaser rather than standard soap.
Filling nail holes and minor cracks
You do not need to handle every repair, but filling obvious nail holes with lightweight spackle before your painters arrive is genuinely helpful. Apply it with a small putty knife, let it dry, and sand it flush. This shortens the crew’s patching phase, particularly on rooms with a lot of wall art that has been removed. Larger cracks, damaged drywall sections, or areas with peeling existing paint should be left for the professional crew to assess and repair correctly.
When to caulk before painting
Gaps where trim meets the wall are a common source of a finished paint job that looks unpolished at close inspection. Fill these gaps with paintable acrylic caulk before priming. Do not use silicone caulk on interior trim – it cannot be painted over and will leave a visible gap in the finished surface. Paintable latex caulk is the correct product for interior trim-to-wall junctions.
Pro tip: Water stains and marker or crayon marks on walls will bleed through standard paint even after two coats. Do not paint over them and hope for the best. These areas need a stain-blocking primer applied before the topcoat. If you notice these on any wall being prepared for painting, flag them explicitly for your crew so the right primer is brought to the job.
DIY Prep vs. Professional Prep: A Direct Comparison
Homeowners sometimes ask how much of the preparation they should handle themselves and how much they should leave to a professional crew. The honest answer: some tasks you are well-positioned to handle, others you should not touch without professional guidance. The table below gives a clear view of which is which.
| Preparation Task | Homeowner DIY | Professional Crew |
|---|---|---|
| Moving small furniture and floor items | Ideal for homeowner – saves crew time and protects personal items | Can handle if needed, but slower for complex or cluttered rooms |
| Removing wall art, outlet covers, switch plates | Quick DIY task – takes 30 minutes for most homes | Crew will do it, but it adds time to your billable prep phase |
| Cleaning walls (dusting, washing) | Homeowner can handle standard cleaning in advance | Crew handles degreasing, TSP washing, and specialty surface cleaning |
| Filling small nail holes with spackle | Appropriate DIY task for superficial holes | Crew handles all structural patching, drywall repair, and skim coating |
| Caulking trim-to-wall gaps | Acceptable for simple straight runs with paintable caulk | Crew handles detailed caulking around window frames, architrave, and moulding |
| Masking and taping | Not recommended – poor taping creates visible bleed lines and edge defects | Professional masking is a skilled step that directly affects cut-in quality |
| Priming bare drywall or stain-blocking | Not recommended without knowledge of primer types and dry times | Crew selects primer by substrate, existing finish type, and topcoat product |
Frequently Asked Questions
How far in advance should I prepare my home for interior painters?
The most useful window is 24 to 48 hours before your crew is scheduled to arrive. Removing wall art, clearing small items from along walls, stripping bed linens, and doing any basic wall cleaning can all be done the evening before. If you are doing your own minor spackle patching, do that 48 hours in advance so the filler has time to cure and dry fully before the crew sands and primes.
Do professional painters move furniture, or is that my job?
Most professional painting crews, including Dreamscape Painting’s teams, will move large furniture to the center of each room and protect it with drop cloths. What the homeowner should handle in advance are the smaller items that accumulate along walls: floor lamps, side tables, plant stands, shoe racks, pet beds, decorative baskets, and anything fragile or irreplaceable. These items move faster and more safely when the homeowner handles them, and it reduces the risk of breakage during the setup phase.
Do I need to clean my walls before painters arrive?
Yes, especially in kitchens, bathrooms, and high-traffic areas. Paint does not bond well to greasy, dusty, or dirty surfaces. A basic wipe-down with mild soap and warm water handles most rooms. Kitchen walls near the range need a proper degreaser. Your professional crew will handle more thorough surface preparation as part of their process, but arriving to already-clean walls shortens the prep phase and reduces the chance of adhesion issues later.
What paint finish should I use for each room?
As a general rule: semi-gloss or gloss for bathrooms and kitchens, where moisture resistance and washability matter most. Satin or eggshell for living rooms, dining rooms, and bedrooms, where a subtle sheen reads well under most lighting without showing every imperfection. Flat finish is appropriate for ceilings throughout the home. Your Dreamscape estimator will walk through finish recommendations for each surface as part of the estimate, accounting for the specific conditions in your home.
What happens if I miss something on the preparation checklist?
The crew will work around most gaps in preparation, but it adds time to the project. A room that still has wall art up when the crew arrives requires the crew to stop and remove it before setting up protection. A kitchen with items still on the counters means the counter protection step takes longer. None of these are disasters, but they shift time and can affect your project schedule, particularly if multiple rooms are involved. When in doubt, over-prepare rather than under-prepare.
Should I be home while painting is in progress?
You do not need to be home for the entire project, but staying reachable by phone is important. Questions come up during the work day, such as confirming colour placement at an accent wall, deciding whether a closet interior should be included, or getting a quick answer about where a specific piece of art will go back. A delayed response can halt work while the crew waits for direction. If you will be away during any part of the project, designate one point of contact who can make decisions on your behalf.
Have you recently prepped your home for a painting project in the Fraser Valley or Lower Mainland? We would love to hear what worked well for you, and what you wish you had known before day one.
References
- Room-by-room interior painting preparation guide for homeowners working with a professional crew
- Interior painting preparation checklist covering wall cleaning, patching, and surface protection steps
- Interior paint preparation guide covering patching, caulking, wall cleaning, and surface repair
- How to prep a home for painting, including floor protection, furniture prep, and wall preparation advice
- Room-by-room checklist for preparing a home before professional interior painters arrive

