
Most paint jobs that fail within two years do not fail because of bad paint. They fail because of what happened before the first coat was ever applied. Surface preparation painting is the single most important step in any residential or commercial paint project, yet it is the step most often rushed, skipped, or underestimated. At Dreamscape Painting Ltd., after 35 years of working across Abbotsford, Langley, Surrey, and the entire Lower Mainland, we have seen thousands of surfaces. The pattern is consistent: proper prep equals paint that lasts a decade or more. Poor prep means callbacks, peeling, and disappointed homeowners inside of two years.
Table of Contents
- Why Surface Preparation Is the Foundation of Every Paint Job
- What Professional Surface Preparation Actually Involves
- Exterior Paint Prep in the Lower Mainland: What the Climate Demands
- Interior Surface Prep: What Changes When You Go Inside
- How DIY Prep Compares to Professional Prep
- The Most Common Surface Prep Mistakes We See in the Fraser Valley
- Surface Preparation for Cabinet Refinishing: A Different Standard
- Frequently Asked Questions
- References
Why Surface Preparation Is the Foundation of Every Paint Job
Paint does not bond to dirt, moisture, chalk, or grease. It bonds to the substrate underneath. If that substrate is not properly cleaned, sanded, primed, and repaired, the paint film has nothing stable to hold onto. The Paint Quality Institute has long documented that adhesion failure is the leading cause of premature coating failure, and adhesion failure is almost always a prep failure.
Think about what a painted exterior wall in Abbotsford or Surrey faces in a single year: heavy rain, temperature swings between freezing winters and warm summers, UV exposure, mildew growth from moisture. A paint film applied over a compromised surface will not survive those stresses. A paint film applied over a properly prepared surface, using quality coatings, can realistically last 8 to 12 years on the exterior and well over 10 years on interior surfaces.
The financial argument is simple. Spending the time and money to prepare correctly the first time costs a fraction of what a premature repaint costs. Professional painters who skip prep are not saving you money. They are borrowing against your future budget.
What Professional Surface Preparation Actually Involves
Surface preparation is not one step. It is a sequence of steps, and each one matters. In practice, our crews at Dreamscape Painting follow a consistent process regardless of whether the project is a single-family home in Langley or a commercial building in Surrey.
Cleaning and Degreasing
Every paintable surface must be clean. For exteriors, that typically means pressure washing to remove dirt, mildew, and chalking from old paint. Mildew must be treated with a diluted bleach solution before washing, not simply rinsed away. For interiors, surfaces near kitchens, bathrooms, and high-traffic areas need degreasing with a TSP (trisodium phosphate) substitute or equivalent cleaner. Painting over grease is one of the most reliable ways to guarantee peeling within months.
Scraping, Sanding, and Feathering
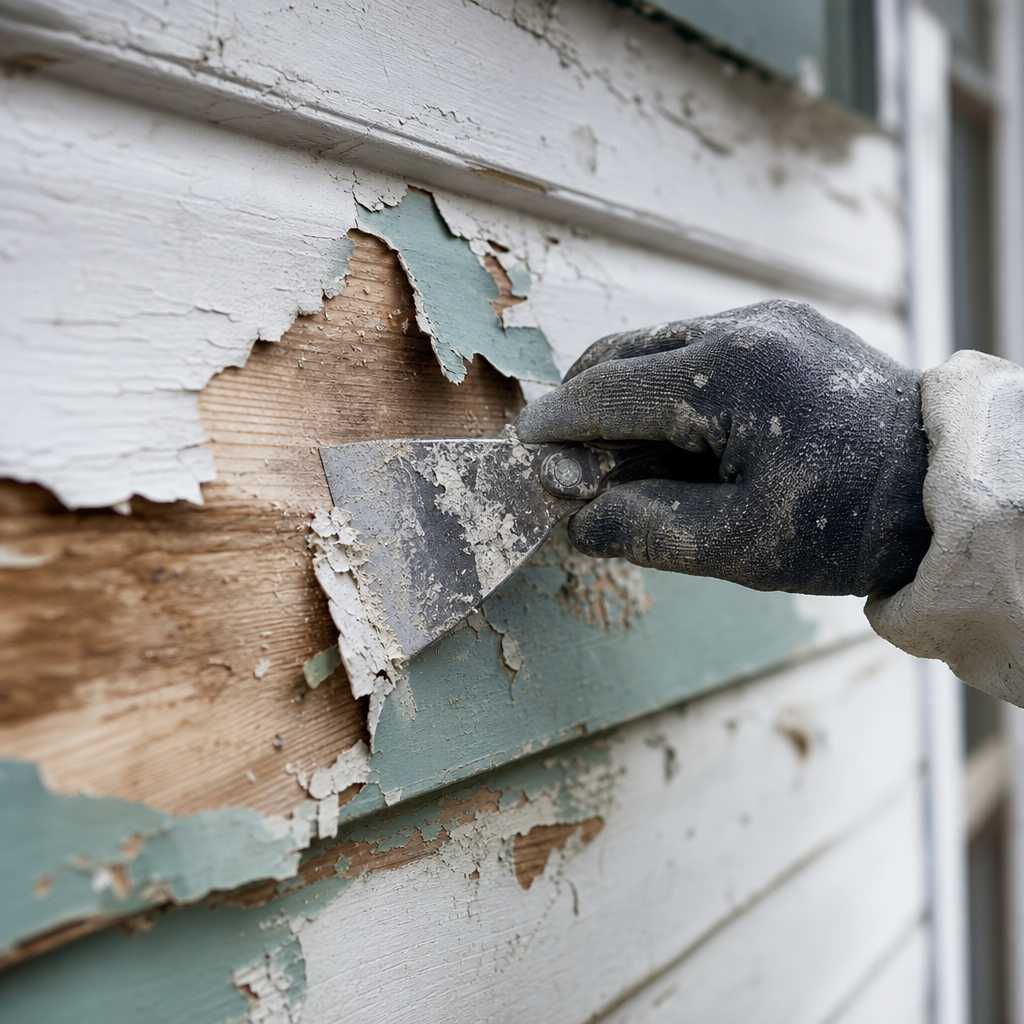
Any paint that is already peeling, bubbling, or flaking must be removed. This is non-negotiable. The common mistake is painting over peeling paint and hoping primer will hold it together. It will not. After scraping, edges must be feathered with sandpaper so there is no visible ridge between the bare substrate and the remaining old paint. Skipping this step produces a bumpy, unprofessional finish even under a fresh topcoat.
Patching, Caulking, and Filling
Cracks in drywall, nail holes, gaps around trim, and failed caulk around windows all need to be addressed before primer goes on. Caulking is especially important in Lower Mainland climates, where water infiltration behind siding or around window frames is a constant risk. We use paintable caulks rated for exterior use and allow proper cure time before coating. Skipping this step means painting over stress points that will simply re-crack through the new paint film.
Priming
Primer is not optional. It is a bonding agent, a stain blocker, and a moisture barrier depending on the product used. Bare wood requires a penetrating oil or water-based primer. Stained surfaces from water damage or smoke require a shellac-based or specialty stain-blocking primer. New drywall requires a PVA primer to seal the paper face before topcoats are applied. Using the wrong primer, or skipping it entirely, undermines every dollar spent on finish paint.
Pro tip: Never apply primer to a surface that is still damp. In the Lower Mainland, this means checking for residual moisture after pressure washing or rain. A moisture meter costs under $40 and removes all guesswork. Professional painters use them routinely.


Exterior Paint Prep in the Lower Mainland: What the Climate Demands
Paint prep in the Fraser Valley is not the same as paint prep in a dry interior climate. The Lower Mainland averages over 1,100 mm of rainfall annually, according to Environment and Climate Change Canada. That moisture level makes exterior surface preparation genuinely more demanding than in most of North America.
Wood siding in this region absorbs moisture repeatedly throughout the year. Before any exterior paint is applied, wood moisture content should ideally be below 15 percent. Above that threshold, the paint film traps moisture inside the wood, which causes blistering and peeling from the inside out. This is the most common reason exterior paint fails prematurely on cedar siding homes throughout Abbotsford and Langley.
Timing and Weather Windows
Professional exterior prep and painting in the Lower Mainland requires planning around weather. Paint should not be applied when temperatures are below 10 degrees Celsius or when rain is forecast within 24 hours of application. Many painting companies in this region rush jobs in marginal weather to hit deadlines. At Dreamscape Painting, we delay rather than compromise. A job painted in ideal conditions will outlast a rushed one by years.
Handling Mildew and Biological Growth
Mildew is not cosmetic in this climate. It is structural. Left untreated under fresh paint, mildew continues to grow and will cause the paint film to fail within one to two seasons. The standard approach is a 1:3 bleach-to-water solution applied to affected areas, followed by thorough rinsing and drying before priming. Mildewcide additives in the topcoat add a layer of protection but are not a substitute for proper cleaning at the prep stage.
“Surface preparation accounts for 80 percent of the durability of any coating system. The coating itself accounts for only 20 percent.” – The Society for Protective Coatings (SSPC), a recognized authority on coating performance standards.
Interior Surface Prep: What Changes When You Go Inside
Interior surface preparation follows similar logic to exterior prep but with different priorities. Adhesion and cleanliness still matter, but moisture and UV exposure are replaced by surface damage, staining, and the challenge of achieving a smooth, flawless finish that looks sharp under close-range lighting.
Drywall Preparation
New drywall looks smooth until you put a coat of paint on it. Then every imperfect taping seam, every slight bulge, every screw dimple that was not filled properly becomes visible. Professional drywall prep involves skim coating imperfections, sanding smooth, and applying PVA primer before any finish coats. This process takes time, but it is what separates a magazine-quality interior finish from a mediocre one.
Repainting Over Existing Walls
When repainting existing interior walls, the prep checklist includes washing down walls with a mild cleaner, filling any holes or cracks with lightweight spackle, sanding those repairs flush, and spot-priming repaired areas before the full coat goes on. Skipping spot priming causes flashing, where repaired areas look duller than surrounding painted surfaces, even after two full topcoats.
Pro tip: When repainting a room that previously had flat paint, always sand the walls lightly before repainting with an eggshell or satin finish. The slight tooth this creates dramatically improves adhesion and prevents the new sheen from looking blotchy in raking light.

How DIY Prep Compares to Professional Prep
Homeowners across Surrey and Abbotsford often ask whether they can handle surface prep themselves to reduce costs. The honest answer is: it depends on what you are comfortable doing and what tools you have. But the comparison below shows where the gaps typically appear.
| Preparation Step | Typical DIY Approach | Professional Approach (Dreamscape Painting) |
|---|---|---|
| Cleaning (Exterior) | Garden hose rinse or light scrubbing | Commercial pressure washing with mildew treatment and full rinse cycle |
| Scraping and Sanding | Spot scraping of visible peeling areas only | Full inspection, complete removal of all loose paint, feathering with graduated grits |
| Moisture Testing | Rarely done; relied on visual assessment | Moisture meter readings taken on wood substrates before priming |
| Caulking | Applied over failed caulk without removing old material | Old caulk fully removed, joint cleaned and dried, proper paintable caulk applied and tooled |
| Priming | Skipped or limited to one coat of general-purpose primer | Substrate-appropriate primer selected and applied to ensure correct adhesion and stain blocking |
| Outcome | Finish coat applied faster but lifespan reduced to 2 to 5 years in many cases | Finish coat applied over a stable surface with a realistic lifespan of 8 to 12 years exterior, 10-plus years interior |
The table above is not meant to discourage homeowners from participating in their projects. It is meant to illustrate why professional paint prep costs more upfront and why that investment is usually worth it over the life of the home.
The Most Common Surface Prep Mistakes We See in the Fraser Valley
After 35 years of repaints, touch-ups, and remediation work across the Lower Mainland, certain patterns repeat. These are the prep failures we see most often when clients call Dreamscape Painting after a previous company’s work has failed.
Painting Over Wet or Damp Surfaces
This is the single most common exterior failure mode in the Lower Mainland. A crew pressure washes in the morning and starts priming in the afternoon. The surface looks dry to the touch but wood moisture content is still well above the safe threshold. The primer seals in that moisture and the paint blisters within one season. There is no shortcut around letting surfaces fully dry, even if that means losing a day or two on the schedule.
Using Interior Primer on Exterior Surfaces
It happens more than it should. Interior primers lack the UV resistance and flexibility required for exterior applications. In the temperature and moisture swings of a Lower Mainland winter and summer, an interior primer on exterior wood will fail at the adhesion layer. The result is peeling that looks like a painting failure but is actually a product selection failure at the prep stage.
Skipping Caulk Around Windows and Trim
Caulk is the first line of defence against water infiltration in wood-frame construction. Failed caulk around window frames allows water to penetrate behind siding, which causes wood rot, mold growth, and paint failure from the inside out. We regularly inspect homes in Surrey and Abbotsford where windows have never been properly caulked and re-caulked over 20 or 30 years. By the time paint failure is visible, there is often substrate damage underneath that requires repair before repainting can begin.
Sanding Without Dust Removal
Sanding creates fine dust that settles back onto the surface if not removed properly. Painting over sanding dust produces a rough, gritty texture in the finish and reduces adhesion. The correct approach is to sand, vacuum with a brush attachment, and then wipe down with a tack cloth before applying primer or finish coats. This detail is consistently skipped by crews working too fast.
Surface Preparation for Cabinet Refinishing: A Different Standard
Cabinet refinishing is where surface preparation demands reach their highest level. Cabinets are high-touch surfaces that are opened and closed hundreds of times per year. They are exposed to cooking grease, steam, and direct hand contact. Any adhesion failure is immediately visible and immediately irritating to live with.
The prep process for cabinet refinishing at Dreamscape Painting involves complete degreasing with a strong cleaner, light scuff sanding to create mechanical adhesion, dust removal, and application of a bonding primer formulated specifically for previously finished surfaces. Melamine, thermofoil, and factory-finished cabinets all require different bonding primers. Using the wrong one is the primary reason cabinet paint peels at edges and door corners.
The finish coats for cabinets are also applied differently than wall paint. We use fine-finish spraying techniques to achieve a smooth, factory-like result. But no amount of spraying skill compensates for inadequate prep. A cabinet door with insufficient prep will chip and peel regardless of how many topcoats are applied.
Homeowners considering cabinet refinishing across Langley, Surrey, and Abbotsford should ask any contractor specifically about their prep process. If the answer is “we clean them and spray them,” that is a red flag. Proper cabinet refinishing prep takes several hours per linear foot of cabinetry before a single finish coat goes on. See our full range of interior painting services for context on how we approach high-detail residential work.
For those exploring commercial applications, the same principles apply at larger scale. Our commercial painting services in the Lower Mainland follow the same rigorous prep protocols, because commercial clients have even less tolerance for coating failure than residential ones.
Frequently Asked Questions
How long does surface preparation take compared to the actual painting?
On a well-maintained home in reasonable condition, prep typically takes 30 to 50 percent of the total project time. On a home with significant peeling, mildew, failed caulk, and substrate damage, prep can easily account for 60 to 70 percent of total labor hours. This is not inefficiency. It is what the job requires to produce a result that lasts.
Can I skip priming if I use a paint-and-primer-in-one product?
Paint-and-primer-in-one products are useful for low-stress repaints over previously painted surfaces in good condition. They are not a substitute for dedicated primer on bare wood, bare drywall, stained surfaces, or anywhere adhesion is in question. In the Lower Mainland climate, we still recommend separate primer applications on exterior surfaces regardless of what the paint label says.
Why does paint peel even when it looked fine at first?
Paint that looks fine immediately after application but peels within one or two seasons almost always failed at the prep stage, not the paint stage. The most common culprits are moisture trapped beneath the coating, painting over a surface that was not properly cleaned, or primer applied to a surface that needed more thorough mechanical preparation. The failure often does not appear until the surface experiences its first temperature and moisture stress cycle.
Does professional paint prep cost significantly more than DIY prep?
Yes, professional prep costs more upfront because it takes skilled labor and professional-grade materials. However, a professionally prepped and painted exterior that lasts 10 years costs significantly less per year than a DIY or budget-contractor job that needs repainting in 3 to 4 years. Across the Lower Mainland, where exterior repaints average several thousand dollars, the math consistently favors doing it right the first time.
What should I ask a painting contractor about their prep process before hiring them?
Ask specifically: How do you handle existing peeling paint? What primer will you use and why? How do you test for moisture on wood substrates? What is your caulking process around windows and trim? A contractor who gives specific, confident answers to these questions has a real prep process. A contractor who says “we sand and prime” without further detail is likely cutting corners. Dreamscape Painting provides detailed written estimates that specify prep steps for this reason. You can contact our team through the contact page to request a full estimate for your project.
Does surface preparation matter as much for interior painting as exterior?
Interior prep matters just as much, though the failure modes are different. Interior paint that was applied over poorly patched walls, dirty surfaces, or without proper priming will show uneven sheen, flashing at repair spots, and poor durability in high-traffic areas like hallways, kitchens, and children’s rooms. The finish may look acceptable for six months before the flaws become obvious. Proper interior prep produces a finish that looks clean and holds up for a decade or more.
If you have had a paint job fail prematurely or you are planning a repaint and want to understand exactly what proper prep looks like for your specific home, we would love to hear what you are dealing with. Share your experience or questions in a message to our team and we will give you a straight answer based on what we have seen across 35 years of work in this region.
We would love your feedback and any insights you would share with others. What perspective would you add?
References
- Environment and Climate Change Canada, national climate data and precipitation averages for Canadian regions
- The Society for Protective Coatings, industry standards and technical guidance on surface preparation and coating performance
- National Research Council Canada, building science research on moisture management and exterior cladding performance
- Forbes, coverage of home improvement investment returns and the value of professional painting and surface preparation
- Statista, market data on the painting and coating industry including residential and commercial project statistics

