

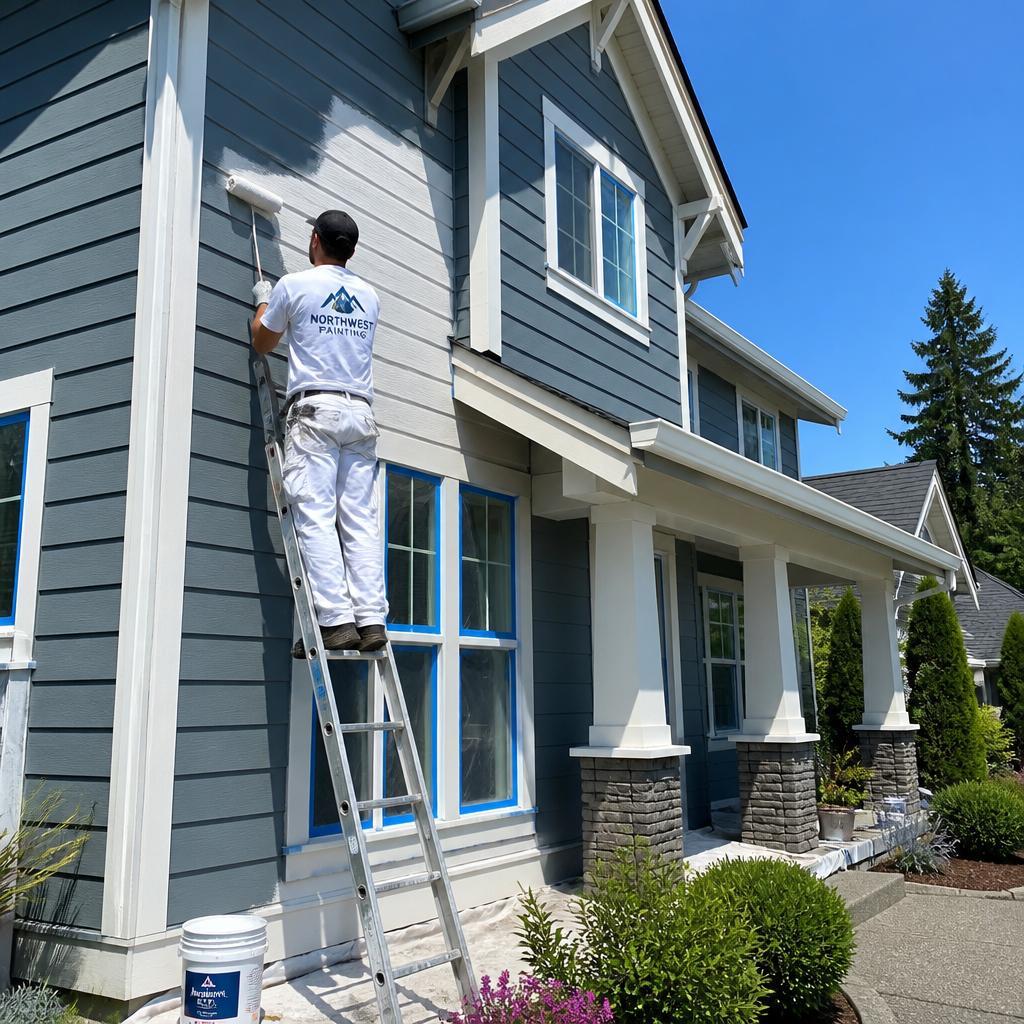
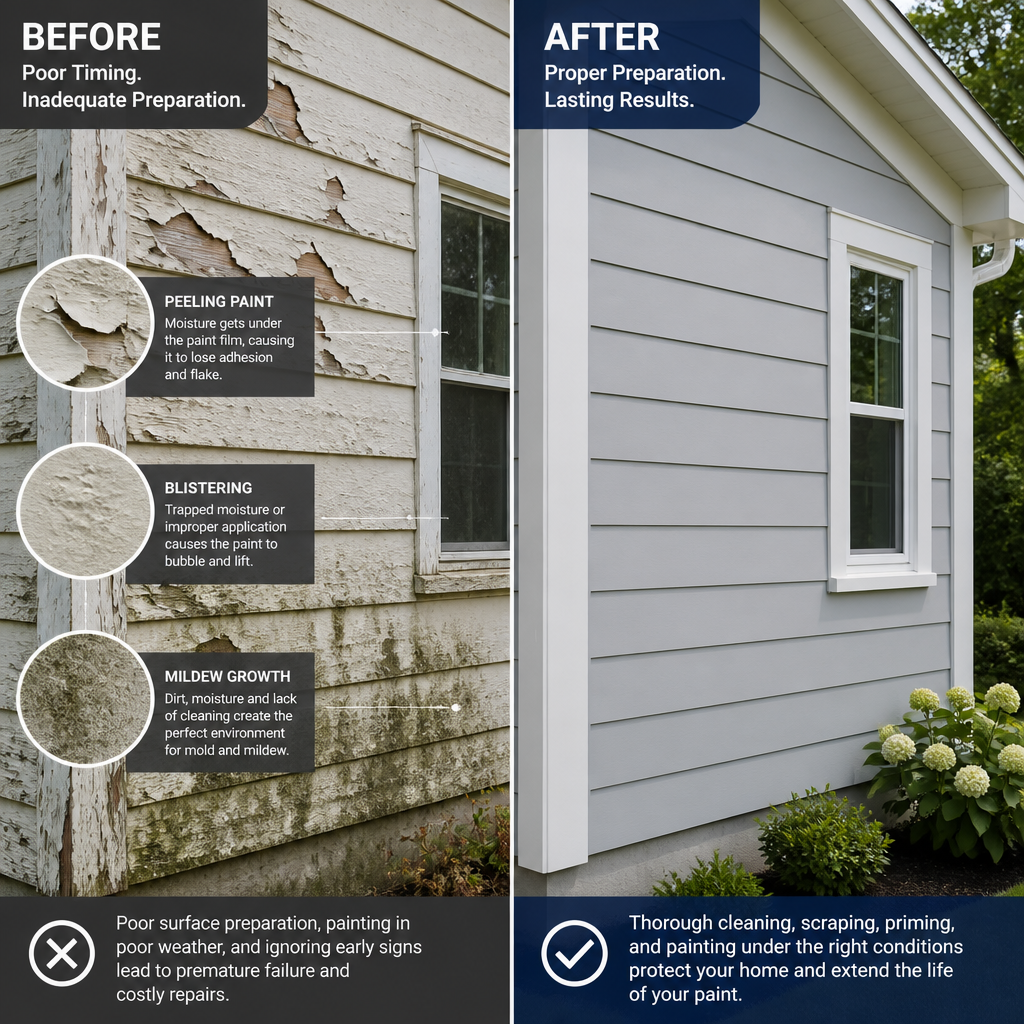
Most homeowners in the Lower Mainland pick the wrong week to paint their home’s exterior, and they pay for it within two or three years when the paint starts peeling, blistering, or growing mildew. Exterior painting in the Lower Mainland is not simply a warm-weather task you can slot into any dry afternoon. The Fraser Valley’s climate, with its heavy rainfall from October through April and high humidity year-round, demands a deliberate approach to timing and surface preparation. Get both right, and a quality exterior paint job can last ten years or more. Get either wrong, and you are repainting far sooner than you planned.
Table of Contents
- Quick Takeaways
- The Best Time to Paint Your Home’s Exterior in the Lower Mainland
- The Weather Conditions That Actually Matter
- How to Prepare Your Home’s Exterior for Painting
- Common Exterior Surfaces in the Fraser Valley and How to Handle Them
- DIY vs. Hiring Professional Exterior Painters in the Fraser Valley
- Curb Appeal and Colour: Making the Right Choice for Your Neighbourhood
- Exterior Painting Season Comparison
- Frequently Asked Questions
- References
Quick Takeaways
| Key Insight | Explanation |
|---|---|
| Late May through September is the reliable painting window | The Lower Mainland’s dry season typically runs from late May or early June into September, offering the most consistent stretches of low humidity and manageable temperatures for exterior painting. |
| Temperature range matters as much as dry skies | Most quality exterior paints perform best between 10°C and 30°C (50°F and 85°F). Painting outside this range risks adhesion failure, bubbling, or uneven curing. |
| Surface moisture is the number-one cause of premature paint failure | Even if it looks dry, porous materials like cedar siding and stucco can hold moisture after rain. Always allow 48 to 72 hours of dry weather before painting. |
| Power washing is non-negotiable prep | Mold, mildew, chalky residue, and dirt are common on Lower Mainland homes. Painting over them without washing first means paint adhesion will fail within months. |
| Caulking prevents moisture intrusion before paint goes on | Gaps around windows, doors, and trim are entry points for water. Re-caulking these joints before painting protects both the paint film and the structure beneath it. |
| Curb appeal painting adds measurable value in competitive markets | In active Surrey, Langley, and Abbotsford real estate markets, a fresh exterior paint job is one of the highest-return improvements a homeowner can make before listing. |
| Priming repaired and bare surfaces is not optional | New wood, patched stucco, and repaired caulk lines are all highly absorbent. Skipping primer on these areas produces uneven sheen and dramatically shortens paint life. |
The Best Time to Paint Your Home’s Exterior in the Lower Mainland
The short answer is this: aim for early summer to early fall, specifically the window between late May and the end of September. During these months, temperatures across the Fraser Valley and the Greater Vancouver area are mild, rainfall is significantly reduced compared to the rest of the year, and humidity levels drop enough that paint can dry and cure properly.
Summer is widely considered the best season for exterior painting in the Lower Mainland. Longer dry spells, warmer daytime temperatures, and lower relative humidity all work in your favour. The drier stretch typically begins around late May or early June and can run through September, though this varies year to year depending on how early the fall rains arrive.
Spring can work if you time it carefully around the weather forecast, but spring showers in Abbotsford and Surrey can appear with little warning. A brief rain shower the day before you planned to paint can set your schedule back by two to three days if surfaces are not given enough time to dry out fully.
The Fraser Valley’s driest month is July, but it is not the only viable month. Any stretch of three or more consecutive dry days with overnight lows above 10°C is a legitimate painting window. The mistake most homeowners make is waiting for perfect weather and then rushing the prep once it arrives.
What About Fall Exterior Painting?
Early fall, meaning August and September in the Lower Mainland context, is genuinely excellent for exterior painting. Temperatures are still warm, the summer dryness often continues, and the intense July heat that can cause paint to dry too quickly on sun-facing walls has passed. Many professional exterior painters in the Fraser Valley prefer this window precisely because conditions are stable and predictable.
Once October arrives, the risk increases substantially. Rain becomes more frequent, nighttime temperatures drop, and there are fewer consecutive dry days. Painting into October is possible during warm years but requires close monitoring of both daytime and overnight temperatures.
Winter and Early Spring: The Seasons to Avoid
November through March is not a viable exterior painting window for most Lower Mainland homes. The combination of regular rain, high humidity, and low temperatures means paint cannot cure correctly even if you find a dry day. Applying paint in these conditions almost guarantees premature peeling and adhesion failure. If you are considering a winter exterior project, re-schedule it or consult a professional about whether any protected surfaces could be painted safely.
The Weather Conditions That Actually Matter
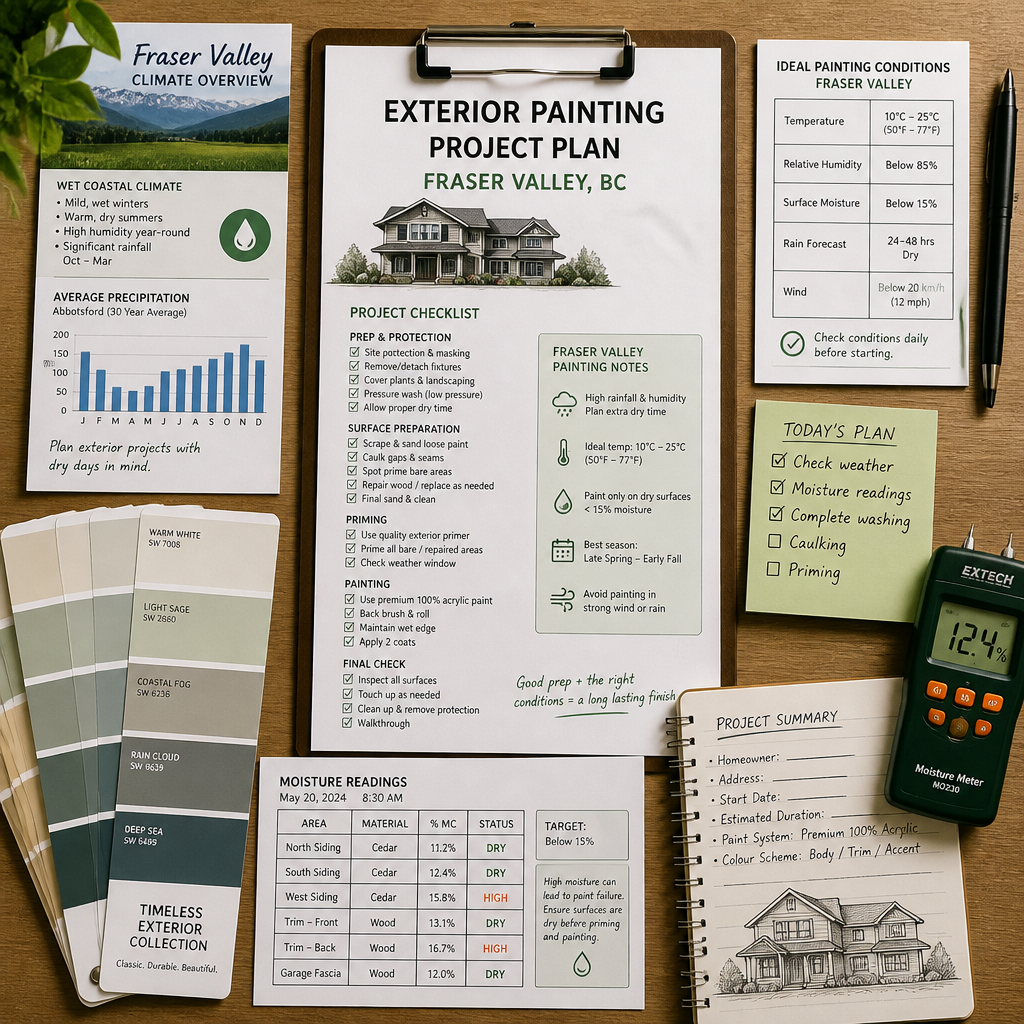
Rain is the obvious enemy of exterior painting, but it is not the only one. Three conditions determine whether any given day is appropriate for painting the exterior of a Lower Mainland home: temperature, humidity, and surface dryness.
Temperature: Work Within the Window
Most professional-grade exterior paints are formulated to be applied between 10°C and 30°C (50°F and 85°F), with ideal conditions around 15°C to 21°C (60°F to 70°F). Below 10°C, paint thickens, adhesion suffers, and curing slows to the point where a single overnight frost can ruin a fresh coat. Above 30°C, paint on south-facing or west-facing walls can dry too rapidly, leaving brush marks, uneven sheen, and poor film formation.
Nighttime temperatures matter just as much as daytime highs. Even if your afternoon reads a comfortable 18°C, a nighttime drop below freezing within 24 to 48 hours of application can compromise a fresh coat before it has fully cured. Always check overnight lows before scheduling a painting day in early spring or late fall.
Humidity: The Invisible Variable
The Lower Mainland is known for high relative humidity, even during the dry season. Painting at humidity levels above 85% slows drying dramatically and increases the risk of mildew developing within the paint film itself. The target range for exterior painting is between 40% and 70% relative humidity. On particularly muggy summer days, even during July, it is worth checking humidity levels before starting.
Pro tip: Paint in the mid-morning to early afternoon on sunny days. Morning dew raises humidity, and direct late-afternoon sun on west-facing walls can cause paint to flash-dry. Mid-morning is the sweet spot.
Surface Dryness: The Test Most People Skip
Wood, stucco, and other porous exterior materials absorb moisture. Even after rain stops and skies clear, these surfaces can remain damp well below the outer layer. A surface that looks dry to the touch may still hold enough moisture to prevent proper paint bonding. As a general rule, allow at least 48 hours of dry weather after any significant rainfall before painting. On north-facing walls or heavily shaded areas, extend that to 72 hours or more.
How to Prepare Your Home’s Exterior for Painting
Surface preparation is where the longevity of any exterior paint job is determined. Skilled painters know that a flawless finish starts well before a brush or roller touches a wall. Skipping or rushing preparation is the most common reason a paint job fails prematurely, and in the Lower Mainland climate, it can mean re-painting within two to three years instead of ten.
Step 1: Power Washing
Power washing is the first and most important preparation step. Lower Mainland homes accumulate mold, mildew, algae, chalky paint residue, and airborne grime at a rate that homes in drier climates do not. Painting over any of these contaminants is essentially painting over a layer of material that will not bond to the surface beneath it. Power washing removes these contaminants so that primer and paint can adhere properly.
Allow the surface to dry completely after washing, which typically means waiting 48 hours minimum in summer conditions before any coating is applied. Rushing this step is one of the most costly mistakes in exterior painting.
Step 2: Scraping and Sanding Failing Paint
Once the surface is clean and dry, all loose, peeling, or flaking paint must be removed by scraping. After scraping, sanding smooths rough edges and feathers the transition between old paint and bare surface. This step is not about making the wall perfectly smooth. It is about eliminating any unstable paint film that new paint would otherwise be anchored to. New paint applied over flaking old paint will eventually fail at the same rate as the old paint beneath it.
Step 3: Caulking and Sealing Gaps
Gaps around windows, doors, trim boards, and transitions between different siding materials are moisture entry points. In the wet Lower Mainland climate, these gaps allow water to get behind paint films and into wall assemblies, causing swelling, rot, and paint failure from the inside out. Re-caulking all gaps before painting seals these entry points and gives the new paint a continuous surface to bond to.
Use a quality exterior-grade paintable caulk. Cheap caulk shrinks and cracks within a year, undermining all the prep work done around it.
Step 4: Repairs to Damaged Surfaces
Cracked stucco, rotted wood trim, and damaged siding all need to be repaired before painting. Painting over damage without fixing the structural problem first is cosmetic at best. In most cases, the paint will highlight imperfections rather than hide them, and the underlying damage will continue to worsen beneath the film. Any repairs to stucco should be given adequate curing time before priming and painting.
Step 5: Priming
All bare wood, patched areas, repaired stucco, and any freshly caulked joints should receive a coat of primer before the finish paint goes on. Bare surfaces are highly absorbent and will soak up finish paint unevenly, resulting in poor sheen consistency and reduced coverage. Primer seals the surface, improves adhesion, and gives the finish coat a uniform base to work from.
Pro tip: On homes with significant south or west exposure in Surrey or Abbotsford, ask your painter about tinting the primer close to the finish colour. This reduces the number of finish coats needed for full coverage and improves the final appearance on saturated or deep colours.
Common Exterior Surfaces in the Fraser Valley and How to Handle Them
Not all exterior surfaces behave the same way, and the Fraser Valley has a mix of housing stock that spans several decades and construction styles. Knowing what your siding is made of matters for both preparation and product selection.
Cedar and Wood Siding
Cedar is common on homes built in the 1970s through 1990s in Abbotsford, Langley, and Surrey. It is a beautiful material but requires more maintenance than most other siding types. Cedar is highly porous, absorbs moisture readily, and is vulnerable to tannin bleed-through if not primed properly with a stain-blocking primer. Any bare cedar must be primed before topcoating, and any signs of wood rot must be addressed before paint goes on.
Stucco
Stucco is one of the most common exterior finishes on Lower Mainland homes. It is durable and handles the wet climate reasonably well when properly maintained, but cracks in stucco are serious. They allow moisture to penetrate the cladding system. Before painting stucco, all cracks should be filled and allowed to cure, the surface should be power washed, and a masonry primer appropriate for the existing surface condition should be applied.
Hardie Board and Fibre Cement
Hardie board and other fibre cement siding products have become increasingly popular in newer Fraser Valley builds. They are dimensionally stable and hold paint well. Preparation is typically simpler than cedar or stucco, but any unprimed edges or cut ends should be primed before painting, as exposed fibre cement absorbs moisture and can deteriorate at unprotected edges.
Vinyl Siding
Vinyl siding can be painted, but it requires specific vinyl-safe paint formulations. Standard exterior paints can cause vinyl siding to warp due to heat absorption if the colour chosen is darker than the original. Always confirm product compatibility before painting vinyl siding, and ensure the surface is thoroughly cleaned before any coating is applied.
DIY vs. Hiring Professional Exterior Painters in the Fraser Valley
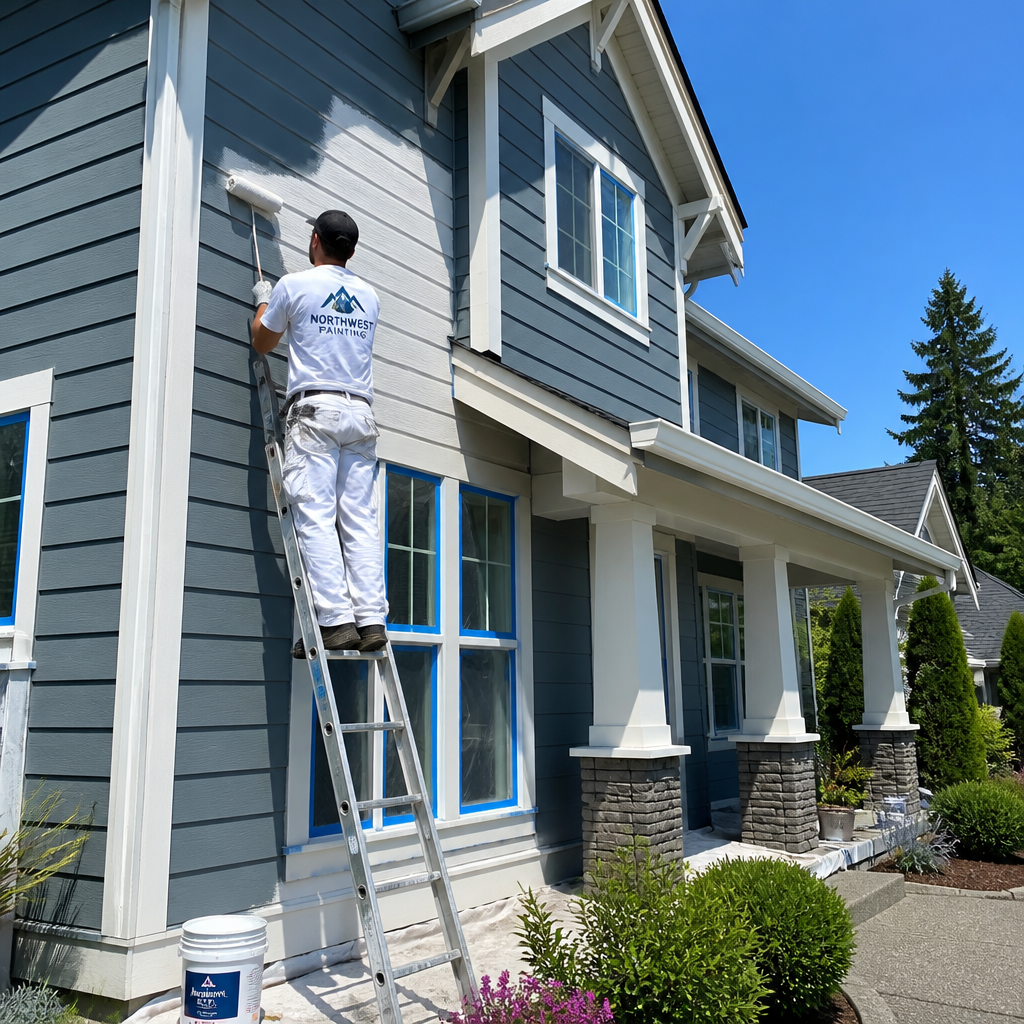
Exterior painting is one of those projects that looks more manageable from the driveway than it turns out to be once you are on a ladder with a brush in hand. The decision to hire professional exterior painters versus doing it yourself comes down to four honest factors: scale, safety, quality, and time.
For a single-storey home with straightforward siding, a skilled and patient homeowner can produce acceptable results if they commit fully to preparation. The preparation is where most DIY attempts fall short, not the painting itself. Most people power wash for 20 minutes, slap on a coat, and wonder why it peels by the following spring.
For two-storey homes, complex rooflines, or surfaces requiring significant repair, professional exterior painters are the right call. Working at height with ladders and scaffolding on homes above two storeys involves genuine risk. Professional painters carry WorkSafeBC-required insurance, know how to set up safe working environments, and have the equipment to reach all surfaces properly.
At Dreamscape Painting, Abbotsford-based and serving the entire Lower Mainland for over 35 years, exterior projects include experienced estimators who assess surface conditions before any work begins. That assessment step, which many contractors skip, is what ensures the prep work matches what the surface actually needs rather than a generic checklist applied to every job.
Pro tip: When getting quotes for exterior painting in Surrey, Langley, or Abbotsford, ask each contractor specifically what their preparation process includes. A quote that does not mention power washing, scraping, caulking, and priming as separate line items is a quote that is almost certainly skipping some of those steps.
Curb Appeal and Colour: Making the Right Choice for Your Neighbourhood
A well-executed exterior paint job is one of the most cost-effective curb appeal improvements available to homeowners in the Fraser Valley. In active real estate markets like Surrey and Abbotsford, the visual impact of a freshly painted exterior is immediate and tangible to buyers, neighbours, and appraisers alike.
Choosing Colours That Work for the Lower Mainland
The Lower Mainland’s overcast sky for much of the year changes how colours read on a home’s exterior compared to how they look on a paint chip under store lighting. Deep charcoals, warm greiges, and classic whites all perform well in this climate from a durability standpoint, but their appearance shifts significantly depending on the amount of natural light on any given day.
Test colours as large sample patches directly on the wall and observe them at different times of day over at least two days before committing. A colour that reads as a warm cream in afternoon July sun can look cold and grey on a typical October morning, which is what your home looks like for much of the year.
Trim, Doors, and Accents
The body colour of a home is only part of the equation. Trim colour, front door colour, and soffit and fascia colours all work together to define the overall impression. A common approach is to use three values: a primary body colour, a trim colour that is either lighter or darker by two to three shades, and an accent colour on the front door that creates contrast without conflict.
In heritage neighbourhoods of Abbotsford and Langley, earth tones and muted palettes tend to complement the surrounding streetscape. In newer Surrey and Langley developments, bolder contrasts between body and trim are increasingly common and acceptable.
Exterior Painting Season Comparison
Choosing the right painting window requires weighing multiple factors specific to the Lower Mainland climate. The table below summarises how each season performs against the conditions that determine paint success.
| Season / Window | Conditions in the Lower Mainland | Suitability for Exterior Painting |
|---|---|---|
| Late May to June (Early Summer) | Temperatures rising to 15°C to 22°C, rainfall reducing but spring showers still possible, humidity moderate | Good. Monitor the 5-day forecast closely. Allow 48 to 72 hours after any rain before starting. |
| July to August (Peak Summer) | Driest months of the year in the Lower Mainland. Temperatures typically 22°C to 30°C, low humidity, long dry stretches | Excellent. The most reliable window. Watch for extreme heat on south and west-facing walls. |
| September (Early Fall) | Temperatures begin easing from summer highs, rainfall still relatively low, nights cooling but rarely below 10°C | Excellent to Good. Often the preferred window for professional painters due to stable, mild conditions. |
| October (Late Fall) | Rainfall increasing significantly, overnight temperatures dropping, humidity rising | Marginal. Possible during warm years with careful scheduling, but risk of weather disruption is high. |
| November to March (Winter and Early Spring) | Heavy rain, low temperatures, high humidity, frequent frost | Not viable. Paint will not cure correctly. Adhesion and mildew resistance will be compromised. |
Frequently Asked Questions
How long does exterior paint last on a Lower Mainland home?
A properly prepared and professionally applied exterior paint job on a Lower Mainland home should last between eight and twelve years, depending on the surface type, paint quality, and how much weather exposure the home receives. South and west-facing walls that get the most UV exposure and rain will typically show wear first. Homes with significant shade or north-facing aspects often hold their paint longer. Regular maintenance, including touching up caulking and cleaning the exterior every few years, extends paint life significantly.
Can you paint a house exterior in Abbotsford or Surrey in October?
It is possible during a warm, dry October, but it is genuinely risky. Once daytime temperatures drop consistently below 10°C, or if overnight temperatures approach freezing within 48 hours of painting, curing is compromised. The safest approach is to complete exterior painting by the end of September. If your project has been delayed into October, consult a professional painter who can assess conditions and make a realistic call rather than painting regardless of the forecast.
What is the most important step in exterior paint preparation?
Power washing is the single most important preparation step for exterior painting in the Lower Mainland. The region’s wet climate means mold, mildew, and chalky residue accumulate on exterior surfaces faster than in drier climates. Painting over these contaminants is the leading cause of premature paint failure. Every other preparation step, including scraping, caulking, and priming, builds on a clean surface. Without thorough washing, none of the subsequent steps will produce a durable result.
How do I know if my home’s exterior needs repainting or just cleaning?
Run your hand across the surface. If you see a chalky, powdery residue, or if the colour looks faded and dull compared to areas protected from the weather, the paint film is degrading and repainting is the right call. If paint is peeling, bubbling, or cracking anywhere on the surface, those are clear signals that the paint film has failed and is no longer protecting the surface beneath it. A simple power wash can refresh a home that is merely dirty but does not address a paint film that has reached the end of its service life.
What makes exterior painting in the Fraser Valley different from painting in drier parts of Canada?
The primary difference is moisture. The Fraser Valley receives significantly more annual precipitation than most other parts of Canada, and the wet season runs for roughly six months of the year. This means exterior paint must resist mold and mildew growth, handle repeated wetting and drying cycles, and maintain adhesion on surfaces that are never completely free of moisture. Paint selection matters more here than in dry climates, and preparation, particularly caulking and ensuring surface dryness before painting, is more critical than it would be in a place like Calgary or Saskatoon.
Should I hire professional exterior painters or do it myself for a two-storey home?
For a two-storey home, hire professionals. The safety risk of working on ladders at full height on an exterior, managing extension ladders around uneven ground, shrubs, and overhangs, is significant. Beyond safety, professional exterior painters bring proper equipment to reach all surfaces correctly, the experience to identify and address surface problems before they paint over them, and the product knowledge to choose coatings suited to your specific surfaces and exposures. For a single-storey home with simple siding and a homeowner committed to doing thorough preparation, DIY is achievable but still demands patience and attention to the prep steps.
If you have recently painted your home’s exterior in Abbotsford, Surrey, Langley, or anywhere else in the Fraser Valley, share what worked, what you wish you had done differently, or what surprised you about the process.
We would love your feedback and any insights you would share with others. What perspective would you add?
References
- When to start exterior painting in Vancouver and the Lower Mainland: seasonal timing guidance
- Best time of year to paint a house exterior in Vancouver and the Lower Mainland
- Fraser Valley exterior painting cost guide and seasonal timing recommendations
- Temperature and curing requirements for exterior painting: what professionals recommend
- Exterior paint preparation steps that make paint last: scraping, priming, caulking, and spot repairs

