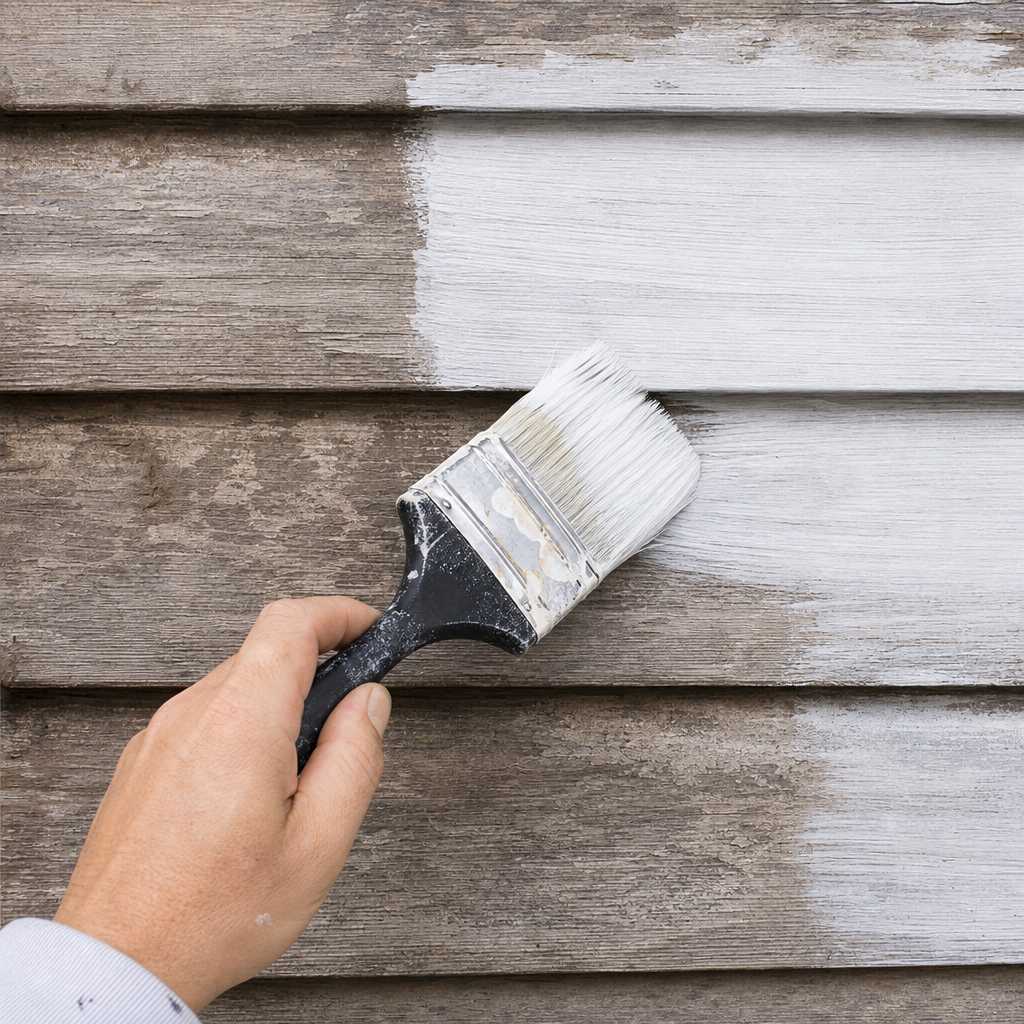
Most homeowners in the Lower Mainland who call us after a paint job gone wrong share one thing in common: the previous contractor skipped primer. Exterior painting primer in Vancouver is not a luxury step or an upsell tactic. It is the single most important prep decision that determines whether your paint lasts three years or thirteen. The data is clear. According to the Paint Quality Institute, properly primed exterior surfaces can extend topcoat life by up to 50 percent compared to unprimed surfaces. If you are planning an exterior painting project in Abbotsford, Langley, Surrey, or anywhere across the Fraser Valley, what follows will save you thousands of dollars.
Table of Contents
- Quick Takeaways
- What Primer Actually Does to Your Exterior Surface
- Why the Lower Mainland Climate Makes Primer Non-Negotiable
- The Real Cost of Skipping Primer on Your Home’s Exterior
- Types of Exterior Primer and When to Use Each One
- Primer Type Comparison: Which One Is Right for Your Project
- Exterior Paint Prep in the Lower Mainland: What Proper Preparation Looks Like
- Common Primer Mistakes That Cost Homeowners Money
- Frequently Asked Questions
- References
Quick Takeaways
| Key Insight | Explanation |
|---|---|
| Primer seals porous surfaces | Without primer, topcoat paint soaks unevenly into wood, stucco, and concrete, leading to blotchy finishes and rapid fading. |
| Lower Mainland moisture demands primer | The Fraser Valley receives over 1,600 mm of rain annually. Primer creates a moisture barrier that bare wood and uncoated stucco simply cannot provide on their own. |
| Skipping primer doubles repainting frequency | Exterior paint on unprimed surfaces in wet climates typically fails within 3 to 5 years. With primer, quality topcoats regularly last 8 to 12 years. |
| Primer improves adhesion on problem surfaces | Chalky old paint, bare metal, and previously stained wood all require a bonding primer before any topcoat is applied. |
| Not all primers are interchangeable | Oil-based, water-based, and shellac primers each serve specific surface and condition needs. Using the wrong one causes adhesion failure. |
| Primer reduces total paint consumption | A sealed primed surface requires fewer topcoat coats, cutting material costs and labor time. |
| Professional primer application prevents callbacks | At Dreamscape Painting, every exterior project includes proper primer application as a non-negotiable step, which is a primary reason our work consistently avoids premature failure. |
What Primer Actually Does to Your Exterior Surface
Primer is not a watered-down version of paint. It is an engineered bonding agent formulated specifically to adhere to raw or previously coated surfaces and create a stable foundation for the topcoat. The chemistry is different, the purpose is different, and skipping it creates a chain reaction of problems that no amount of premium topcoat can fix after the fact.
In practice, primer performs three distinct jobs simultaneously. First, it seals porous substrates like cedar, fir, and stucco so the topcoat sits on top of the surface rather than soaking into it. Second, it chemically bonds to the substrate, giving the topcoat something to grip rather than just sitting on a slick or inconsistent surface. Third, it blocks stains, tannins, and bleed-through from wood knots or previous paint layers that would otherwise discolor your finish coat within months.
Wood siding is particularly vulnerable. Cedar and fir, which are common on older homes throughout Abbotsford and Langley, contain natural tannins and oils that bleed through paint applied directly without a stain-blocking primer. You will see yellow or brown discoloration within a single season. This is not a topcoat quality issue. It is a missing primer issue.


How Primer Interacts with Different Exterior Substrates
Stucco, which is widespread across Surrey and the Fraser Valley, is highly alkaline when new and remains moderately alkaline even after curing. Applying latex paint directly to stucco without a masonry primer leads to saponification, a chemical reaction that turns the paint film soft and sticky. This is irreversible without stripping back to the substrate.
Bare metal, including railings, fascia caps, and steel garage doors, oxidizes within weeks of exposure to the Lower Mainland’s wet winters. A rust-inhibiting primer applied before the topcoat physically blocks oxygen and moisture from reaching the metal surface. Without it, rust bubbles through your finish coat in a single season.
Pro tip: On any surface where you can see bare wood grain, raw masonry, or exposed metal, primer is not optional. Applying topcoat directly to these substrates is the single fastest way to shorten the life of an otherwise quality paint job.
Why the Lower Mainland Climate Makes Primer Non-Negotiable
The Lower Mainland does not give exterior paint an easy life. Metro Vancouver and the Fraser Valley receive between 1,100 and 1,800 mm of precipitation annually depending on location, with Abbotsford averaging around 1,567 mm per year according to Environment and Climate Change Canada. That moisture is relentless, and it finds every weakness in an exterior paint system.
Paint that has not been applied over a proper primer coat absorbs moisture differently across its surface. Where the substrate is more porous, water penetrates faster. Where the substrate is denser, it runs off. This uneven moisture absorption causes the paint film to expand and contract at different rates, which leads directly to cracking, peeling, and bubbling within two to three years on unprimed surfaces.
“The number one cause of premature exterior paint failure in humid climates is inadequate surface preparation, and the most common preparation failure is skipping primer.” – Paint Quality Institute, Surface Preparation Guidelines
The freeze-thaw cycles in the Fraser Valley add another layer of stress. Water that has penetrated a paint film without a proper moisture barrier will freeze, expand, and physically push the paint away from the substrate. This is called paint delamination, and it is extremely common on unprimed wood siding in Langley and Abbotsford after even a mild winter.
UV Exposure on South-Facing Walls
Despite the rain reputation, the Lower Mainland gets significant UV exposure, particularly in summer. South and west-facing walls take the hardest UV punishment. Primer creates a stabilizing base that helps topcoats resist UV degradation more effectively. Without primer, the topcoat bonds directly to an unstable substrate, and UV breakdown starts from below the paint film outward, accelerating fading and chalking.
At Dreamscape Painting, we routinely see south-facing walls on unprimed homes chalking and fading within two summers. The same wall with proper primer preparation holds color visibly better over the same period, which is a pattern consistent across dozens of project comparisons over 35 years in the trade.
The Real Cost of Skipping Primer on Your Home’s Exterior
Homeowners are sometimes tempted to skip primer because it adds time and material cost to a project. The logic seems sound on the surface: save a few hundred dollars now by eliminating a step. The actual financial math works out the opposite way, and it is not even close.
A typical exterior paint job on a 2,000 square foot home in Langley or Surrey currently costs between $4,000 and $9,000 depending on complexity, surface condition, and product selection. Primer for that same home adds roughly $400 to $800 in materials and a day or two of additional labor. That is a meaningful but manageable addition.
The failure scenario without primer is far more expensive. When paint fails prematurely on an unprimed surface, you are not simply repainting. You are paying to strip failed paint, repair substrate damage that moisture has caused during the failure period, and then properly prime and repaint from scratch. That remediation job regularly costs 30 to 60 percent more than the original project would have cost with primer included.
Warranty Implications of Skipping Primer
Every major paint manufacturer, including Benjamin Moore, Sherwin-Williams, and PPG, specifies primer as a required step in their exterior application warranties. A common mistake is assuming that buying premium topcoat paint automatically provides warranty protection. It does not. If a warranty claim is filed and the applicator cannot demonstrate that proper primer was used on the appropriate substrate, the claim is denied. You are left with failed paint and no manufacturer recourse.
At Dreamscape Painting, we document our primer selection and application as part of every project record. This protects our clients and ensures warranty coverage is legitimate and enforceable, not just a selling point on a brochure.
Pro tip: Before signing any exterior painting contract in the Lower Mainland, ask the contractor specifically what primer they are using, on which surfaces, and why. If they cannot give you a specific product name and a substrate-specific reason, walk away.

Types of Exterior Primer and When to Use Each One
Not every primer is appropriate for every situation. Using the wrong primer for the substrate or condition is nearly as problematic as using no primer at all. Here is a direct breakdown of what works and what does not across the surface types common to Lower Mainland homes.
Oil-Based Primer
Oil-based primer is the gold standard for raw wood, especially wood with high tannin content like cedar and redwood. It penetrates deeply into the wood grain, blocks tannin bleed more effectively than most water-based alternatives, and creates a hard, adhesion-rich surface for topcoats. The trade-off is longer dry time, stronger solvent odor, and stricter VOC compliance requirements. It remains the correct choice for severely weathered wood siding and bare wood with significant grain raise.
Water-Based Acrylic Primer
Modern water-based acrylic primers have improved substantially over the past decade and are appropriate for most exterior applications in the Lower Mainland. They dry faster than oil-based options, have lower VOC content, and remain flexible through temperature fluctuations, which matters in a climate with pronounced seasonal shifts. They are the right choice for previously painted surfaces in good condition, fiber cement siding, and most stucco applications.
Shellac-Based Primer
Shellac primer is the heaviest-duty stain blocker available. It is used in situations where oil-based primer has already failed to control bleed-through, where severe fire or smoke staining exists, or where extreme tannin bleed from wood is persistent. It is not a general-purpose exterior primer but an intervention product for specific problem conditions.
Primer Type Comparison: Which One Is Right for Your Project
| Primer Type | Best Use Case for Lower Mainland Exteriors | Key Limitation |
|---|---|---|
| Oil-Based Primer (e.g., Zinsser Cover Stain) | Raw cedar or fir siding, high-tannin wood, severely weathered wood substrates | Long dry time (24 hours), higher VOC content, solvent cleanup required |
| Water-Based Acrylic Primer (e.g., Benjamin Moore Fresh Start) | Previously painted surfaces, fiber cement, stucco, general exterior prep in moderate conditions | Less effective on heavy tannin bleed; requires dry surface conditions for application |
| Shellac-Based Primer (e.g., Zinsser BIN) | Extreme stain blocking, persistent tannin bleed, fire or water damage situations | Alcohol-based cleanup, strong odor, not suitable as a general primer for large exterior surfaces |
Exterior Paint Prep in the Lower Mainland: What Proper Preparation Looks Like
Exterior paint prep in the Lower Mainland is not a single step. It is a sequence of steps, each one creating the conditions the next step requires. Primer is the final preparation step before topcoat, but it cannot compensate for preparation failures that happened earlier in the sequence.
Proper exterior prep for a Lower Mainland home starts with a thorough pressure wash to remove surface contamination including mildew, which is endemic to the region’s wet climate. Any areas with active mildew require treatment with a biocide solution before painting. Mildew under paint continues to grow and pushes the paint film off the substrate. Primer does not stop active mildew; biocide treatment does.
Surface Repair Before Primer Application
After washing and drying, all damaged areas need physical repair. Rotted wood sections require replacement, not caulking over. Failed caulk around windows, doors, and trim joints needs complete removal and replacement with a paintable exterior-grade caulk. Loose paint needs to be scraped back to a firm edge and feathered. Only after these repairs are complete does primer application make sense.
Applying primer over soft or rotted wood is not a solution. The primer bonds to the compromised fiber, not to the solid substrate beneath, and the whole system fails with the rot. At Dreamscape Painting, we identify and flag substrate damage during our initial estimate walk-through, so homeowners understand exactly what prep is required before a brush touches the wall.
Application Conditions That Determine Primer Success
Primer application temperature and humidity thresholds are not suggestions. Applying most exterior primers below 10 degrees Celsius or when rain is forecast within six hours compromises adhesion and film formation. The Lower Mainland’s fall and winter scheduling often pushes contractors to cut these corners, which is a decision that fails the homeowner. We schedule exterior primer application around specific weather windows, not around arbitrary deadlines.
Common Primer Mistakes That Cost Homeowners Money
After 35 years of exterior painting across the Lower Mainland, the primer mistakes we see most often are consistent and predictable. Most of them are also entirely avoidable with a contractor who knows what they are doing.
The most common mistake is using interior primer on exterior surfaces. Interior primer is not formulated to withstand UV exposure, moisture cycling, or temperature extremes. It breaks down faster than the topcoat above it, undermining the entire paint system. This mistake is more common than homeowners realize, particularly with budget-focused contractors trying to use leftover materials.
The second most common mistake is applying primer over a surface that has not dried after pressure washing. Wet wood swells. Primer applied to swollen wet wood seals in that expansion. When the wood dries and contracts, the primer film cracks. That crack network becomes the entry point for every rain event that follows.
Inadequate primer coverage is the third failure pattern. Primer applied too thin, particularly over porous stucco or weathered wood, does not seal the substrate fully. The topcoat still soaks in unevenly, adhesion is patchy, and the visual and functional benefits of priming are largely lost. Coverage rates on the product label are minimum thresholds, not targets to beat by stretching the material.
Frequently Asked Questions
Does every exterior painting project in the Lower Mainland require primer?
Not every project requires a full primer coat on every surface, but most do. Previously painted surfaces in excellent condition that are receiving a similar color topcoat may require only spot priming of repaired areas. However, any bare substrate, any surface with staining or bleed-through risk, any surface where the paint is chalking significantly, and any surface receiving a dramatically different color requires full primer application. When in doubt, prime. The cost of unnecessary primer is minimal compared to the cost of premature paint failure.
Can I use a paint-and-primer-in-one product instead of separate primer?
Paint-and-primer-in-one products are appropriate for surfaces already in good condition with a sound existing paint film. They are not a substitute for dedicated primer on bare wood, raw stucco, bare metal, or surfaces with staining issues. The marketing language around these products has created significant confusion. They perform well within their actual design parameters, which are narrower than most homeowners assume.
How long should primer dry before applying topcoat on an exterior surface?
Most exterior water-based primers require a minimum of two to four hours before topcoat application under ideal conditions (above 15 degrees Celsius, below 70 percent relative humidity). Oil-based primers typically require 24 hours. Always check the specific product data sheet because manufacturer specifications vary. In practice, we prefer to allow an overnight cure for oil-based primer and at least four hours for water-based primer, even when the label permits faster recoating, because the Lower Mainland’s ambient humidity can slow film formation significantly.
Why is my exterior paint peeling even though it was recently applied?
Premature peeling on recently applied exterior paint is almost always a preparation failure. The most common causes are inadequate surface cleaning, painting over damp or wet substrate, applying paint in conditions too cold for proper film formation, and failing to prime the substrate correctly. If your paint was applied within the last two years and is already peeling, primer absence or incorrect primer selection is the most likely culprit. A professional inspection of the failing areas will confirm the cause and determine whether a full strip-and-repaint is necessary.
How do I know if a painting contractor is using the right primer for my home?
Ask for the specific primer product name before work begins. A competent contractor will tell you immediately: the product, the substrate it is being applied to, and why that product was selected for those conditions. Ask to see the product on site when the crew arrives. If the contractor is vague, cites a generic brand without specifics, or deflects the question, that is a signal that primer selection is not being taken seriously on your project. At Dreamscape Painting, we specify primer selection in our project documentation so clients have a clear record of what was applied and where.
Have you ever dealt with premature paint failure on your home’s exterior? Share what happened and what you learned from the experience in the comments below.
References
- Environment and Climate Change Canada: precipitation and climate data for the Lower Mainland and Fraser Valley
- United States Environmental Protection Agency: VOC regulations and exterior coating standards affecting primer product formulations
- Forbes: home improvement cost data and exterior renovation value analysis for Canadian homeowners
- Statista: paint and coatings industry market data including product performance benchmarks and coating longevity statistics
- National Research Council Canada: building envelope research and moisture management standards relevant to exterior coatings in Canadian climates