Most homeowners underestimate how much preparation impacts their painting project’s outcome. A rushed prep phase leads to delayed timelines, increased costs, and subpar results that show up weeks after the painters leave. Professional crews like those at Dreamscape Painting can work faster and deliver better finishes when homeowners complete specific tasks before arrival, cutting project time by 20-30% and reducing the risk of miscommunication or damage.
The difference between a smooth painting experience and a frustrating one often comes down to what happens in the 48 hours before your painters walk through the door. Proper interior painting preparation protects your belongings, ensures accurate color application, and allows skilled professionals to focus on their craft rather than moving furniture or tracking down paint samples.
Table of Contents
- Quick Takeaways
- Clear and Protect the Work Area
- Address Wall and Surface Issues
- Secure Paint Colors and Finishes
- Prepare Access Points and Utilities
- Communicate Special Concerns
- Preparation Approach Comparison
- Frequently Asked Questions
- References
Quick Takeaways
| Key Insight | Explanation |
|---|---|
| Remove wall hangings 24 hours early | Pictures, mirrors, and shelves must come down before painters arrive to prevent delays and allow crews to start immediately on surface preparation |
| Consolidate furniture to room centers | Moving furniture away from walls by at least 3 feet gives painters safe access while protecting your belongings from accidental splatters |
| Point out every wall defect | Nail holes, cracks, and water stains need identification before work begins so estimators can include proper repair materials and time |
| Confirm paint selections in writing | Color codes, sheen levels, and room assignments must be documented to prevent costly repaints from miscommunication |
| Secure pets and establish access rules | Painters need clear entry instructions and pet management plans to maintain safety and work efficiency throughout multi-day projects |
| Test smoke detectors after removal | Disconnected alarms for painting must be properly reinstalled and tested, as regulations require functional detectors in all sleeping areas |
| Document existing conditions with photos | Time-stamped images of floors, fixtures, and surfaces protect both homeowners and contractors if disputes arise about pre-existing damage |
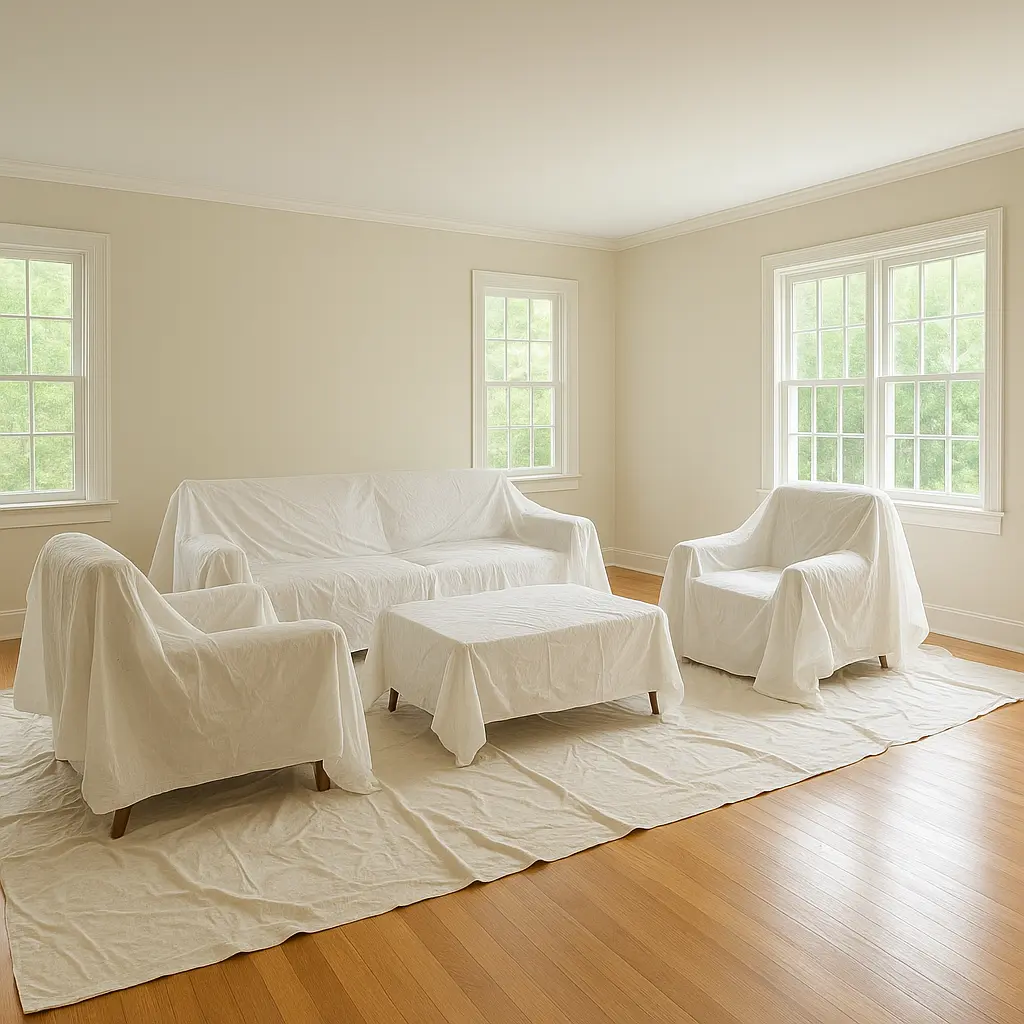
Clear and Protect the Work Area
Professional painters spend 40% of their first day moving items that homeowners could have relocated in advance. This wastes billable hours and increases your project cost. In practice, clearing rooms completely delivers better results than leaving furniture covered in place.
Remove all wall decorations, including picture hooks and nails. These small protrusions create uneven paint application and force painters to work around obstacles. Pull down curtain rods, remove outlet covers, and take light switch plates off the walls. Store these small items in labeled bags so you can reinstall them correctly after painting completes.
Pro tip: Group hardware from each room in separate sandwich bags labeled with the room name and wall location to eliminate confusion during reinstallation.
Furniture and Flooring Protection
Move furniture to room centers or, ideally, to unpainted rooms entirely. Painters need at least 3 feet of clearance from walls to set up ladders safely and maintain proper brush angles. Heavy items like dressers and beds can stay if moved to the center and covered, but lighter pieces should leave the room completely.
Professional crews bring drop cloths, but homeowners should protect valuable flooring with additional layers. Hardwood floors in older Abbotsford homes scratch easily under ladder feet and equipment movement. Canvas drop cloths work better than plastic sheets because they absorb spills rather than creating slippery surfaces that increase fall risk.
Address Wall and Surface Issues
Walk through each room with a notepad and mark every defect you want addressed. Nail holes from removed artwork, drywall cracks, water stains, and texture inconsistencies all require different repair approaches. Pointing these out during the estimate prevents surprises when painters encounter them mid-project.
The data consistently shows that projects with comprehensive pre-work assessments finish on schedule 85% more often than those without documentation. At Dreamscape Painting, experienced estimators note all repairs during initial walkthroughs, but homeowners spot issues contractors might miss, especially in rooms with specific lighting conditions that reveal imperfections.
Moisture and Mold Concerns
Painting over moisture problems guarantees paint failure within months. Check for water stains on ceilings below bathrooms, around window frames, and in basement areas. The Lower Mainland’s high humidity creates conditions where untreated moisture leads to mold growth under fresh paint.
If you discover soft drywall, bubbling texture, or musty odors, address the moisture source before painting begins. Professional painters can repair drywall damage, but the underlying leak or condensation issue needs separate attention from a plumber or building envelope specialist.
According to the Canada Mortgage and Housing Corporation, painting over moisture-damaged surfaces without remediation leads to paint failure in 90% of cases within the first year, making proper diagnosis essential before any coating application.
Surface Cleaning Requirements
Walls accumulate cooking grease, dust, and hand oils that prevent paint adhesion. Kitchen walls near stoves need degreasing with TSP substitute or similar cleaners. Bathrooms require mildew treatment even if no visible growth appears.
Most professional painters include light cleaning in their scope, but heavily soiled surfaces need homeowner attention first. Wipe down baseboards, door frames, and window sills where dirt concentrates. This simple step improves paint bonding and extends finish durability by 30-40%.
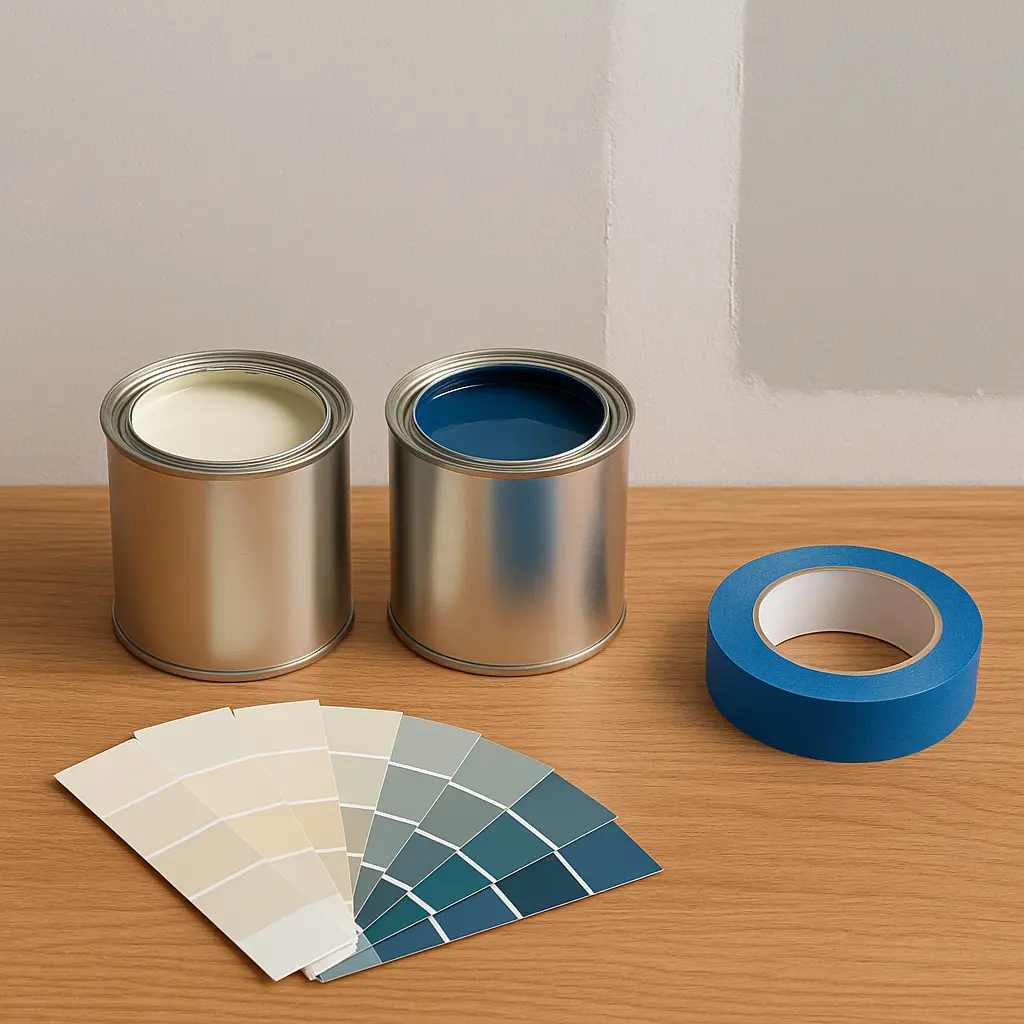
Secure Paint Colors and Finishes
The most common source of painting disputes involves color expectations. What looks perfect on a 2-inch sample card can appear drastically different across an entire wall under your home’s specific lighting conditions. Testing colors in actual rooms prevents expensive repaints.
Purchase sample pots of your top three color choices and paint 2-foot squares on different walls in each room. Live with these samples for at least 48 hours, observing them in morning light, afternoon sun, and evening artificial light. Colors shift dramatically based on the time of day and the direction windows face.
Sheen Selection Strategy
Paint finish affects durability as much as color affects aesthetics. Flat and matte sheens hide wall imperfections but show scuffs easily. Eggshell and satin finishes balance washability with subtle sheen. Semi-gloss and gloss work best in high-moisture areas but highlight every surface defect.
In practice, most Abbotsford homeowners choose eggshell for living areas, satin for kitchens and hallways, and semi-gloss for bathrooms and trim. This combination provides appropriate durability for each space’s use pattern while maintaining visual consistency throughout the home.
Pro tip: Document your final paint selections with both color names and actual paint codes, then assign specific colors to each room in a written list that painters can reference throughout the project.
Prepare Access Points and Utilities
Painters need clear instructions about home access, especially for multi-day projects when homeowners might be at work. Decide whether crews will lock up each day or if you’ll secure the house when you return. Provide working garage codes or hide keys in agreed locations to prevent schedule delays from access issues.
Interior painting in the Fraser Valley often coincides with rainy weather, making entry procedures critical. Designate a specific door for crew entry to minimize tracked mud and wet footprints. Place mats at entry points and communicate whether shoes-off policies apply to workers.
Utility and System Considerations
Identify your electrical panel location and ensure painters can access it if they need to reset breakers. High-wattage lighting equipment and power sprayers occasionally trip circuits, and quick resets prevent work stoppages.
Disconnect or cover smoke detectors and carbon monoxide alarms in painted rooms after notifying your monitoring company if applicable. Paint fumes and dust trigger sensitive detectors, causing false alarms that disrupt work flow. Remember to reconnect and test all safety devices immediately after painting completes, as this is both a safety requirement and often a municipal code mandate.
HVAC and Temperature Control
Paint cures properly only within specific temperature ranges, typically 50-85°F. In winter months, maintain normal heating throughout the painting process. In summer, keep air conditioning running but set thermostats 2-3 degrees warmer than usual to prevent rapid drying that causes lap marks.
Cover HVAC vents in painted rooms with painter’s tape and plastic to prevent dust circulation throughout your home. This protection is especially important during sanding operations when fine particles can travel through ductwork and settle in clean rooms.
Communicate Special Concerns
Every home has unique considerations that impact painting logistics. Pet management ranks among the most critical planning elements. Dogs and cats become stressed by strangers moving through their territory, and open doors during furniture relocation create escape opportunities.
Arrange pet boarding for the duration of interior work, or confine animals to unpainted areas with clear signage on doors. A common mistake is assuming painters will manage pet containment while working, which creates safety risks and work interruptions.
Occupancy During Painting
Modern low-VOC paints allow occupancy during most interior projects, but living in active work zones creates complications. Painters work most efficiently in empty homes where they can spread equipment, play music, and move freely without navigating around homeowners.
If you must remain home during painting, establish which rooms remain off-limits to crews and which hours you need quiet. Communicate these boundaries during the estimate phase so contractors can schedule work accordingly and avoid conflicts.
Valuable and Fragile Items
Remove irreplaceable items, important documents, and high-value electronics from work areas entirely. While professional crews take precautions, accidents happen, and insurance claims never fully compensate for sentimental loss.
Antique furniture, family heirlooms, and collectibles belong in locked rooms or off-site storage during painting. The modest inconvenience of temporary relocation beats the permanent regret of damage to irreplaceable possessions.
Preparation Approach Comparison
| Preparation Level | Homeowner Actions | Project Impact |
|---|---|---|
| Minimal Preparation | Leave furniture in place, keep wall hangings up, provide no access instructions | Adds 1-2 days to project timeline, increases cost by 15-25%, higher risk of damage or miscommunication |
| Standard Preparation | Remove wall decorations, move small furniture, confirm colors verbally, establish basic access | Project proceeds on schedule, standard quality results, occasional delays from unclear details |
| Comprehensive Preparation | Clear rooms completely, document all defects, confirm selections in writing, provide detailed access and pet plans | Reduces project time by 20-30%, maximizes paint quality, eliminates most disputes, allows painters to focus on craftsmanship |
Frequently Asked Questions
How far in advance should I start preparing for interior painting?
Start preparation one week before your scheduled paint date. Use the first few days to test paint samples, identify repairs, and arrange pet boarding. Complete physical preparation tasks like removing wall hangings and moving furniture 24-48 hours before painters arrive. This timeline prevents rushed decisions while keeping disruption minimal.
Do I need to remove outlet covers and switch plates myself?
Professional painters typically remove and reinstall cover plates as part of their standard service. However, removing them yourself saves 30-45 minutes of labor and ensures you can label and store hardware systematically. If painters handle removal, they may not track which screws belong to which plates, complicating reinstallation.
Should I empty closets in rooms being painted?
Empty closets only if you want the interiors painted. Most interior painting projects exclude closet interiors unless specifically requested. If painting closet interiors, remove all contents completely because covering hanging clothes adequately is nearly impossible. For standard room painting with closed closet doors, contents can remain inside.
What should I do about furniture that is too heavy to move?
Professional painting crews can work around heavy furniture by moving it to room centers and protecting it with drop cloths. However, this approach limits access to walls behind these pieces, potentially leaving unpainted gaps. For rooms with built-in furniture or extremely heavy pieces, discuss options during the estimate so painters can plan ladder placement and access strategies.
How do I prepare kitchen cabinets if I am only painting walls?
Clear countertops completely and remove small appliances, knife blocks, and decorative items. Painters need space to set up ladders and position drop cloths that extend several feet from walls. Leave cabinet contents inside unless you are also having cabinet refinishing done. For cabinet painting projects, remove all contents and hardware before crews arrive to maximize efficiency.
Do painters expect me to clean walls before they start?
Light cleaning is typically included in professional painting services, but heavily soiled surfaces need homeowner attention first. Degrease kitchen walls near cooking areas and clean bathrooms with mildew treatment products. Standard dust and light dirt on walls in living areas fall within normal painter preparation scope. Communicate surface conditions during estimates so contractors can allocate appropriate prep time.
What happens if I discover wall damage after painters have started?
New damage discovered mid-project requires change order approval and often delays completion while painters source additional materials. This is why thorough pre-work walkthroughs matter. If you find issues after work begins, document them immediately with photos and discuss repair options with the crew supervisor. Most established companies like Dreamscape Painting can accommodate reasonable additions, but expect schedule and cost adjustments.
Share your own interior painting preparation experience in the comments below, especially any steps you wish you had taken before your painters arrived.
We would love your feedback and any insights you would share with others. What perspective would you add?