Walk into any hardware store in Langley or Abbotsford and you will find rows of spray paint cans promising a kitchen transformation for under $30. Most homeowners in the Lower Mainland have tried it at least once. The results, almost universally, are disappointing. Professional cabinet refinishing vs DIY is not a close comparison when you examine the actual outcomes. The difference comes down to surface preparation, material quality, application equipment, and the curing science behind a durable finish. This article breaks down exactly where DIY spray cans fall short and what a trained finishing crew actually does differently.
Table of Contents
- Quick Takeaways
- Why DIY Spray Cans Fail on Kitchen Cabinets
- Surface Preparation: The Real Separator
- Equipment Gap: Spray Cans vs Professional HVLP Systems
- Coating Materials and Chemistry
- Comparison Table: DIY vs Professional Refinishing
- Durability and Longevity in the Lower Mainland Climate
- Cost Reality: Cheap Upfront, Expensive Over Time
- Frequently Asked Questions
- References
Quick Takeaways
| Key Insight | Explanation |
|---|---|
| Surface prep accounts for 70% of finish quality | Professional crews sand, degrease, and prime in stages. Spray cans skip this entirely or cover poorly prepped surfaces. |
| HVLP spray systems deliver 10x finer atomization | High-volume low-pressure equipment produces a factory-level smooth coat. Consumer aerosol cans cannot replicate this particle size. |
| Professional coatings cure chemically, not just dry | Two-component catalyzed finishes cross-link at a molecular level, creating hardness that aerosol paint never achieves. |
| DIY finishes typically fail within 12 to 18 months | Chipping at door edges and peeling at hinges are predictable outcomes when adhesion prep is skipped and paint film is thin. |
| Cabinet painting quality in Vancouver depends on humidity control | Lower Mainland humidity fluctuations cause wood movement. Professionals account for this with flexible, bonding primers. |
| Spray finish cabinets require a controlled environment | Dust contamination ruins an aerosol finish applied in a kitchen. Professional finishers work in isolated, ventilated spray environments. |
| Re-refinishing over a failed DIY adds cost and complexity | Stripping aerosol paint improperly bonded over original lacquer requires more labor than starting fresh on original surfaces. |
Why DIY Spray Cans Fail on Kitchen Cabinets
The core problem with aerosol spray paint on cabinets is not the color. The color usually looks acceptable for the first few weeks. The failure point is adhesion and film thickness. A standard aerosol can delivers a coating measured in microns that is too thin to withstand the thermal cycling, grease exposure, and repeated contact that kitchen cabinet doors receive every single day.
In practice, a kitchen cabinet door is opened and closed hundreds of times per month. The edges take the most abuse. Aerosol paint applied without a bonding primer and without proper surface scuffing will begin to chip at those high-contact edges within one winter season in Abbotsford or Surrey, where temperature swings between morning and afternoon can be significant even indoors.
A common mistake is assuming that applying more coats of spray paint compensates for thin individual layers. It does not. Multiple thin coats of an aerosol product still produce a soft, non-catalyzed film that dents under fingernail pressure. The chemistry of the coating matters far more than the number of passes.


Surface Preparation: The Real Separator
Ask any experienced painter at Dreamscape Painting what separates a lasting cabinet refinish from a failure and the answer is always preparation. Not paint brand. Not spray technique. Preparation.
Professional cabinet refinishing begins with a complete teardown. Doors come off their hinges, drawer fronts are removed, and all hardware is pulled. This allows every surface, including the edges and the back faces of doors, to be addressed properly. No amount of careful spraying around hinges produces results comparable to working on a fully removed door laid flat in a spray environment.
Degreasing and Chemical Etching
Kitchen cabinet surfaces accumulate years of cooking grease, silicone residue from cleaning products, and oxidized finish material. Professionals apply a dedicated degreaser, often a TSP substitute or a purpose-built cabinet cleaning solution, and let it dwell before wiping. This is a non-negotiable step. Paint applied over grease will peel in sheets regardless of quality.
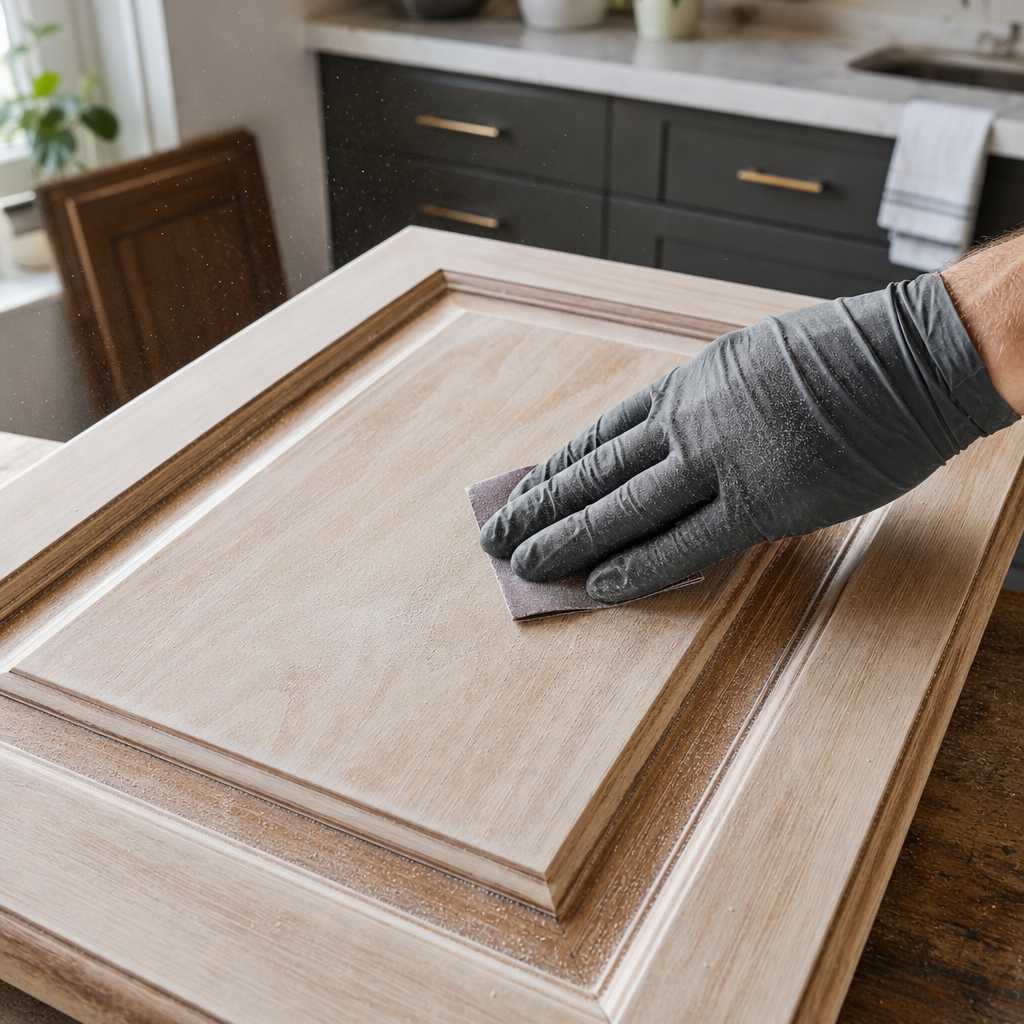
After degreasing, the surface receives a mechanical scuff or chemical etch depending on the existing finish type. This creates tooth for the primer to grab. Aerosol can instructions mention light sanding but provide no guidance on how to identify the existing finish, what grit to use, or when to use a liquid deglosser instead.
Primer Selection by Substrate
Not all cabinet surfaces are the same. Solid wood, MDF, thermofoil-wrapped, melamine, and lacquered original surfaces each require a different primer chemistry. Shellac-based primers work on stain-blocking and adhesion to slick surfaces. Epoxy-based primers bond to factory lacquer that would otherwise repel standard products. A spray can contains one generic formula that is indifferent to what it is being asked to bond to.
Pro tip: Before any primer goes on, run your fingernail across a hidden cabinet interior surface. If the original finish is soft enough to mark easily, it likely needs a chemical deglosser followed by a shellac primer before any topcoat. Skipping this step is the single most common reason professionally painted cabinets fail prematurely.
Equipment Gap: Spray Cans vs Professional HVLP Systems
The atomization quality of an aerosol spray can and a professional HVLP (high-volume, low-pressure) turbine system are not in the same category. HVLP systems break paint into particles roughly 10 to 30 microns in diameter. Consumer aerosol cans produce particles ranging from 40 to 100 microns. Larger particles mean visible texture, uneven sheen, and orange peel surface imperfections that are difficult to sand out after the fact.
Professional spray equipment also allows precise fluid control, fan pattern width adjustment, and air pressure calibration. A trained finisher can dial in the exact viscosity and pressure combination to suit the specific coating being applied. None of this exists in a spray can. You get whatever the manufacturer decided was average.
Controlled Environment vs Open Kitchen
Spray finish cabinets require a dust-free, climate-controlled environment for best results. Professional finishing crews set up temporary spray booths or work in dedicated shop environments with filtered air movement. When paint is applied in a live kitchen, even a clean one, ambient dust, cooking particles in the air, and pet dander settle into the wet film and create a rough, gritty texture that is visible in raking light.
This is not a small aesthetic concern. In a gloss or semi-gloss cabinet finish, which is the most common request in Fraser Valley kitchens, dust nibs in the topcoat are immediately apparent. Sanding them out risks cutting through to the primer layer, requiring spot re-coats and sheen inconsistencies.
Pro tip: If you are evaluating a cabinet refinishing quote in the Lower Mainland, ask the contractor whether doors are removed and finished off-site or sprayed in place. In-place spraying with masking is a compromise technique. Door removal and off-site finishing is the professional standard for spray finish cabinets that hold up over time.
Coating Materials and Chemistry
The coatings available to professional finishers are simply not sold in aerosol cans at retail. The products that deliver lasting results on cabinets are two-component catalyzed systems, conversion varnishes, and waterborne acrylics formulated specifically for cabinetry. These products require professional-grade spray equipment to apply and have pot-life limitations that make them impractical for casual use.
“The finish coat on a properly refinished cabinet should have a pencil hardness rating of H to 2H and a cross-cut adhesion rating of 4B or better under ASTM D3359 testing. Consumer aerosol paints rarely meet even half of those standards on real-world cabinet substrates.” – Finishing industry guidance from the American Coatings Association technical resources.
Conversion varnish is a particularly relevant product for cabinet refinishing. It cures through a chemical reaction rather than simple solvent evaporation. The result is a film hardness comparable to the original factory finish on new cabinetry. It resists acetone, alcohol, and household cleaners without softening. No aerosol product available at a Canadian hardware retailer performs at this level.
Waterborne cabinet enamels formulated for professional application are a different product category from the latex wall paints that come in spray cans. They contain crosslinkers, flow additives, and leveling agents designed to self-smooth after application, reducing brush marks and spray texture. The aerosol equivalents marketed for furniture and cabinets omit most of these additives to maintain shelf stability.

Comparison Table: DIY vs Professional Refinishing
The table below compares three real approaches homeowners in the Lower Mainland consider when refinishing kitchen cabinets.
| Approach | Typical Outcome at 2 Years | Realistic Total Cost (Average Kitchen) |
|---|---|---|
| DIY aerosol spray cans (e.g., Rust-Oleum Cabinet Transformations or generic spray paint) | Chipping at edges, yellowing on white finishes, visible orange peel texture, peeling at hinge points | $80 to $250 in materials, plus time. Often requires professional correction within 18 months, adding $1,500 or more in remediation cost. |
| DIY brush-and-roller with cabinet-specific paint (e.g., Benjamin Moore Advance) | Better adhesion than aerosol if prep is thorough, but brush marks visible in gloss sheens. Durability depends entirely on prep quality. | $300 to $600 in materials. Results vary widely. Brush marks on cabinet doors are a common regret in online DIY communities. |
| Professional cabinet refinishing with HVLP and catalyzed or premium waterborne coatings (Dreamscape Painting approach) | Factory-smooth finish, consistent sheen, no chipping or peeling at edges, maintains appearance with normal cleaning | $2,500 to $6,000 for a full kitchen depending on door count, existing finish condition, and color choice. Finish life of 8 to 15 years with proper care. |
Durability and Longevity in the Lower Mainland Climate
The Fraser Valley and Lower Mainland present specific challenges for cabinet finishes. Humidity regularly swings between dry winter heating conditions and wet coastal air in spring and fall. This causes wood cabinet boxes and doors to expand and contract. A finish without adequate flexibility will crack along grain lines and at joints within a year or two of application.
Professional finishes account for this movement. Bonding primers with some elasticity, combined with topcoats formulated for wood substrates, are the standard approach. The prep work also includes checking for loose joints, filling grain in open-grain wood species like oak before priming, and ensuring adequate film build without brittleness.
Aerosol spray paints applied to cabinet surfaces in this climate fail faster than they would in a controlled indoor environment precisely because they have zero elasticity engineering behind them. They are designed to coat metal furniture and craft projects, not to survive a decade of coastal humidity cycles on a kitchen cabinet that gets washed weekly.
Cabinet refinishing services from Dreamscape Painting are specifically calibrated for this regional environment, using products selected for their performance in BC coastal conditions rather than products chosen for their availability at a local store.
Cost Reality: Cheap Upfront, Expensive Over Time
The upfront cost difference between a $40 collection of spray cans and a professional cabinet refinishing quote is real and significant. That gap narrows considerably when you look at a three-year window instead of a three-day window.
A failed DIY aerosol finish on kitchen cabinets creates a remediation problem that costs more than starting fresh. The professional crew now has to assess what the aerosol paint bonded to, strip or abrade it sufficiently without damaging the underlying substrate, and then proceed with the correct prep and coating sequence. According to remodeling cost data tracked by sources like the National Association of Realtors, kitchen updates including cabinet refinishing consistently rank among the highest return-on-investment projects a homeowner can undertake. That return depends on the quality of the refinish holding up long enough to be relevant at point of sale.
Homeowners in Surrey and Langley who have called Dreamscape Painting after a failed DIY attempt consistently describe the same pattern: the job looked good for a few months, then edge chipping started, and within 18 months the cabinets looked worse than before the project began. The economics of quality professional refinishing become obvious in that context.
Frequently Asked Questions
Can I use spray paint made specifically for cabinets and get professional results?
Products marketed specifically for cabinets, like Rust-Oleum Cabinet Transformations, perform better than generic aerosol paint but still fall short of professional standards. They lack the adhesion primer chemistry, film hardness, and application control of professional systems. On a smooth, well-prepped surface they can look acceptable initially but durability at edges and high-contact areas remains a consistent weakness across user reports.
How long does a professional cabinet refinish last compared to DIY?
A professionally applied catalyzed or premium waterborne finish on properly prepped cabinets typically lasts 8 to 15 years with normal care. DIY aerosol finishes in the same kitchen environment typically show visible failure within 12 to 24 months. The gap is not marginal. It represents a fundamentally different product and application standard.
Is professional cabinet refinishing worth it if my cabinets are older?
Age of the cabinet box matters less than the condition of the substrate. If the cabinet frames and doors are structurally sound, with no delaminating MDF, water damage, or failing joints, professional refinishing is a high-value option regardless of age. Replacing structurally sound cabinets purely for cosmetic reasons is a significant cost that refinishing avoids entirely. Dreamscape Painting’s estimators assess substrate condition before quoting to ensure the investment makes sense for the specific project.
What is the difference between cabinet painting and cabinet refinishing?
Cabinet painting typically refers to applying a brush-applied or rolled paint product to cabinets, sometimes without removing doors. Cabinet refinishing is a more comprehensive process involving complete teardown, professional surface preparation, primer application matched to the substrate, and a sprayed topcoat in a controlled environment. The terms are used interchangeably in the market but the scope of work they describe is quite different. When evaluating quotes in the Lower Mainland, ask specifically what the prep process involves and whether doors are removed.
Does the type of existing cabinet finish affect the professional refinishing process?
Yes, significantly. Original factory finishes on cabinets from BC cabinet manufacturers are typically a catalyzed lacquer or conversion varnish. These are very hard, slick surfaces that require specific adhesion primers, often shellac-based or epoxy-modified, before any topcoat will bond properly. Painted cabinets with previous latex paint require a different approach. Thermofoil cabinets require heat-based removal of the foil layer before refinishing can begin. A professional finisher identifies the existing finish type before selecting any products, which is a step that simply has no equivalent in a spray can project.
How do I evaluate cabinet painting quality in Vancouver or the Fraser Valley when getting quotes?
Ask to see completed projects that are at least two years old, not just fresh work. A finish that looks good the week it is done tells you very little. Ask about the specific primer and topcoat products being used, whether doors are removed during finishing, and what the warranty covers. Companies with 35 years of experience in the region, like Dreamscape Painting, have the portfolio depth and product knowledge to answer these questions specifically rather than in general terms.
If you have refinished cabinets yourself or had them professionally done in the Fraser Valley, share what your experience looked like at the one-year and two-year marks. Real-world feedback from Lower Mainland homeowners helps others make better decisions.
We would love your feedback and any insights you would share with others. What perspective would you add?
References
- National Association of Realtors: Remodeling impact reports and return-on-investment data for home improvement projects including kitchen updates
- United States Environmental Protection Agency: Resources on VOC content regulations and coating chemistry relevant to interior painting products
- ASTM International: Technical standards for coating adhesion testing, film hardness measurement, and paint performance classification
- Forbes: Home improvement cost analysis and contractor selection guidance for homeowners
- Statista: Market data on home renovation spending trends in Canada and North American paint industry statistics